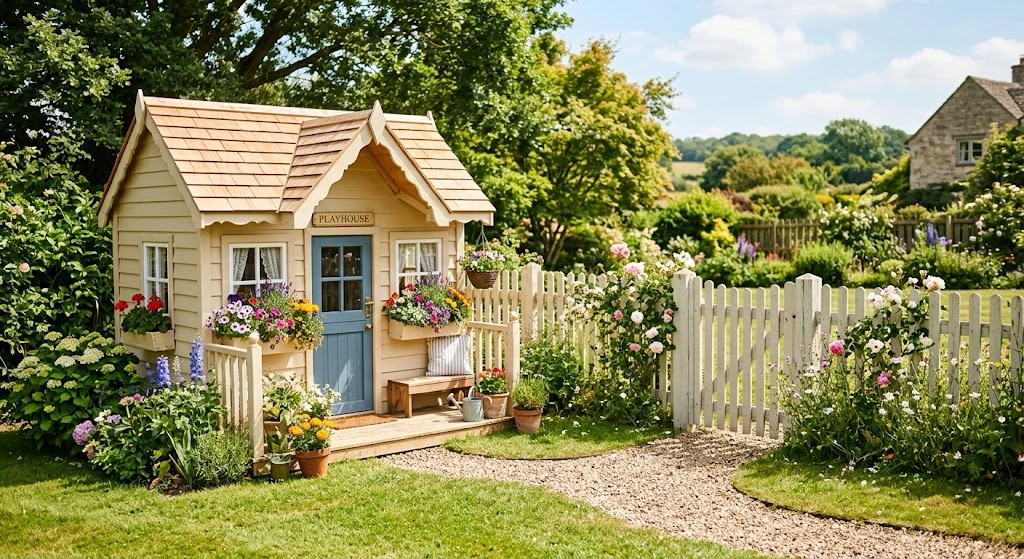
Creating a wooden playhouse in your backyard can be an exciting adventure for both you and your children. Not only does it enhance your outdoor space, but it also provides hours of imaginative play. To make the most of this project, consider these creative design ideas that can elevate your Wooden Playhouse Outdoor, ensuring it’s not just a structure but a cherished play haven.
Unique Themes for Inspiration
Choosing a theme for your Wooden Playhouse Outdoor can spark creativity and make it a fun project to design and build. Here are some ideas:
- Fairy Tale Cottage: Create a whimsical cottage with a thatched roof appearance. Add colorful flower boxes and whimsical paint colors to enhance the fairy tale vibe.
- Treehouse Adventure: Design your playhouse as a treehouse, elevated off the ground. Use wood and natural materials to blend it seamlessly with nature.
- Pirate Ship: Inspire your kids’ imaginations with a playhouse shaped like a pirate ship. Use ropes, a wheel, and plenty of pirate-themed décor.
- Space Station: Go for a futuristic look with a space station. Round windows and metallic paint can give it an out-of-this-world appearance.
Incorporate Functional Features
To make your Wooden Playhouse Outdoor even more enjoyable, consider adding functional elements that encourage play and learning.
- Sliding Door: Rather than a typical hinged door, use a sliding door for a modern twist that is also easier for little hands to operate.
- Windows with Shutters: Add working shutters to windows. This not only enhances the aesthetics but provides a hands-on learning opportunity about ventilation and natural light.
- Built-In Seating: Incorporate benches or a small picnic table inside the playhouse. This creates a perfect area for creative activities like drawing or enjoying snacks.
- Chalkboard Wall: Install a chalkboard paint section on one wall for an interactive surface. This allows kids to draw, write messages, or play educational games.
Safety First in Design
While creativity is key, safety should never be overlooked. Here are some essential safety tips:
- Rounded Edges: Make sure all edges are rounded to prevent injuries. Use sanders on corners during the construction process.
- Non-Toxic Paints: Use non-toxic paints and finishes to ensure a safe environment for your kids to play in.
- Secure Fixtures: Ensure all fixtures, such as windows and doors, are secured and can withstand wear and tear.
- Proper Ventilation: Include sufficient ventilation to prevent overheating inside the playhouse, especially during hot days.
Utilizing Outdoor Space
Your How To Build a Wooden Playhouse Outdoor doesn’t have to exist in isolation. Consider building a play area around it to create a complete outdoor experience:
- Sandbox: Adding a sandbox nearby complements the playhouse and gives kids another avenue for creative play.
- Garden Patch: Designate a small garden patch where kids can plant their favorite flowers or vegetables.
- Obstacle Course: Set up a mini obstacle course leading to the playhouse for an exciting way to encourage physical activity.
Color and Decoration
Don’t forget to think about colors and decorations that reflect your child’s personality:
- Bright Colors: Paint the playhouse in bright colors that attract attention. This makes it an appealing feature in your outdoor space.
- Themed Decor: Use themed décor items like flags, banners, and fairy lights to create an inviting atmosphere.
- Personalization: Allow your child to help decorate their playhouse. Personal touches can make them feel more connected to their play space.
In creating your Wooden Playhouse Outdoor, you can unleash limitless creativity while ensuring your kids have a safe and fun space to enjoy. Implement these creative design ideas, and your project will become a delightful retreat for imaginative play.
Essential Tools and Materials for Building a Playhouse
Building a wooden playhouse is a wonderful project that can spark joy for both you and your children. With the right tools and materials, you can create a magical space for your kids to play, explore, and let their imaginations run wild. In this guide, we’ll look at everything you need to get started on this fun and rewarding endeavor.
Essential Tools for Building a Playhouse
Using the right tools is crucial to ensure your project runs smoothly. Here’s a list of the essential tools you will need:
- Measuring Tape: A reliable measuring tape will help you make accurate measurements to ensure your Wooden Playhouse Outdoor is built to the right dimensions.
- Level: A level tool ensures that your walls and surfaces are even, which is important for a sturdy structure.
- Hammer: You will need a good hammer to drive nails into the wood.
- Saw: A circular saw or a hand saw is essential for cutting wood to the desired lengths.
- Drill: A power drill will allow for quicker assembly, especially when inserting screws into the wood.
- Screwdriver: A basic screwdriver set will be needed to secure various components together.
- Safety Gear: Don’t forget safety goggles and gloves to protect yourself while working with tools.
Materials Required for Construction
Once you’ve gathered your tools, you’ll need to collect the right materials to build your Wooden Playhouse Outdoor. Below is a breakdown of the essential materials:
| Material | Description | Quantity |
|---|---|---|
| Wood (Plywood or Lumber) | Used for the frame, walls, roof, and flooring of the playhouse. | Vary based on size |
| Nails | Used to attach various wooden pieces together. | As needed |
| Screws | Secures components more tightly than nails. | As needed |
| Wood Glue | Provides extra bonding between joints for stability. | 1-2 bottles |
| Sealant or Paint | To protect the wood and add a nice finish. Non-toxic options are best for children’s play areas. | 1 can |
| Roofing Material | Asphalt shingles or wood shingles for waterproofing. | As required |
| Hardware (Hinges, Handles) | For doors and windows, ensuring they function properly. | As needed |
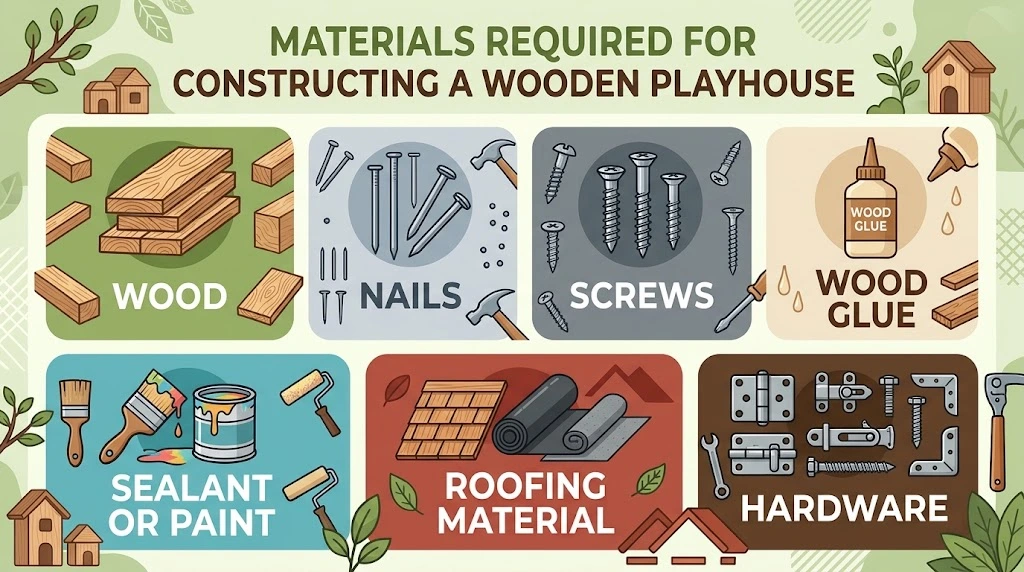
Make sure to choose materials that are safe for children. Opt for untreated or non-toxic wood finishes that will hold up well outdoors.
Where to Purchase Tools and Materials
You can find tools and materials for building a Wooden Playhouse Outdoor at various local hardware stores or home improvement centers. Here are a few reliable options:
- Home Depot – A great place for all your hardware and lumber needs.
- Lowe’s – This store offers a wide variety of tools and building materials.
- Menards – Known for competitive pricing on building supplies and tools.
Before making a trip, consider doing research or calling ahead to ensure they have everything you need in stock.
Budgeting for Your Project
When planning your Wooden Playhouse Outdoor construction, it’s beneficial to budget effectively. Here are some tips to help:
- Identify your project’s scale and materials to estimate costs accurately.
- Seek out discounts or clearance items at your local hardware stores to save money.
- Consider renting larger tools instead of purchasing them if you don’t plan to use them regularly.
By taking the time to prepare your tools, materials, and budget, you will set yourself up for a successful playhouse building experience. This project can foster creativity in your kids as they enjoy hours of play in their new outdoor space!
Step-by-Step Guide on How to Build a Wooden Playhouse
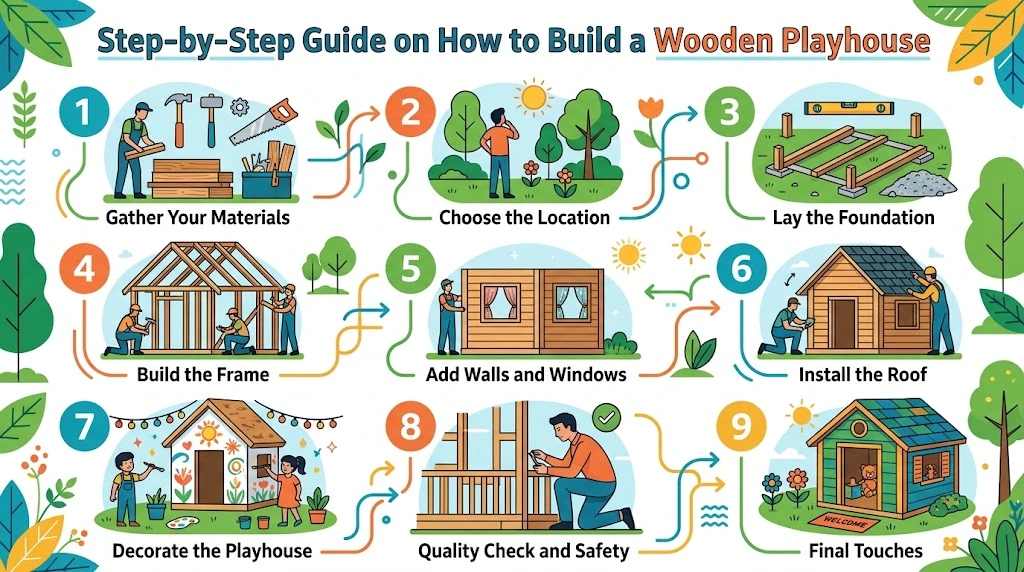
Building a wooden playhouse outdoors can be a fantastic project that not only gives your children a space to play but also enhances your backyard. With the right tools, materials, and instructions, you can create a beautiful and sturdy Wooden Playhouse Outdoor. Follow this step-by-step guide to get started.
Gather Your Materials
Before you begin your building project, you need to gather all the necessary materials:
- Wooden boards (2x4s for the frame and plywood for the walls)
- Wood screws and nails
- Roofing materials (shingles or metal sheets)
- Non-toxic paint or wood sealant
- Sandpaper
- Tools such as a saw, drill, hammer, measuring tape, and level
Choose the Location
Select a suitable spot in your yard for the Wooden Playhouse Outdoor. Ensure the area is level and free from any obstruction such as trees or large rocks. Near a grassy area can make the playhouse safer for children to play around.
Lay the Foundation
A solid foundation is crucial for the stability of your Wooden Playhouse Outdoor. Follow these steps:
- Clear the area of any debris or growth.
- Set up four wooden posts at the corners of the layout you desire.
- Connect the posts with wooden boards, forming a square platform.
- Ensure the platform is level using a level tool.
Build the Frame
Now it’s time to build the frame of the Wooden Playhouse Outdoor:
- Construct the walls using 2×4 wooden boards. Each wall will consist of vertical studs spaced 24 inches apart.
- Connect the walls at the corners with screws to ensure they are stable.
Add Walls and Windows
Once the frame is constructed, you can add plywood panels:
- Measure and cut plywood according to the wall frames.
- Secure the plywood panels to the frame using screws.
- Cut window openings if desired, leaving enough space for window frames.
Install the Roof
The roof is an essential part of the Wooden Playhouse Outdoor design:
- Create a sloped roof by cutting 2x4s into the right angles.
- Attach the roof framing securely to the top of the walls.
- Cover the roof with roofing material, ensuring it is waterproof.
Decorate the Playhouse
Make the playhouse special with some decorative touches:
- Use non-toxic paint to paint the walls in fun colors.
- Add window boxes, doors, and even a small porch using wooden boards.
- Add your child’s name or other decorations to personalize the space.
Quality Check and Safety
Once construction is complete, do a thorough quality check:
- Make sure all screws and nails are secure and not protruding.
- Sand down any rough edges that could be a safety hazard.
- Consider installing child-proof locks on the doors.
Final Touches
To ensure that the Wooden Playhouse Outdoor lasts longer, add a protective wood sealant. This will guard against weathering and rot. Additionally, make sure to check periodically for wear and tear throughout the seasons.
Building a Wooden Playhouse Outdoor can be a rewarding and enjoyable experience. By following these steps, you can create a safe and inviting outdoor space for your children. For further details on woodworking and playhouse designs, visit Wood Magazine and enhance your woodworking skills and knowledge.
Safety Considerations When Constructing an Outdoor Playhouse
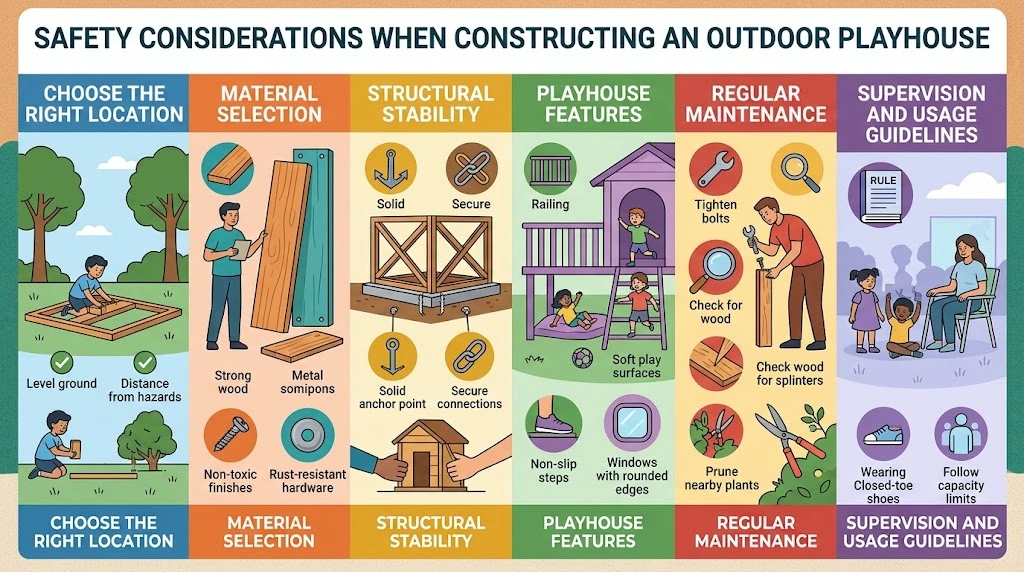
When building an outdoor playhouse for children, safety must be your top priority. You want to create a fun environment for kids, but it should never come at the cost of their well-being. Here are some essential safety considerations to keep in mind throughout the construction of your Wooden Playhouse Outdoor.
Choose the Right Location
The location of your Wooden Playhouse Outdoor can greatly influence its safety. Consider the following factors:
- Flat, Level Ground: Choose an area that is flat and free from rocks or other hazards. This helps prevent tripping and ensures stability.
- Distance from Hazards: Keep the playhouse away from things like fences, trees, or swimming pools. These can pose potential dangers if children fall or climb.
- Sun and Shade: Position the playhouse in a spot that offers both sun and shade. Too much sun can lead to overheating, while shade can provide a cool area to recover.
Material Selection
Using quality materials is vital for both safety and durability. Consider the following options:
- Non-toxic Paint: If you are painting the playhouse, make sure to use non-toxic, child-safe paint to avoid any harmful chemicals.
- Weather-resistant Wood: Choose wood that is treated and designed for outdoor use. Cedar and redwood are excellent choices as they resist decay.
- Smooth Edges: Ensure all wooden surfaces are sanded down to eliminate sharp edges. This will prevent cuts and scrapes while children play.
Structural Stability
The design and build of the Wooden Playhouse Outdoor need to be sound to ensure stability:
- Secure Foundation: Use concrete footings or blocks to provide a firm foundation that will keep the playhouse anchored and stable.
- Reinforced Walls and Roof: Make sure walls and the roof are reinforced to withstand typical weather conditions. This is especially important if you live in an area that experiences severe weather.
Playhouse Features
Features that enhance safety can prevent injuries as well:
- Sturdy Steps: If the playhouse has a ladder or steps, ensure they are sturdy with secure railings.
- Window Grills: If there are windows, install grills or screens to prevent children from falling out.
- Non-slip Surfaces: Adding non-slip materials to climbing surfaces can help prevent slips and falls.
Regular Maintenance
Even after building the best Wooden Playhouse Outdoor, regular maintenance is key to ensuring it remains safe for use:
- Inspect Regularly: Regularly check for any signs of wear and tear, such as deteriorating wood or loose screws.
- Clean Up Debris: Keep the area around the playhouse clear of any branches, toys, or other items that could pose a tripping hazard.
Supervision and Usage Guidelines
Setting rules for play can also help ensure safety:
- Limit the Number of Children: Establish a limit on how many kids can play in the playhouse at once.
- Age Appropriateness: Make sure that the playhouse is suitable for the age of the children using it. Smaller children may need specific features to keep them safe.
- Supervision Required: Encourage parents to supervise their children while they play to ensure everyone is safe.
By focusing on these safety considerations, you can create a wonderful outdoor playhouse that provides a safe haven for children to explore and play.
Adding Personal Touches: Customizing Your Playhouse for Fun and Function
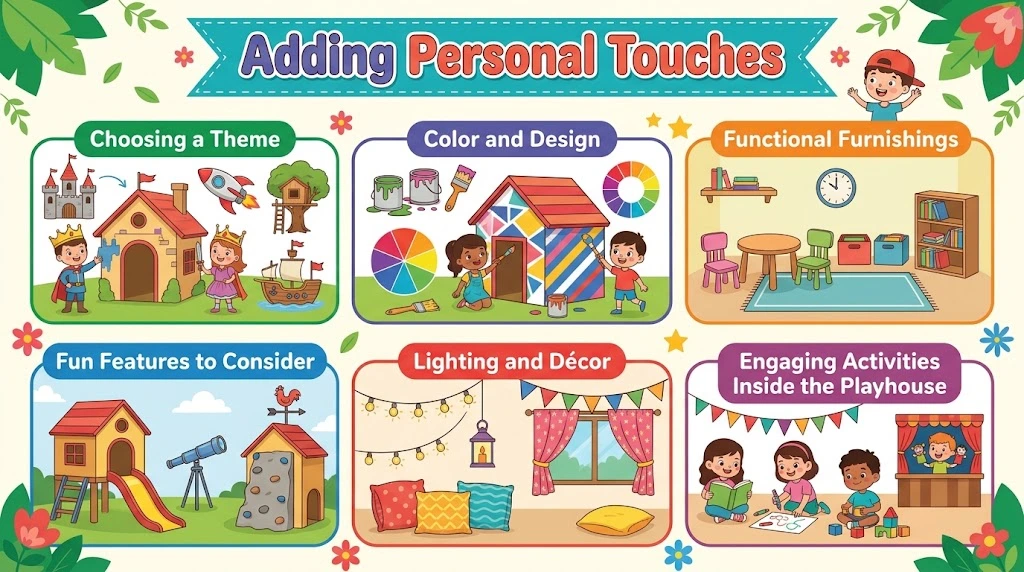
Building a Wooden Playhouse Outdoor is an exciting project that can ignite your child’s imagination. Once you’ve established the basic structure, the next step is to make it unique with personal touches that reflect your child’s personality and interests. Here are some creative ways to customize your playhouse for both fun and function.
Choosing a Theme
Picking a theme for your Wooden Playhouse Outdoor sets the tone for all additional enhancements. Here are a few popular themes:
- Fairytale Castle: Add turrets and colorful flags for a magical touch.
- Treehouse Adventure: Incorporate natural elements like wood stain or bark accents.
- Space Station: Paint it metallic gray, add stars, and include a countdown clock.
Color and Design
The color scheme can dramatically affect the overall vibe of the Wooden Playhouse Outdoor. You can choose bright, cheerful colors like yellow, blue, and red, or opt for softer tones such as pastels, depending on your child’s preferences.
Let your child have a say in the choice of colors. This involvement will create ownership and excitement. Consider applying stencils for patterns like stars, flowers, or even animals to add whimsical details. Using non-toxic paint is essential for safety purposes.
Functional Furnishings
When customizing your Wooden Playhouse Outdoor, think about pieces of furniture that make it enjoyable and functional. Here are a few ideas:
| Item | Function |
|---|---|
| Small Table and Chairs | Perfect for tea parties or art activities. |
| Storage Bins | Helps keep toys organized and the playhouse tidy. |
| Mini Kitchen Set | Encourages imaginative play with cooking and food preparation. |
| Cozy Cushions | Creates a comfortable space for reading or relaxing. |
Fun Features to Consider
Adding exciting features can elevate the Wooden Playhouse Outdoor experience. Here are some suggestions:
- Windows and Doors: Install shutters or colorful curtains for a playful touch.
- Slide: Adding a slide can make the playhouse even more fun!
- Climbing Wall: Build a small climbing wall for added adventure.
- Mailbox: Create a little mailbox for imaginative correspondence.
Lighting and Decor
Adding proper lighting can transform your Wooden Playhouse Outdoor into a magical space, especially in the evenings. Here are practical ways to illuminate your playhouse:
- Solar Lights: These are safe and eco-friendly, perfect for outdoor use.
- Fairy Lights: A string of fairy lights adds a whimsical glow.
In addition to lighting, personalized decorations can enhance the atmosphere. Consider using items like:
- Artwork created by your child.
- Decorative Dreamcatchers.
- Wall-mounted shelves for displaying treasures.
Engaging Activities Inside the Playhouse
Customize the Wooden Playhouse Outdoor to cater to various activities that will engage your child. Activities can include:
- Art Station: Include easels and canvases for painting.
- Reading Nook: Cozy seating with a bookshelf for storytime.
- Playing House: Equip with pretend play items like dishes and dolls.
By adding personal touches to your Wooden Playhouse Outdoor, you encourage creativity and imaginative play. Ensuring you incorporate both fun and practical features will make it a cherished getaway for your child. For additional ideas and resources on enhancing your outdoor playhouse, you can visit Playrific or Playhouses.com.
Conclusion
Building a Wooden Playhouse Outdoor is not just a construction project; it’s an opportunity to create a magical space for your children to explore and play. With the creative design ideas you have in mind, from charming rustic finishes to vibrant colors, the sky is the limit. Having the right tools and materials ensures that your playhouse is sturdy and safe, allowing you to enjoy the process without any hitches.
Following a step-by-step guide makes the building experience manageable and fun. Each phase unveils the playhouse more, bringing you closer to the final reveal. Remember, safety should be a priority. By integrating sturdy materials and following best practices, you create an environment where your children can safely enjoy their new retreat.
Personalizing your Wooden Playhouse Outdoor with unique touches enhances its charm and functionality. Whether it’s a slide, a lookout tower, or hand-painted artwork, these custom features can turn a simple wooden structure into an extraordinary haven.
As you embark on this exciting project, embrace the joy of creation. In the end, the time and effort you invest will not only provide a unique play area but also create lasting memories for you and your family. So gather your tools, unleash your creativity, and let the adventure begin as you build the Wooden Playhouse Outdoor of your dreams.