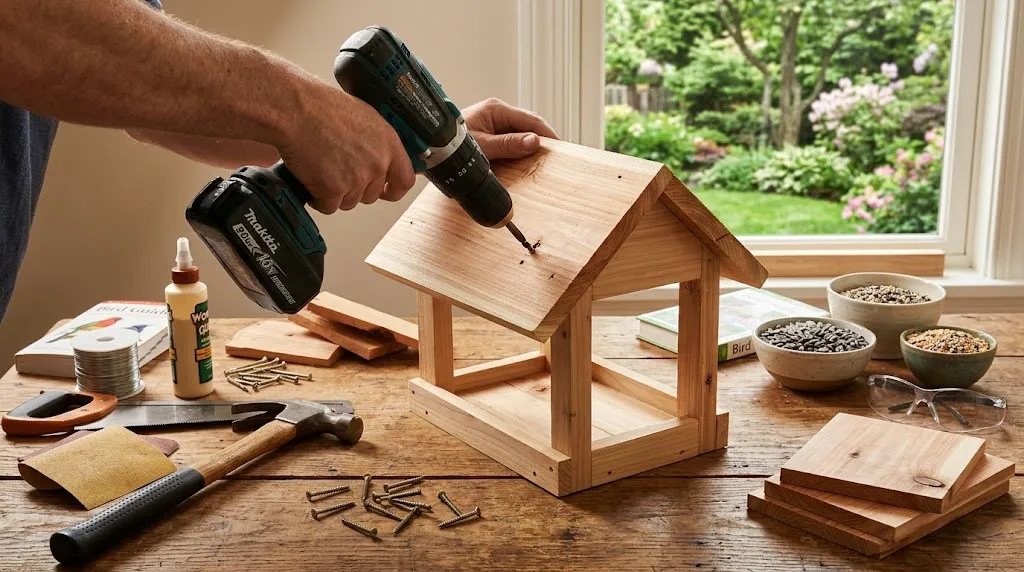
Building a Wooden Bird Feeder House is a rewarding project that allows you to connect with nature and help birds in your area. To get started, you need to gather essential materials. Here’s a list of what you’ll require to create a sturdy and attractive Wooden Bird Feeder House.
Wood
The primary material you will need is wood. When selecting wood for your bird feeder, consider using the following options:
- Cedar: Naturally resistant to decay, cedar is a great long-lasting choice.
- Pine: Affordable and widely available, pine is easy to work with but may need a protective finish.
- Redwood: Durable and strong, redwood can withstand the elements well.
Fasteners
Fasteners are essential for securing the different parts of your Wooden Bird Feeder House together. You will typically need the following:
- Screws: Stainless steel or galvanized screws resist rust and corrosion.
- Nails: You can use wood nails, but ensure they’re also rust-resistant.
- Wood Glue: A strong adhesive can provide extra support for joints.
Roofing Material
The roof of your Wooden Bird Feeder House will protect it from the elements. You can use various materials depending on your design preferences:
- Wood shingles: Offer a decorative touch and match the natural look.
- Metal roofing: Provides excellent durability and is easy to maintain.
- Asphalt shingles: Readily available and inexpensive, asphalt is a practical option.
Finishing Materials
To ensure your a Wooden Bird Feeder House withstands the weather, you will need finishing materials:
- Paint or Stain: Use non-toxic, water-resistant paint or stain to protect the wood.
- Sealant: A quality wood sealant helps keep moisture out and increases longevity.
Tools
Having the right tools is crucial for a successful build. Here’s a list of basic tools you might need:
- Drill: For making holes and driving screws.
- Saw: A circular saw or miter saw can help you cut the wood accurately.
- Measuring Tape: Essential for ensuring precise measurements.
- Screwdriver: Both manual and electric screwdrivers can be helpful.
Optional Accessories
To enhance the usability and aesthetics of your Wooden Bird Feeder House, consider adding some optional accessories:
- Perches: Small wooden dowels or branches for birds to rest on while feeding.
- Feeding Trays: A tray can catch seeds and provide easier access for the birds.
- Drainage Holes: Ensure there are holes in the bottom to allow water to escape.
Safety Gear
Prioritize safety while you work. Gather the following safety gear:
- Safety goggles: Protect your eyes from sawdust and debris.
- Work gloves: Keep your hands safe while cutting and assembling wood.
- Dust mask: A mask helps prevent inhalation of wood dust.
Step-by-Step Guide to Constructing Your Bird Feeder
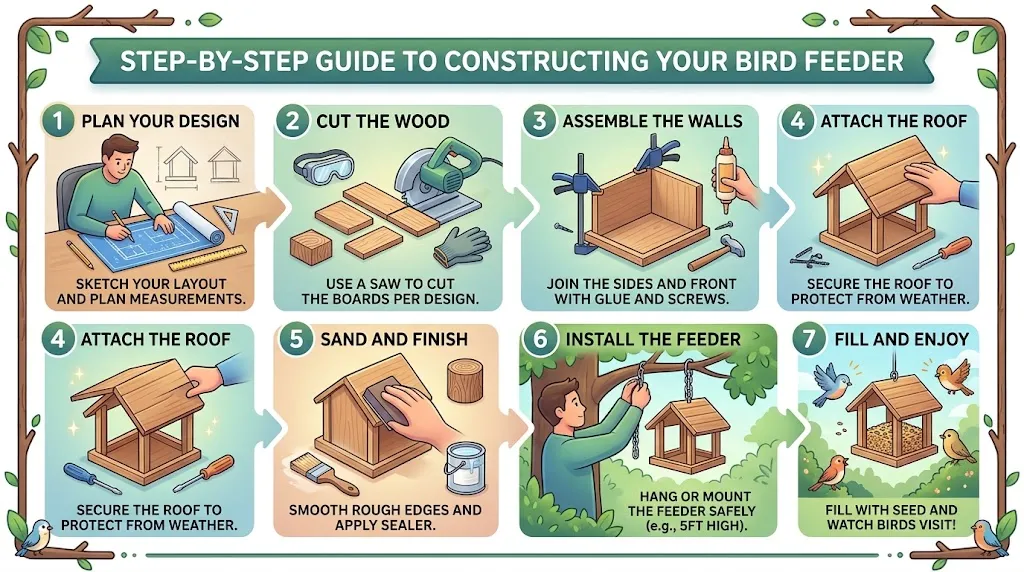
Building a wooden bird feeder is a rewarding project that can provide a safe space for your feathered friends to dine. This guide will take you through a simple, step-by-step process to construct your own Wooden Bird Feeder House. You don’t need to be a woodworking expert to create an attractive and functional feeder!
Before diving into the construction, gather all your materials and tools. Here’s a quick list:
- Wooden boards (cedar or pine are good choices)
- Wood screws or nails
- Wood glue
- Sandpaper
- Paint or wood sealer (optional)
- Drill
- Saw
Now that you have everything ready, let’s start with the construction.
Step 1: Plan Your Design
Design your bird feeder. You can draw a simple layout on paper to visualize how your feeder will look. A basic feeder might resemble a small house with a roof, walls, and a bottom tray for seeds. Be sure to include proper measurements for the entrance hole, typically about 1.5 inches in diameter for small birds like finches or chickadees.
Step 2: Cut the Wood
Using a saw, cut your wooden boards according to your design. Here are the typical pieces you may need:
- Two side walls
- One back wall
- One front wall with entrance hole
- One bottom tray
- Two roof panels
Step 3: Assemble the Walls
Start by assembling the side walls to the back wall. Secure them with wood screws or nails, along with some wood glue for added strength. Next, attach the front wall, ensuring the entrance hole is facing outward. add the bottom tray to catch any spills and provide a place for the birds to eat.
Step 4: Attach the Roof
Once the walls are stable, attach your roof panels. These can be slanted or flat, depending on your design. Ensure they overhang slightly to protect the feeder from rain.
Step 5: Sand and Finish
Use sandpaper to smooth any rough edges. This is crucial to avoid injury to the birds while they feed. If you wish, you can apply non-toxic paint or wood sealer to protect the feeder from the elements, but ensure it’s safe for birds. Natural finishes are often the best choices.
Step 6: Install the Feeder
Choose an appropriate location for your feeder. Hanging it from a tree branch or mounting it on a pole at least 5 feet off the ground will work well. Ensure it’s at least 10-15 feet from any structures to protect the birds from predators like cats.
Step 7: Fill and Enjoy
Fill your bird feeder with seeds and watch as your backyard comes to life with chirping birds! Popular seed choices include sunflower seeds, millet, and mixed birdseed.
Creative Designs to Personalize Your Wooden Bird Feeder
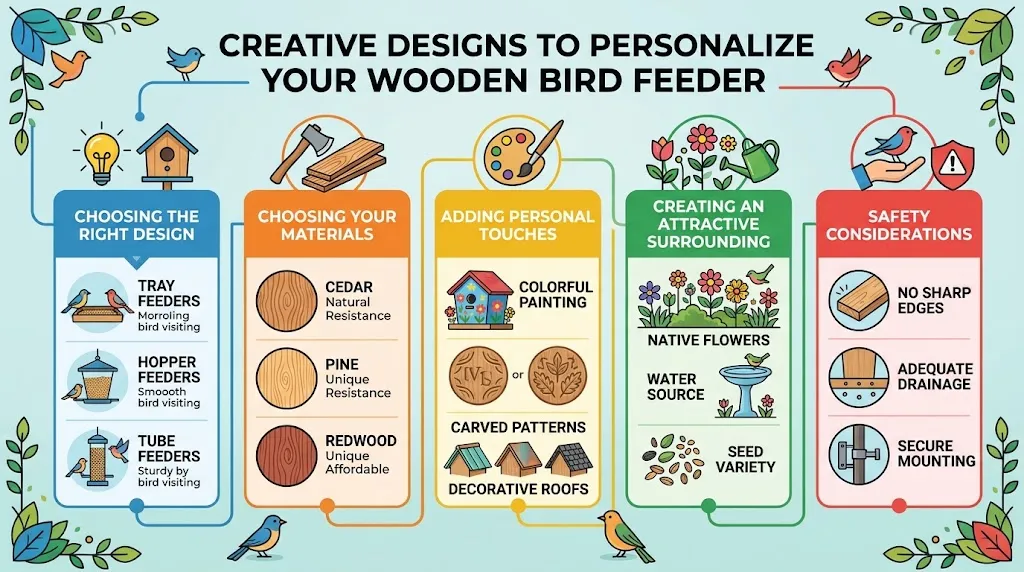
Creating a Wooden Bird Feeder House is not only a delightful project, but it also provides an opportunity to add a personal touch to your backyard. With some creative designs, you can craft a feeder that reflects your style and attracts birds to your garden. Here are some ideas and tips for personalizing your Wooden Bird Feeder House.
Choosing the Right Design
Before you begin building, consider the type of birds you want to attract. Different bird species have varying preferences for feeder styles. Here are some popular designs:
- Tray Feeders: Simple to make and great for various birds.
- Hopper Feeders: These can hold a larger volume of seed and keep it dry.
- Tube Feeders: Ideal for smaller birds like finches.
- Platform Feeders: These flat surfaces are accessible to ground-feeding birds and are easy to design.
Choosing Your Materials
Using high-quality wood is essential to ensure durability and weather resistance for your bird feeder. Cedar and pine are popular choices, but you can also consider:
- Redwood: Naturally resistant to decay.
- Plywood: Cost-effective and easy to work with, but be sure to seal it properly to protect from rain.
Adding Personal Touches
There are countless ways to personalize your Wooden Bird Feeder House. Try incorporating some of these creative ideas:
- Painting: Use non-toxic, water-based paint to add color. You could paint your favorite designs, patterns, or even a fun theme!
- Carving: If you’re skilled with tools, consider carving your initials, a name, or a fun animal design into the wood.
- Decorative Roofs: Experiment with different roof styles, such as a peaked roof, decorative tile patterns, or a thatched look made from natural materials.
- Mirrors: Attach small, safety mirrors around the feeder to attract birds with reflections of their habitat.
Creating an Attractive Surrounding
Your bird feeder can stand out even more by creating a beautiful setting around it. Here are some suggestions:
- Flowers: Plant native flowers nearby to support local wildlife.
- Water Source: Add a birdbath within sight of the feeder to draw birds in for a drink.
- Seed Variety: Use a mix of seeds to attract different species. Popular choices include sunflower seeds, millet, and mixed seeds.
Safety Considerations
Always ensure that your feeder is safe for birds:
- Sand down any rough edges or splinters to prevent injury.
- Make sure there are drainage holes to keep seeds dry and prevent mold growth.
- Ensure the feeder is securely mounted to avoid falls.
| Bird Species | Feeder Type | Preferred Seed |
|---|---|---|
| Chickadee | Tray Feeder | Sunflower seeds |
| Goldfinch | Tube Feeder | Niger seeds |
| Sparrow | Platform Feeder | Mixed seeds |
Tips for Attracting Different Types of Birds to Your Feeder
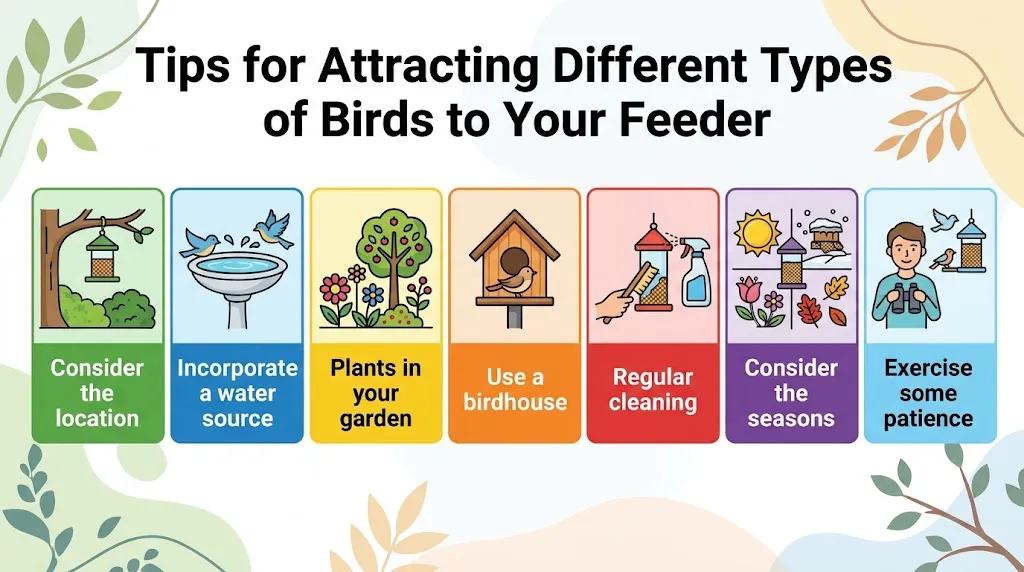
Attracting various types of birds to your feeder can create a lively atmosphere in your yard. Birds bring joy and beauty, and seeing them up close can turn everyday moments into delightful experiences. Here are some tips to help you draw in different species of birds to your feeder.
Consider the location
First, consider the location of your bird feeder. Birds are more likely to visit feeders that are situated in a safe and quiet place. Aim for a location that is close to trees or shrubs where birds can quickly escape from predators. Additionally, avoid placing the feeder near busy areas to reduce disturbances. A sheltered position can also protect birds from harsh weather.
Next, the type of feeder you choose plays a significant role in which birds you attract. There are several designs available:
- Tube Feeders: Ideal for small birds like finches and chickadees. The design reduces seed waste and keeps seeds dry.
- Platform Feeders: These are versatile and accommodate larger birds such as doves and jays, as well as ground-feeding birds.
- Hopper Feeders: Perfect for a variety of birds, these feeders hold a larger seed supply and can be made of wood or plastic.
- Suet Feeders: Great for attracting woodpeckers, nuthatches, and other insect-eating birds.
Choosing the right bird food is essential too. Different birds prefer different types of seeds, so offering a variety can help. Here’s a breakdown of common birds and their seed preferences:
| Bird Type | Preferred Seeds |
|---|---|
| American Goldfinch | Nyjer (thistle) seeds |
| House Finch | Sunflower seeds, millet |
| Blue Jay | Peanuts, sunflower seeds |
| Woodpecker | Suet, peanut butter |
Incorporate a water source
Another great method to attract different birds is to incorporate a water source. A birdbath or a small water fountain can entice birds, especially in the warmer months when they need to stay hydrated. Make sure to keep the water clean and change it regularly to encourage birds to return.
Plants in your garden
Plants in your garden can also help to attract a diverse range of birds. Native plants provide natural food sources such as fruits and seeds. Additionally, consider planting a mix of flowering plants and shrubs to offer shelter and nesting sites. Berry-producing plants like elderberry, serviceberry, or holly can be a great addition. They serve as both food and cover for birds.
Use a birdhouse
Using a birdhouse can give birds a safe space to nest, while also enhancing your feeder setup. Make sure to select a birdhouse suitable for the species you aim to attract. Place it in a shaded but visible area for best results.
Regular cleaning
Cleaning your feeders regularly is crucial for the birds’ health. Moldy or spoiled seeds can make birds sick. Aim to clean your feeders at least once a month, and deal with any spills promptly. This will create a healthier feeding environment and encourage more birds to drop by.
Consider the seasons
Consider the seasons as well. Different species migrate at various times, which means your bird feeder will attract different visitors throughout the year. For example, during fall and winter, you might see more sparrows and jays, while spring and summer may bring in orioles and warblers.
Exercise some patience
Exercise some patience. It may take time for birds to discover your feeder, so don’t be discouraged if they don’t flock immediately. You can also observe the birds that visit and learn about their behaviors, which can enhance your birdwatching experience.
With these strategies, you’ll be well on your way to attracting a vibrant variety of birds to your feeder, creating a joyful haven right in your backyard.
Maintenance and Care for Your Bird Feeder House to Ensure Longevity
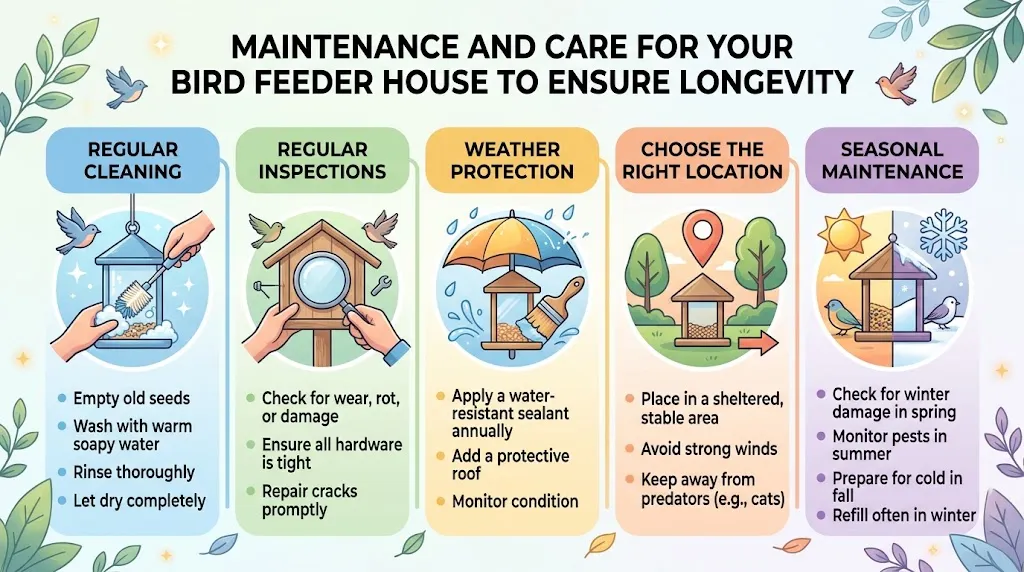
To keep your wooden bird feeder house in tip-top shape, regular maintenance and care are essential. Over time, exposure to the elements can cause wear and tear, which can shorten the life of your feeder. By following a few simple steps, you can ensure that your bird feeder remains a welcoming spot for your feathered friends.
Regular Cleaning
Cleaning your Wooden Bird Feeder House regularly is one of the most important maintenance tasks. A clean feeder helps to prevent the spread of disease among birds. Here’s how to do it:
- Remove the feeder and empty any old seeds. Discard seeds that show signs of mold or deterioration.
- Wash the feeder with warm, soapy water. Use a non-toxic dish soap to avoid any harmful chemicals.
- Rinse thoroughly to ensure there’s no soap residue.
- If possible, soak the feeder in a solution of 9 parts water to 1 part bleach for about 10-15 minutes to disinfect.
- After soaking, rinse again and let the feeder dry completely before refilling with fresh seeds.
Regular Inspections
Take a few minutes each month to inspect your Wooden Bird Feeder House. Look out for the following:
- Wood Condition: Check for signs of rot or damage. Repair any cracked or broken parts promptly.
- Hardware: Ensure that any screws or nails are tight. Replace any corroded or missing hardware.
- Paint or Sealant: If you have painted or sealed your feeder, check to see if it needs a touch-up to protect against moisture.
Weather Protection
Weather can take a toll on your bird feeder. Here are some strategies to help protect it:
- Placement: Make sure to place your bird feeder where it has some natural protection from harsh weather, such as under a tree or an awning.
- Sealing: Apply a water-resistant sealant to the exterior of the wooden feeder to protect it from rain and snow.
- Cover: Consider using a bird feeder cover during extremely harsh weather to provide extra shelter.
Choose the Right Location
The location of your Wooden Bird Feeder House also plays a role in its longevity. Position it where it’s safe from predators and has adequate visibility for both you and the birds. Ideal locations typically have:
- A clear line of sight from nearby trees or bushes for easy access by birds.
- Protection from high winds to reduce movement and wear.
- A distance of at least 10-15 feet from birdbaths and ground feeders to minimize competition and territorial disputes.
Seasonal Maintenance
Different seasons can bring unique challenges for your Wooden Bird Feeder House. Here are tips for seasonal maintenance:
| Season | Action Items |
|---|---|
| Spring | Inspect for winter damage. Clean and refill with fresh seeds. |
| Summer | Monitor for pests like ants and insects. Keep the feeder clean to avoid mold. |
| Fall | Prepare your feeder for winter by sealing any cracks and ensuring it is robust. |
| Winter | Keep the feeder free of snow and ice. Check more frequently for seed levels. |
Investing time in maintenance will ensure that your Wooden Bird Feeder House remains an effective and charming centerpiece for local birdwatching. For more information on caring for bird feeders, you can visit Audubon or Birds & Blooms.
By keeping your feeder clean and inspecting it regularly, you create a safe and inviting place for birds to dine. Happy birdwatching!
Conclusion
Building a Wooden Bird Feeder House is not just a fun DIY project; it’s a rewarding way to connect with nature. By gathering essential materials and following a simple step-by-step guide, you can create a beautiful home for your feathered friends. Let your creativity shine as you explore unique designs that not only serve a functional purpose but also enhance your garden’s aesthetic.
To ensure your feeder becomes a hotspot for various bird species, remember to apply tips for attracting different types of birds. From selecting the right seeds to placing the feeder in a desirable location, these strategies can lead to a vibrant birdwatching experience right in your backyard.
Maintaining your Wooden Bird Feeder House is equally important. Simple care routines will prolong its life, keeping it an inviting place for birds for years to come. Regular cleaning, checking for weather damage, and replenishing seeds can make all the difference.
So, if you’re ready to embark on this project, gather your materials, unleash your creativity, and prepare to welcome birds into your life. With each bird that visits, you’ll find joy in your handiwork and a deeper appreciation for the beauty of nature. Happy birdwatching!