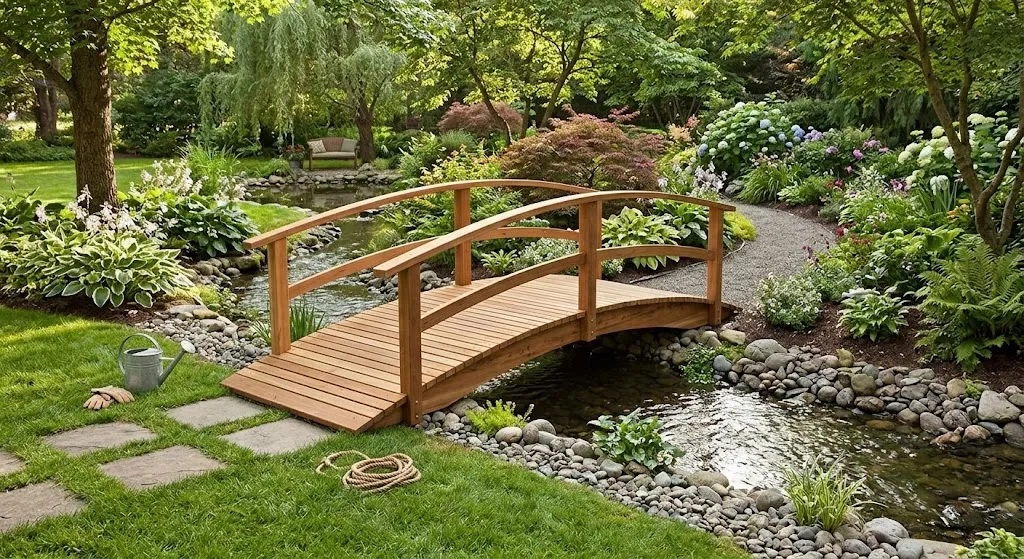
Planning Your Wooden Bridge
Before diving in, take some time to plan the design of your wooden bridge. Consider the following aspects to ensure you create a functional and beautiful addition to your garden:
- Purpose: Decide if the bridge will simply act as an aesthetic feature, or if it needs to support weight, such as foot traffic.
- Location: Choose a spot in your garden that will benefit from a bridge—perhaps spanning a small stream or connecting different garden sections.
- Design: Sketch out your ideas. Simple designs are often the most attractive and easiest to build.
- Materials: Select quality wood that will withstand the weather. Cedar, redwood, and pressure-treated lumber are great options.
Gathering Your Materials
Once you have your plan finalized, it’s time to gather your materials. Here’s a list of what you’ll need:
- Wood (length depends on your bridge size)
- Wood screws or nails
- Wood sealant or waterproofing treatment
- Concrete for anchor posts (optional)
- Measuring tape
- Level
- Drill and saw
Make sure to check your local regulations when it comes to building structures in your garden. You might find handy resources at sites like Wood Magazine for woodworking tips and project advice.
Measuring and Marking the Area
Using your measuring tape, map out where you want your bridge to be placed. Mark the corners with stakes and string, ensuring that they are level so that your bridge will not slope unevenly.
Building the Bridge Frame
Follow these steps to construct the frame:
- Cut your wood to length based on your measurements.
- Create the base by laying two long pieces of wood parallel to each other. These will serve as the sides of the bridge.
- Connect shorter beams between the two long sides to create a rectangular frame.
- Ensure everything is square by measuring diagonally from corner to corner.
This frame will give your bridge strength. Use wood screws or nails to secure the connections tightly.
Adding the Decking
After the frame is complete, it’s time to add the decking:
- Cut more wood into planks for the surface of the bridge.
- Lay the planks evenly across the frame, leaving small gaps for drainage.
- Screw down the planks to secure them in place.
The decking will be the part that people walk on, so make sure it’s sturdy and well-secured.
Finishing Touches
Enhancing your wooden bridge with simple finishes can give it a great look. Here are a few suggestions:
- Sand down rough edges to prevent splinters.
- Apply a wood sealant or waterproof treatment to protect against moisture.
- Paint or stain your bridge to match your garden theme.
- Add decor such as led lights, flower pots, or railings for additional safety and beauty.
These finishing touches can make your bridge stand out and blend naturally into your garden environment.
Choosing the Right Materials for Your Wooden Garden Bridge
Building a Wooden Bridge for Garden can add charm and functionality to your outdoor space. However, the choice of materials is crucial for durability, aesthetics, and cost. Understanding your options will help you create a beautiful and sturdy structure. Here’s a closer look at the materials suitable for your wooden garden bridge.
Types of Wood for Your Garden Bridge
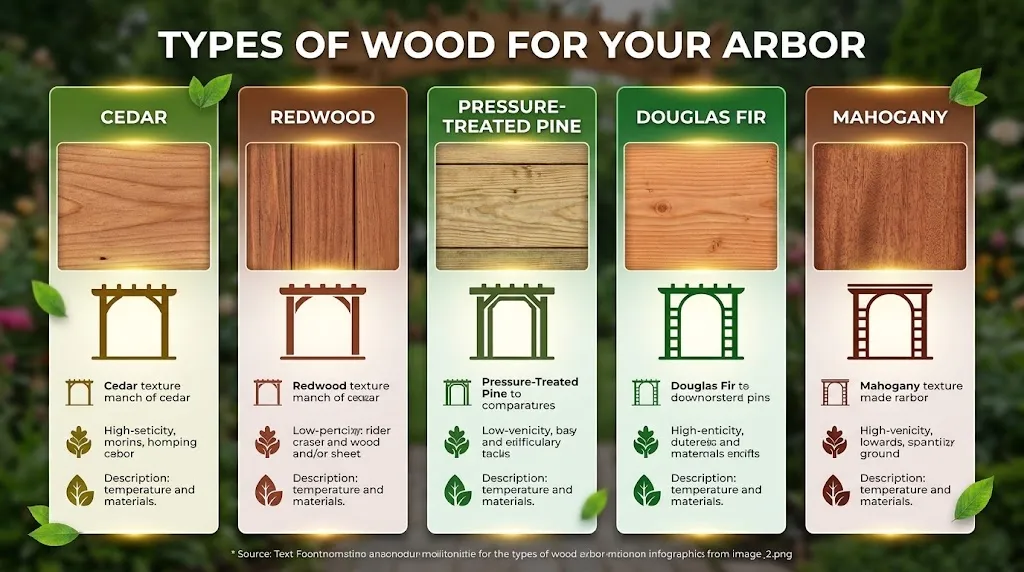
When selecting the right wood for your garden bridge, consider the following types, each with distinct characteristics:
- Cedar: Naturally resistant to decay and insects, cedar is an excellent choice for outdoor structures. It has a lovely reddish tint and weathers well, adding rustic charm to your garden.
- Redwood: Similar to cedar in terms of durability, redwood is another popular option. Its rich color and fine grain make it visually appealing, though it can be pricier than other options.
- Pine: A more economical choice, treated pine can be used for garden bridges. Its treatment protects it from the elements, but it’s essential to check for rot and decay over time.
- Teak: Known for its strength, teak is an exceptional option for a bridge that will stand the test of time. Its high oil content makes it resistant to water and pests, but it comes at a premium price.
- Composite wood: These materials combine wood fibers with plastic and are resistant to warping and decay. They require less maintenance compared to traditional wood, making them an attractive choice for busy gardeners.
Considerations for Your Choice of Wood
When choosing the right wood, several factors come into play:
| Consideration | Details |
|---|---|
| Climate | Consider how the wood will stand up to your local climate. For example, if you live in a humid area, choose wood that is highly resistant to moisture. |
| Aesthetics | Think about how the wood’s color and grain will match your garden style. A cohesive appearance enhances the overall beauty of your outdoor space. |
| Maintenance | Some types of wood require significant upkeep, while others need minimal care. If you prefer lower maintenance, consider composite options or woods like cedar and teak. |
| Budget | Prices vary widely among wood types. Set a budget and choose materials that fit within your financial plan without compromising quality. |
Finishing Treatments
Choosing the right finish for your wooden garden bridge is as important as selecting the wood itself. A good finish protects the wood from moisture, insects, and UV rays, enhancing its lifespan. Here are some common finishing options:
- Stain: This enhances the natural beauty of the wood while offering some protection. Choose a stain that complements your garden color scheme.
- Sealants: Clear sealants safeguard against water damage while preserving the natural look of the wood.
- Paint: If you prefer a specific color, opaque paints can provide robust protection against the elements. However, ensure that the paint is designed for outdoor use.
Additional Considerations
While wood is the primary material for your bridge, consider the hardware, too:
- Fasteners: Stainless steel or galvanized connectors will resist rust and corrosion, ensuring the longevity of the bridge.
- Bracing: To ensure stability, think about using diagonal bracing, especially for wider bridges.
Design Ideas to Enhance Your Garden with a Wooden Bridge
Enhancing your garden with a wooden bridge can create an inviting and picturesque landscape that feels tranquil and serene. A well-designed wooden bridge not only serves a practical purpose but also becomes a focal point in your garden. Here are some design ideas that will inspire you as you plan your wooden bridge.
Choose the Right Style for Your Bridge
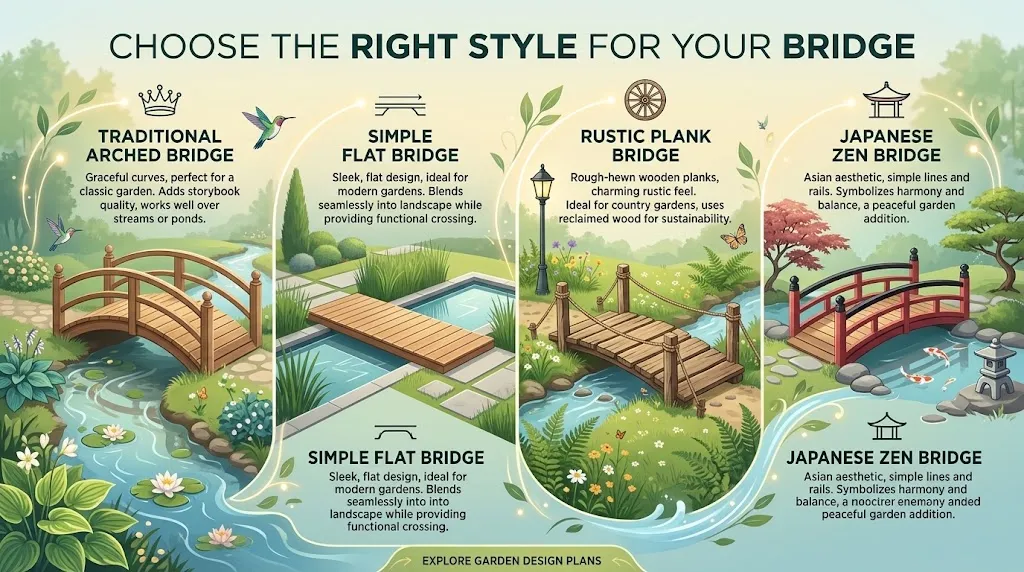
When thinking about how to build a How To Build a Wooden Bridge for Garden, the style is crucial. Different styles can complement various garden themes:
- Traditional Arched Bridge: This elegant style has graceful curves and is perfect for a classic garden. It adds a storybook quality and works well over streams or ponds.
- Simple Flat Bridge: If your garden is more modern, a sleek, flat bridge might be the perfect touch. This design can blend into your garden landscape while providing a functional crossing.
- Rustic Plank Bridge: Made from rough-hewn wooden planks, this type offers a charming, rustic feel. It’s ideal for a country garden and can be built using reclaimed wood for sustainability.
- Japanese Zen Bridge: If you prefer Asian aesthetics, consider a Japanese-style bridge with simple lines and rails. These bridges often symbolize harmony and balance.
Selecting the Right Materials
The choice of materials is central to how to build a How To Build a Wooden Bridge for Garden. Durable materials not only enhance the structure’s longevity but also its visual appeal. Here are some options:
- Cedar: Naturally resistant to decay, cedar is an excellent choice for outdoor structures. Its natural oils protect it from insects and moisture.
- Redwood: Similar to cedar, redwood offers beauty with its rich color and grain patterns, while remaining sturdy in outdoor conditions.
- Treated Pine: This is a cost-effective option, and when treated properly, it stands up against the elements well.
Lighting
Adding lighting to your wooden bridge can enhance its beauty at night and ensure safety. Consider these options:
- Solar Lights: Easy to install, solar lights charge during the day and illuminate the bridge at night, highlighting its structure.
- String Lights: Vintage-style string lights can create a magical ambience. Drape them along the railing or underneath the bridge for a whimsical effect.
- Spotlights: Use spotlights to focus on the bridge itself or the surrounding landscape, drawing attention to your beautiful feature.
Integrating Landscaping Elements
To make your wooden bridge even more appealing, integrate it into the surrounding landscape:
- Pathways: Create walking paths leading to the bridge using gravel, stepping stones, or mulch to make the transition smooth and natural.
- Plants: Add flowering plants or shrubs around the bridge. This will provide color and texture, making the bridge feel like part of the environment.
- Water Features: If possible, include a small pond or stream beneath your bridge. The sound of water adds to the peaceful atmosphere.
Functional Features to Consider
Besides decorative aspects, think about adding functional features to your wooden bridge:
- Railing: Install railings for safety, especially if the bridge is higher off the ground or over water.
- Seating: If space allows, consider building a small bench on the bridge for relaxation and enjoyment of your garden views.
- Planters: Attach small planter boxes to the sides of the bridge. This adds greenery and makes your bridge truly unique.
Once you’ve chosen your design and materials, it’s time to start building. You might want to consult some resources or guides helpful in your project, such as My Little Gardener that offer advice specifically for garden projects. Another useful site is Garden Design for innovative landscape ideas.
Maintenance Tips to Keep Your Wooden Bridge in Top Shape
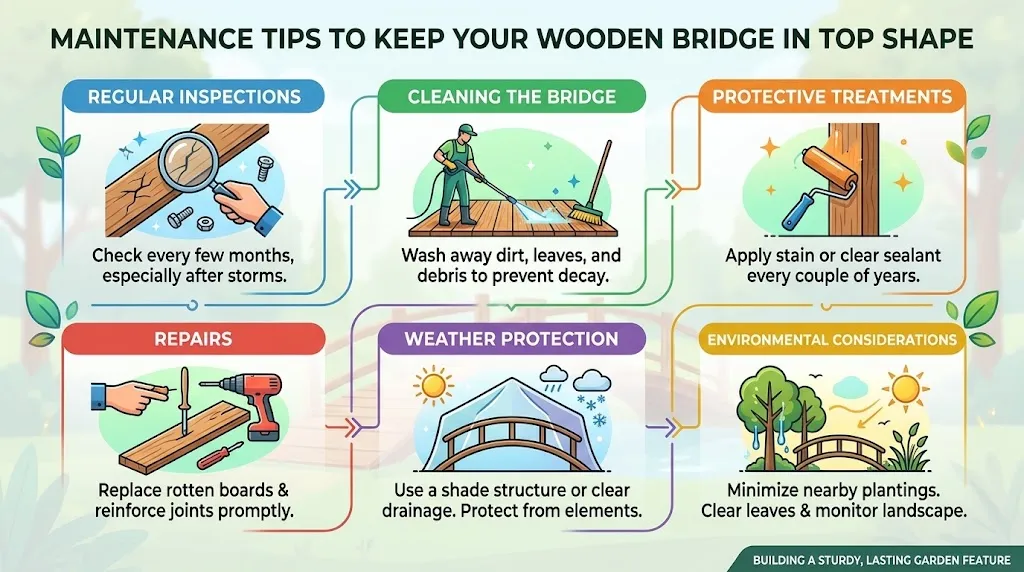
Building a Wooden Bridge for Garden can be an exciting project, but maintaining it is crucial to ensure its longevity and functionality. Wooden bridges are susceptible to environmental wear over time, so regular care is key to keeping them in top shape. Here are essential maintenance tips and strategies to help you preserve your wooden bridge.
Regular Inspections
Conducting regular inspections is the first step in maintaining your wooden bridge. You should check for any signs of damage, rot, or wear every few months, especially after heavy rainfall or storms. Look for the following:
- Cracks in the wood
- Signs of mold or mildew
- Loose or missing boards
- Signs of insect infestation
By identifying problems early, you can address them before they worsen, potentially saving time and costs down the line.
Cleaning the Bridge
Keeping your wooden bridge clean is essential for its health. Dirty surfaces can lead to mold and algae growth, which can cause the wood to rot. Here’s how to clean your bridge effectively:
- Use a broom or leaf blower to remove debris like leaves and twigs.
- Wash the wood surface with a mixture of warm water and mild detergent.
- Rinse thoroughly with clean water to ensure no soap residue is left.
Consider using a pressure washer on lower settings to remove stubborn stains, but be cautious not to damage the wood.
Protective Treatments
Applying a protective treatment can significantly extend the life of your wooden bridge. There are several options to choose from:
- Sealers: These products create a barrier against moisture and UV rays, preventing decay and discoloration.
- Stains: Wood stains can enhance the aesthetic appeal while offering some protection against weather elements.
- Wood preservatives: These chemical treatments help prevent rot and insect infestations.
Reapply these treatments every couple of years or as needed, based on your local climate conditions.
Repairs
During your inspections, you may find areas that require repairs. Addressing these issues quickly is vital. Common repairs may include:
- Replacing rotten or damaged boards: Always use treated wood to prevent future issues.
- Reinforcing joints: Tighten or replace any hardware to ensure stability.
- Repairing railings: Make sure all railings are secure for the safety of users.
Keep a DIY repair kit handy with a saw, screws, nails, wood glue, and other essential tools.
Weather Protection
Weather can be harsh on your wooden bridge. To increase its lifespan, consider the following protective measures:
- Shade structures: Add shade trees or awnings to protect the wood from direct sunlight.
- Water drainage: Ensure proper drainage around the bridge to prevent water accumulation.
Implementing these steps can protect your bridge from sun damage and minimize the impact of water on the wood.
Environmental Considerations
Pay attention to environmental factors that might affect your wooden bridge:
- Avoid planting trees near the bridge that may drop sap or leaves, as they can cause staining and decay.
- Monitor the surrounding ground; keep the area well-drained and clear of weeds.
Being proactive about the landscaping around your wooden bridge can mitigate potential issues.
By following these tips, you can ensure your garden wooden bridge remains in excellent condition for many years. Proper maintenance not only enhances safety but also allows the bridge to continue serving as a lovely feature in your garden.
Overcoming Common Challenges When Building a Garden Bridge
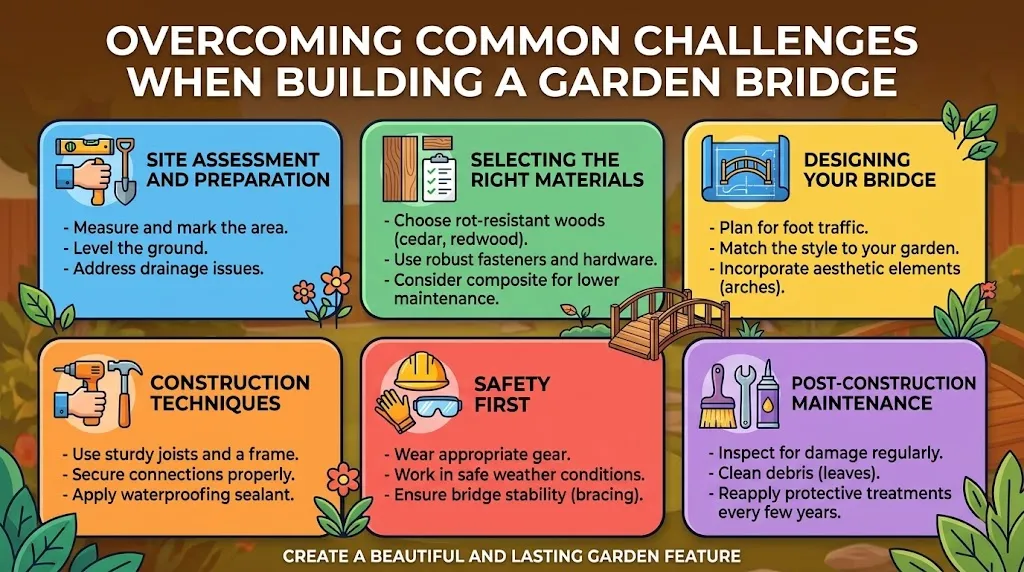
Building a Wooden Bridge for Garden can enhance the beauty of your outdoor space, allowing for easy access and creating a striking focal point. However, several challenges may arise during the construction process. Knowing how to address these common issues can make your project more enjoyable and ensure a successful outcome. Here are some obstacles you might face and ways to overcome them.
Site Assessment and Preparation
Before you start building, a thorough assessment of the intended location for your wooden bridge is crucial. Look for common problems like uneven ground or excessive moisture. These factors can affect the stability and durability of your bridge. To tackle these issues:
- Level the Ground: If the site is uneven, use tools like a shovel and level to create a flat surface.
- Improve Drainage: If the area tends to hold water, consider adding gravel or drainage pipes to ensure the wood does not rot.
Selecting the Right Materials
Choosing the right wood for your garden bridge can be another hurdle. Not all types of wood are suitable for outdoor projects. To make an informed choice:
- Durability: Opt for rot-resistant woods such as cedar, redwood, or pressure-treated lumber to prolong the life of your bridge.
- Weight Considerations: Make sure the material can support the expected load, including people and plants.
For more information on suitable exterior wood types, check out Wood Magazine.
Designing Your Bridge
Creating a design that is attractive yet functional can be tricky. Here are some tips to create a successful bridge design:
- Plan for Foot Traffic: Consider how many people will use the bridge typically. This factor will influence the width and strength of the structure.
- Incorporate Aesthetic Elements: Use curves or arches to make your bridge visually appealing and naturally integrate it into your garden.
Construction Techniques
Once the design is in place, the actual construction may present challenges. Here are some common issues and their solutions:
- Joining Pieces Securely: Ensure all wood pieces fit well and are firmly secured using appropriate connectors like bolts or screws.
- Maintaining Stability: For arched designs, consider adding bracing to improve stability and reduce swaying.
- Waterproofing: Apply a sealant or wood treatment to protect against moisture damage. This extra step can save you from future headaches.
Safety First
Safety should always be a priority when working on outdoor projects. Follow these guidelines:
- Wear Protective Gear: Equip yourself with gloves, safety glasses, and a mask to protect against dust and debris.
- Check Weather Conditions: Avoid working during rain or strong winds, which can create hazardous conditions.
Post-Construction Maintenance
Once your wooden bridge is built, ongoing maintenance is key to its longevity. Here’s what you should keep in mind:
- Regular Inspections: Check for signs of wear, such as loose planks or signs of rot, at least once a month.
- Cleaning: Remove debris and leaves that accumulate, as these can trap moisture against the wood.
- Reapply Sealant: Depending on weather conditions, you may need to reapply weatherproofing sealant every couple of years.
For more guidance on maintaining wooden structures, visit Wood Magazine’s maintenance guide.
With careful planning and attention to detail, you can create a beautiful Wooden Bridge for Garden. Remember, overcoming these challenges will not only ensure a well-built structure but will also make the experience more rewarding.
Conclusion
Building a Wooden Bridge for Garden can significantly elevate the aesthetic appeal and functionality of your outdoor space. By following the step-by-step guide, you can navigate the process with confidence, ensuring that each stage—from planning to final touches—is executed smoothly. Choosing the right materials is crucial; opting for durable and weather-resistant wood can enhance the longevity of your bridge while maintaining its visual charm.
Unique design ideas can transform your garden further, making the bridge a focal point that complements the surrounding landscape. Whether you prefer a rustic look or a modern twist, there are many styles to choose from that can fit your personal taste. Maintenance should not be overlooked either; implementing regular care routines will keep your wooden bridge in pristine condition, allowing it to endure the elements and continue to charm for years to come.
It’s also important to be prepared for common challenges that may arise during the construction process. From leveling the foundation to ensuring proper drainage, being aware of these hurdles helps you plan better and avoid frustration. With a bit of patience and creativity, building a Wooden Bridge for Garden can become a rewarding project that adds both beauty and utility to your garden.
Your garden is unique, and a Wooden Bridge for Garden can bring it to life in a way that reflects your style and enhances its natural beauty. So gather your materials, roll up your sleeves, and embark on this exciting outdoor project. Happy building!