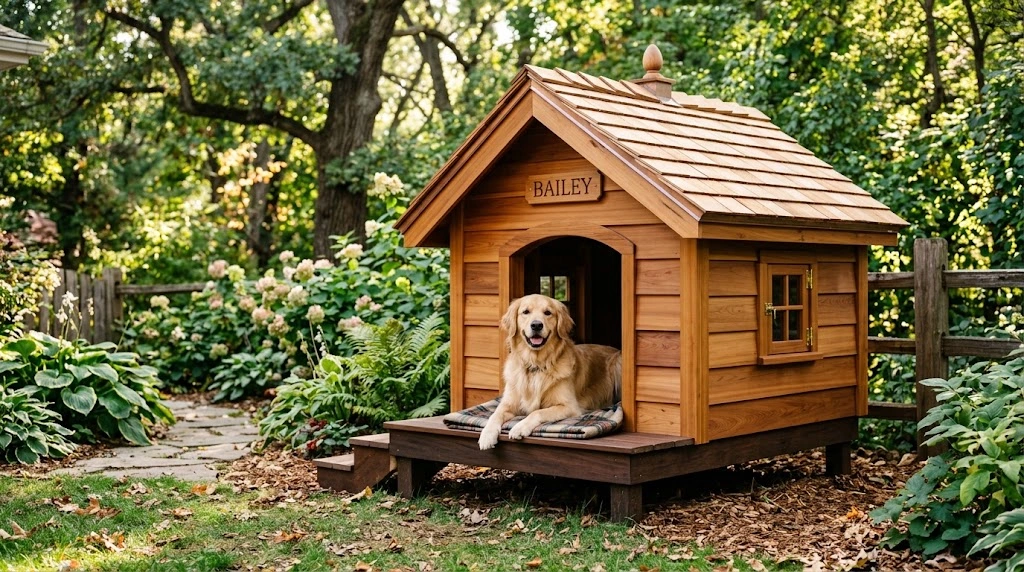
Building a DIY Insulated Wooden Dog House can be a rewarding project that provides your furry friend with a comfortable space. It’s important to consider various factors that contribute to your dog’s comfort, safety, and well-being. Before setting out to build your dog house, keep the following key considerations in mind.
Choosing the Right Wood
The material you choose plays a crucial role in the overall construction of your insulated wooden dog house. Opt for durable wood that can withstand the elements. Here are some options:
- Redwood: Naturally resistant to decay and insects.
- Cedar: A great choice due to its natural oils that help repel insects.
- Pine: Generally affordable, but should be treated to increase longevity.
Size Matters
Consider the size of your dog when designing their house. A home that’s too small may feel claustrophobic, while one that’s too large can be difficult for your pet to keep warm. To get the right dimensions, take the following steps:
- Measure your dog’s height and length.
- Add around 3 inches to the height for headroom.
- For width and length, add 5-10 inches to your dog’s measurements.
Insulation Choices
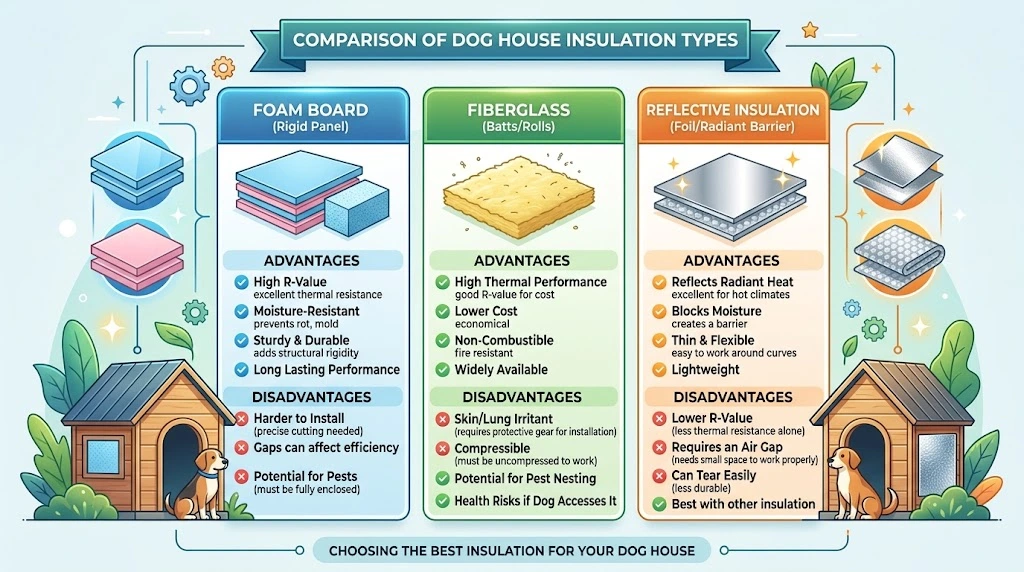
Proper insulation is vital for keeping your dog warm during winter and cool in summer. Here are some popular insulation materials:
| Insulation Type | Advantages | Disadvantages |
|---|---|---|
| Foam Board | Excellent R-value and moisture resistance. | More expensive than other options. |
| Fiberglass Insulation | Widely used and affordable. | Can cause skin irritation; needs to be sealed. |
| Reflective Insulation | Great for hot climates as it reflects heat. | Less effective in cold weather. |
Ventilation
Good ventilation is essential for preventing moisture buildup inside the dog house. Consider installing a small vent or using screens on the entrance. This will help maintain a comfortable temperature for your dog and keep the house dry.
Choosing the Right Roof
The roof of the dog house also plays an essential role in insulation and ventilation. Here are some types of roofs to consider:
- Flat Roof: Easier to build but may collect rainwater.
- Pitched Roof: Allows for drainage and better ventilation; ideal for rainy regions.
- Gabled Roof: Offers good insulation and aesthetics.
Shelter from Elements
Position the dog house in a sheltered area that protects against harsh weather conditions. Avoid placing it near wind tunnels or direct sunlight. Ideally, it should be strategically placed to shield your pet from rain, wind, and extreme sun exposure.
Accessibility and Safety Features
Ensure the entrance is easy for your dog to access without being too large. Here are a few safety measures:
- Add a door flap to keep out drafts.
- Ensure all edges are smooth to avoid splinters.
- Position the house on a raised platform to prevent water pooling.
Essential Materials for Building a Durable Dog House
Building a durable dog house requires careful consideration of materials that ensure comfort and protection for your furry friend. Choosing quality materials not only enhances the structure’s longevity but also guarantees a safe space where your dog can retreat. Here’s a detailed guide on essential materials you will need for constructing a reliable dog house.
Wood
Wood is one of the most popular materials for building dog houses. It provides excellent insulation and is easy to work with. Choose weather-resistant wood, such as cedar or redwood, for the best results. Here’s why wood is a great choice:
- Durability: Quality wood can withstand outdoor conditions if properly treated.
- Insulation: Wood helps keep your dog warm in winter and cool in summer.
- Appearance: Wood has a natural look that blends well with outdoor environments.
Insulation Materials
To provide additional comfort, consider using insulation materials. Insulation helps maintain a stable interior temperature, protecting your dog from extreme weather. Here are some options:
- Foam Board Insulation: Lightweight and highly effective, foam boards are often used in dog houses.
- Reflective Insulation: This type reflects heat away in summer and retains warmth in winter.
- Fiberglass Insulation: Good for dog houses in cold climates, but use caution as it can be irritating.
Roofing Materials
When it comes to roofing, you need to ensure that your dog house is protected from rain and snow. Some popular options include:
- Asphalt Shingles: Affordable and easy to install, asphalt shingles are a common choice.
- Metal Roofs: Durable and long-lasting, metal roofs are excellent for heavy rains.
- Plywood Panels: For a simpler design, plywood can be painted or treated for weather resistance.
Flooring Materials
The floor of the dog house plays a significant role in comfort and hygiene. Here’s what you might consider:
- Wooden Pallets: These can lift the dog house off the ground, keeping it dry and insulated.
- Concrete: Very durable, but make sure to use a bedding material to ensure comfort.
- Rubber Flooring: Provides cushioning and is easy to clean.
Fasteners and Sealants
For assembly, you will need quality fasteners and sealants to ensure everything stays secure and protected. Use the following:
- Galvanized Nails or Screws: These won’t rust over time and ensure the structure holds together.
- Wood Glue: Offers additional strength to joints, particularly in areas where screws alone might not suffice.
- Weatherproof Sealant: Use this to seal joints and edges, providing resistance against rain and pests.
Bedding Materials
A durable dog house also needs comfortable bedding. Consider options like:
- Straw: Insulating and provides comfort, perfect for colder climates.
- Dog Blankets: Soft bedding that can be removed for washing.
- Shredded Newspaper: Cost-effective and offers warmth, though it may require frequent changes.
Step-by-Step Guide to Constructing an Insulated Wooden Dog House
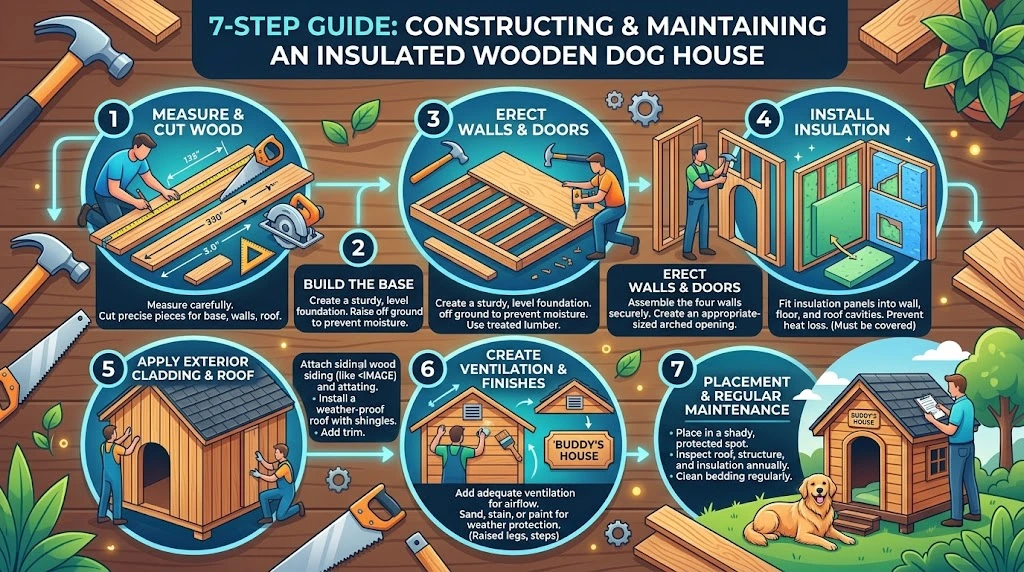
Creating a cozy and energy-efficient space for your furry friend is essential, especially with changing weather conditions. Constructing an insulated wooden dog house can provide comfort and protection against the elements. Here’s a step-by-step guide to help you build the perfect shelter for your dog.
Materials Needed
Before you begin, gather all the necessary materials. Here’s a list to help you get started:
- 3/4 inch plywood for the walls and floor
- 1/2 inch plywood for the roof
- Insulation board or spray foam insulation
- Wood screws
- Wood glue
- Tape measure
- Circular saw or hand saw
- Drill and drill bits
- Paint (optional for weatherproofing)
Step 1: Measure and Cut the Wood
Start by measuring the size of your dog. A good rule of thumb is that your dog should be able to stand up, turn around, and lie down comfortably inside the house. Based on your dog’s size, you can adjust the following measurements:
- For small dogs, aim for dimensions of 24″x24″x24″.
- For medium dogs, dimensions can be 30″x30″x30″.
- For large dogs, consider dimensions of 36″x36″x36″.
Using your saw, cut the plywood according to these dimensions. Ensure that all cuts are straight for a snug fit.
Step 2: Assemble the Walls
Once you have your pieces cut, it’s time to assemble the walls. Follow these steps:
- Take four pieces of plywood for the walls and arrange them upright.
- Secure each corner using wood screws and wood glue for extra stability.
- Ensure that you create a solid frame that can hold up to your dog’s activity.
Step 3: Add Insulation
This is a crucial step for maintaining a comfortable temperature inside the dog house. You have two options for insulation:
- Use insulation boards cut to fit between the wall frames.
- Spray foam insulation can also be applied between the walls for a tight seal.
Make sure to seal any gaps to prevent drafts. Insulation boards provide better R-value, which means better thermal resistance.
Step 4: Construct the Roof
The roof design can be flat or slanted, but a slanted roof is recommended to facilitate water drainage. Here’s how to do it:
- Cut the plywood for the roof to match the dimensions you need based on your chosen design.
- Attach the roof securely to the top of the walls using screws.
- Seal all joints using wood glue and consider using shingles or waterproof paint for extra protection against the elements.
Step 5: Create a Doorway
Providing a doorway is vital for your dog’s entrance and exit. Cut an entry that’s slightly larger than the width of your dog. Typically, an opening of about 10″-14″ provides ample space. To keep the house snug:
- Avoid putting the door directly facing prevailing winds.
- Consider adding a flap or curtain for added insulation.
Step 6: Final Touches
Once your dog house is assembled, inspect it for any sharp edges or splinters. Sand down areas that may harm your pet. If desired, paint the exterior to match your home or yard. Ensure the paint is non-toxic and safe for animals. Links like those at Dog House can provide ideas for design and color choices.
Step 7: Place and Maintain the Dog House
Choose a spot in your yard that provides shelter from direct sunlight and rain. Elevating the house off the ground on wooden pallets or bricks can keep it dry. Regularly check the house for wear and tear and clean it often to maintain a healthy environment for your dog.
Benefits of Insulation in Dog Houses for Different Climates
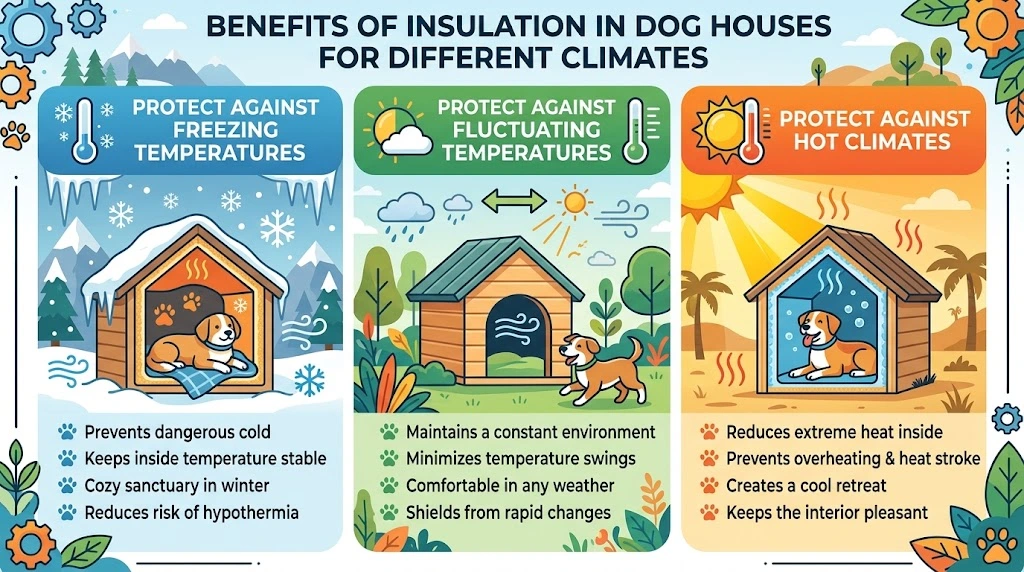
Building a comfortable dog house is essential for your furry friend, especially when considering different climates. Insulation plays a vital role in ensuring that dogs remain warm in cold weather and cool during hot summer days. By examining the benefits of insulation in dog houses, pet owners can provide a healthier and more enjoyable living space for their dogs.
Protect against freezing temperatures
In colder climates, insulated dog houses protect against freezing temperatures. Insulation keeps the heat generated by your dog from escaping, creating a cozy environment. A well-insulated dog house reduces the risk of hypothermia or frostbite. The materials commonly used include foam board and spray foam, which trap warmth and maintain a steady temperature.
Protect against fluctuating temperatures
For areas with fluctuating temperatures, insulated dog houses help manage the temperature effectively. They provide a buffer against heat and cold, maintaining a more stable environment for your pet. This can significantly enhance your dog’s comfort, as it reduces the stress caused by rapid temperature changes.
Protect against hot climates
In hot climates, insulation functions differently but is equally important. A properly insulated dog house stays cooler, providing shade and relief from the intense heat. Insulated walls block outside temperatures, preventing excessive heat build-up inside. Ventilation systems can further enhance this effect, ensuring that hot air can escape while cooler air circulates.
Consider the following benefits of an insulated dog house:
- Temperature Regulation: Insulation keeps the temperature inside your dog’s house stable, regardless of the external conditions.
- Enhanced Comfort: Dogs are more comfortable when temperatures are moderated, which can lead to better behavior and a happier pet.
- Energy Efficiency: Insulated dog houses can potentially reduce your energy bills if you live in areas where outdoor temperatures require heating or cooling.
- Health Benefits: Protecting dogs from extreme weather conditions can prevent health issues associated with adverse environments.
When designing your DIY Insulated Wooden Dog House Plans house, consider the following materials:
| Material | Benefits |
|---|---|
| Foam Board | Lightweight, easy to cut, provides excellent thermal insulation. |
| Spray Foam | Seamless insulation, expands to fill spaces, highly effective in both cold and hot climates. |
| Reflective Materials | Helps reflect heat away in summer while retaining warmth in winter. |
| Wood | Natural insulator, adds weight and structure, and can be combined with other insulating materials. |
Insulating your dog house also contributes to its durability. Insulated materials often stand up better to harsh weather conditions, whether it’s snow, rain, or extreme heat. This added strength and resilience mean your investment lasts longer, providing a consistent environment for your beloved pet.
One critical factor to keep in mind is the location of the dog house. Ideally, place it in a shaded area during hot weather to maximize the benefits of insulation. This simple step can significantly enhance the effectiveness of your insulated dog house. Furthermore, elevating the dog house off the ground can prevent moisture from accumulating, further improving your dog’s living conditions.
Maintenance Tips to Ensure Longevity of Your Homemade Dog House
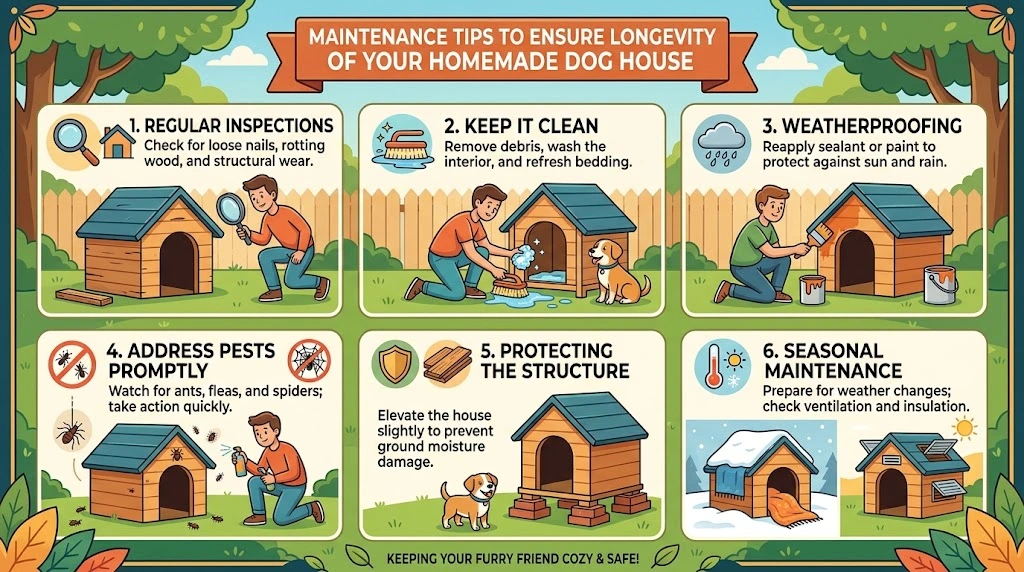
Building a homemade dog house is an excellent way to provide your furry friend with a comfortable and safe space. However, like any structure, it requires regular maintenance to ensure longevity. Here are some maintenance tips to help you keep your DIY Insulated Wooden Dog House Plans in top shape for many years to come.
Regular Inspections
Inspecting your dog house regularly is one of the best ways to prevent major problems down the line. Look for signs of wear and tear, including:
- Cracked or peeling wood
- Leaky roofs
- Rusting hardware
- Signs of mold or mildew
Conduct these checks at least twice a year, particularly before the harsher weather seasons. Catching minor issues early can save you from extensive repairs later on.
Keep it Clean
Cleaning your dog house should be a part of your routine. Regular cleaning helps to prevent the buildup of dirt, parasites, and bacteria. Here’s how to keep it tidy:
- Remove bedding and debris weekly.
- Wash with a hose and mild soap, focusing on corners and crevices.
- Sanitize using pet-safe cleaners to eliminate odors and germs.
- Allow it to dry completely before replacing the bedding.
By maintaining cleanliness, you provide your dog with a healthy living environment and extend the life of your dog house.
Weatherproofing
Weatherproofing is essential to maintain the integrity of the wooden structure. Here’s a few ways to ensure your dog house stands up against the elements:
- Sealants: Apply a waterproof sealant on the exterior to protect against rain and moisture.
- Roof Maintenance: Regularly check and maintain the roof to prevent leaks. Use shingles or metal roofing as necessary.
- Elevate the House: Raise the dog house off the ground with bricks or wooden blocks to avoid moisture accumulation from the ground.
These actions will keep your homemade dog house protected from heavy rain, snow, and strong winds.
Address Pests Promptly
Wooden structures can attract pests, including termites and rodents. Protect your dog house by taking proactive measures:
- Use pet-safe insect repellent around the base of the house.
- Inspect for signs of infestations such as droppings or holes.
- Apply wood preservatives to deter termites and other wood-eating pests.
Taking steps to control pests will help maintain the structure of your dog house and ensure your dog’s safety.
Protecting the Structure
It’s important to ensure that the structure remains sturdy. Consider the following tips:
- Reinforce any loose joints or screws with wood glue or additional fasteners.
- Replace any damaged boards or parts immediately to prevent further decay.
- Inspect the flooring regularly and replace it if it starts to rot or become unstable.
By focusing on the structural integrity, your dog house will remain a safe haven for your pet.
Seasonal Maintenance
Different seasons bring different challenges. Here’s a quick guide on seasonal tasks:
| Season | Maintenance Task |
|---|---|
| Spring | Inspect for winter damage, clean thoroughly. |
| Summer | Ensure good ventilation, shade the house from the sun. |
| Fall | Weatherproof, check for signs of pests. |
| Winter | Insulate if necessary, clear snow from the roof. |
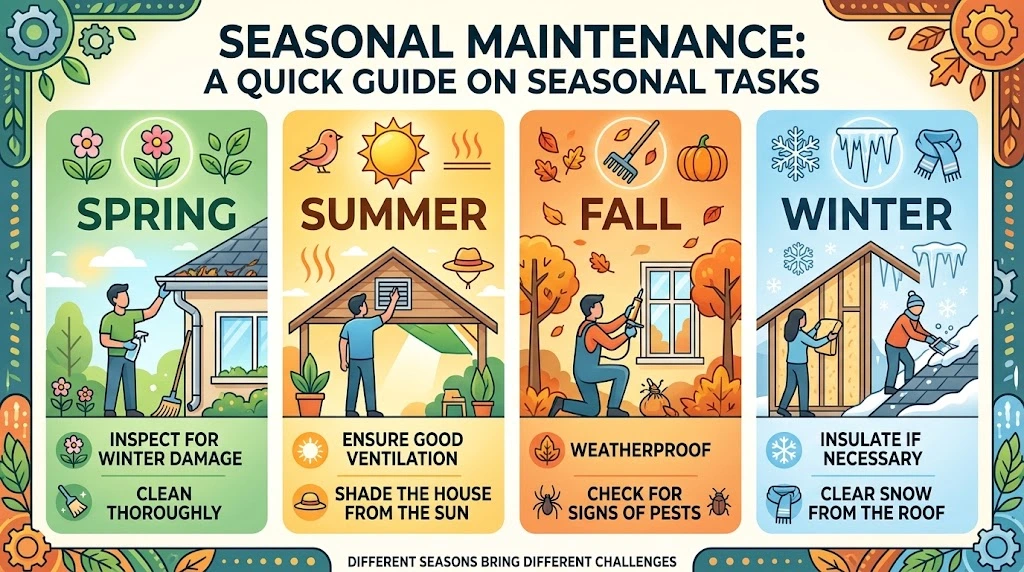
These seasonal reminders will ensure that your dog house is ready for whatever Mother Nature brings.
Remember, a well-maintained dog house is vital for your pet’s comfort and health. By adopting these practices, you can enjoy peace of mind knowing your furry friend is safe and cozy. For more detailed DIY plans and maintenance tips, visit Dog Houses and American Kennel Club.
Conclusion
Building a DIY Insulated Wooden Dog House project can be a rewarding experience that enhances your pet’s comfort and well-being. Throughout this article, we discussed the essential design considerations to ensure a cozy and functional space tailored to your dog’s needs. Choosing the right materials, such as weather-resistant wood and high-quality insulation, plays a crucial role in creating a durable structure capable of withstanding various elements and temperatures.
You have learned a step-by-step guide to constructing an insulated wooden dog house, which can empower you to take on this hands-on challenge with confidence. Insulation not only keeps your furry friend warm in the winter but also cool during the hot summer months, making it a must-have for dog houses in any climate. This adaptation is crucial for maintaining a comfortable environment for your beloved pet.
Moreover, maintaining your dog house is essential for ensuring its longevity and ensuring your pet remains safe and comfortable. Simple actions, like checking for wear and tear or providing regular cleanings, can make a significant difference in the lifespan of your build.
Ultimately, creating an insulated wooden dog house combines creativity with practicality, bringing a cozy retreat to your furry companion. With careful planning, the right materials, and a bit of elbow grease, you can build a haven that your dog will enjoy for years to come. Embrace the challenge and take pride in knowing you’ve created a personalized space that reflects your love and commitment to your four-legged friend.