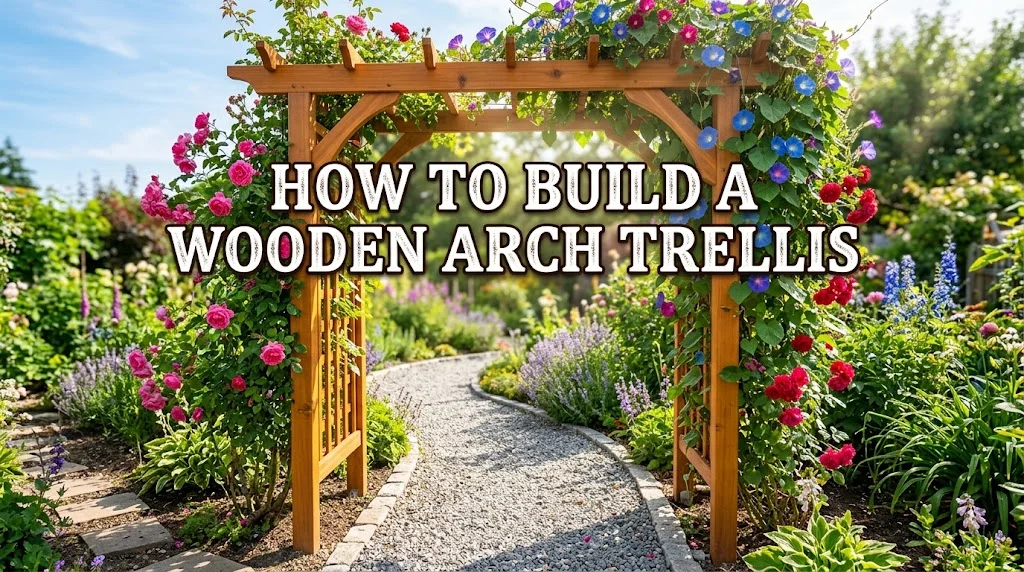
Building a wooden arch trellis is a fulfilling project that enhances any garden. It can support climbing plants, create beautiful pathways, or serve as a stunning focal point. With the right materials and tools, you can construct this elegant structure in just a few steps.
Materials Needed
- Pressure-treated wood (e.g., 2x4s and 2x2s)
- Wood screws or nails
- Wood glue
- Wire cutters (if utilizing wire for climbing plants)
- Measuring tape
- Level
- Drill
- Sandpaper
- Outdoor wood sealant (for weather protection)
Step-by-Step Guide for Building an Arch Trellis
Step 1: Plan Your Design
Before you begin building, sketch a simple design for your Wooden Arch Trellis. Choose the width and height based on your space and what plants you want to grow. An arch that is approximately 7 feet tall and 4 feet wide works well for most gardens.
Step 2: Gather Your Materials
Once your design is set, gather all your materials in one place. It’s important to have everything ready to minimize interruptions during your building process.
Step 3: Cut the Wood
Using your measuring tape and saw, cut your pressure-treated wood to the dimensions of your design. You’ll need two vertical posts for the sides and curved pieces for the top arch. The curves can be made using a jigsaw to create a smooth arch shape.
Step 4: Assemble the Trellis
Begin assembling the structure on a flat surface. First, attach the vertical posts to the base. Use wood screws for a secure fit. Then, position the curved pieces at the top and attach them to the vertical posts. Make sure everything is aligned and level during this step.
Step 5: Reinforce the Structure
To add stability, consider adding cross braces. Cut small pieces of wood and attach them diagonally between the vertical posts. This helps to ensure the trellis can withstand weight from climbing plants.
Step 6: Sand the Edges
After assembly, use sandpaper to smooth out any rough edges. This is crucial not only for appearance but also for the safety of anyone who interacts with the trellis later on.
Step 7: Apply Outdoor Sealant
To protect your Wooden Arch Trellis from the elements, apply a coat of outdoor wood sealant. This helps to prevent rot and extends the lifespan of your structure. Make sure to let it dry completely before placing it in the garden.
Step 8: Install the Trellis
Select a suitable location in your garden. Dig holes for the vertical posts and place the trellis firmly in the ground. Use a level to ensure it’s straight. Fill the holes with soil, packing it tightly around the posts for support.
Step 9: Plant Climbing Vegetation
Select climbing plants that you wish to grow on your trellis. Options include roses, beans, or wisteria. Plant them at the base of the trellis and provide support with wire or twine as needed. Training the plants to climb by guiding them along the structure is key.
Step 10: Regular Maintenance
Maintain your wooden architecture by inspecting it regularly. Look for signs of wear or rot, and treat any issues promptly. This ensures your Wooden Arch Trellis remains a beautiful feature in your garden for years to come.
Choosing the Right Wood for Your Trellis Project
Building a beautiful wooden trellis can enhance your garden, providing support for climbing plants and creating a stunning visual focal point. To ensure your trellis stands the test of time and looks great, choosing the right wood is essential. Different types of wood have unique qualities, which can significantly impact your project. Here’s a guide to help you make an informed decision when learning a Wooden Arch Trellis.
Types of Wood to Consider
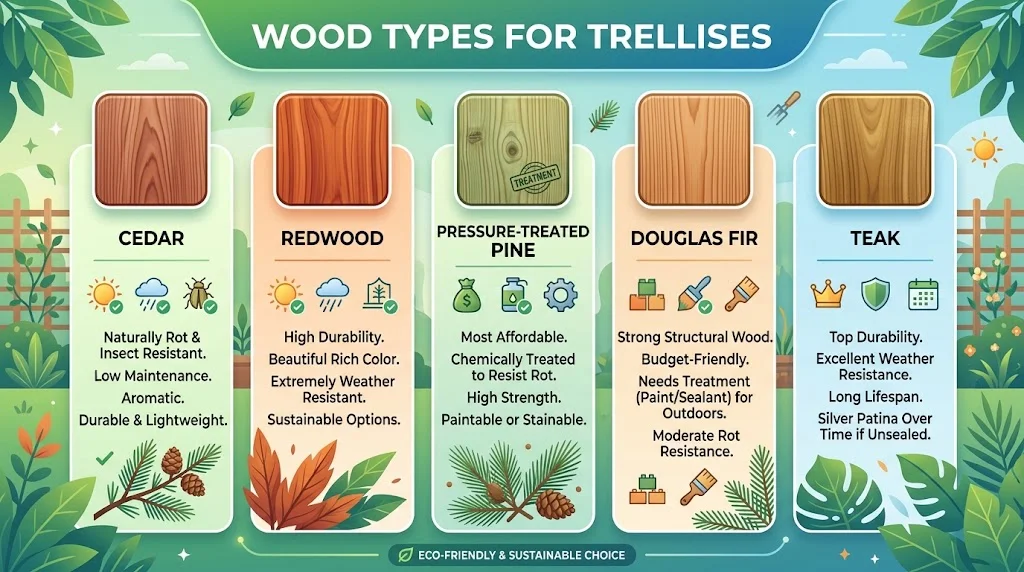
When selecting wood for your trellis, it’s important to consider factors such as durability, resistance to decay, and visual appeal. Here are the most common types of wood to evaluate:
- Cedar: Known for its natural resistance to rot and insects, cedar is a popular choice. Its warm color and pleasant aroma also make it visually appealing.
- Redwood: Similar to cedar, redwood has excellent durability and resistance to decay. It features rich colors and can age beautifully over time.
- Pressure-Treated Pine: This economical option is infused with preservatives to prevent rot. While not as visually appealing as cedar or redwood, it’s readily available and holds up well outdoors.
- Douglas Fir: Strong and resilient, Douglas Fir is ideal for sturdy structures. However, it requires regular maintenance to prevent moisture damage.
- Teak: Though on the pricier side, teak is known for its exceptional durability and resistance to water. Its elegant finish can add sophistication to your garden.
Factors Affecting Your Choice
Before you decide on the type of wood for your trellis, consider the following factors:
- Climate: The weather in your area plays a significant role in wood selection. If you live in a humid climate, opt for naturally resistant woods like cedar or redwood. In drier areas, pressure-treated pine could suffice.
- Functionality: Think about how your trellis will be used. If it needs to support heavier plants, choose a stronger and more durable wood accordingly.
- Aesthetics: Look for wood that complements your garden’s overall design. A visually appealing trellis will enhance your landscaping.
Cost Considerations
Budget is often a key factor when selecting wood for your Wooden Arch Trellis project. Here’s a comparative look at the cost of different wood types:
| Type of Wood | Cost per Linear Foot | Durability |
|---|---|---|
| Cedar | $2 to $5 | High |
| Redwood | $3 to $6 | Very High |
| Pressure-Treated Pine | $1 to $3 | Moderate |
| Douglas Fir | $2 to $4 | High |
| Teak | $10 to $20 | Very High |
Prices can vary based on location and availability, so it’s essential to check local suppliers for the most accurate estimates.
Maintenance Tips
Whichever wood you choose, some maintenance will help prolong the life of your trellis. Here are some helpful tips:
- Sealant: Applying a sealant can protect wood from moisture and UV rays. Look for products specifically designed for outdoor wood.
- Regular Inspections: Periodically check for signs of wear, rot, or insect damage. Addressing issues early can save you time and money in the long run.
- Cleaning: Keep the wood clean by removing debris and dirt, which can trap moisture and promote decay.
To find high-quality wood for your trellis project, consider visiting these resources: Woodworkers Source, Home Depot, and Lowe’s.
Design Ideas to Enhance Your Garden with a Trellis
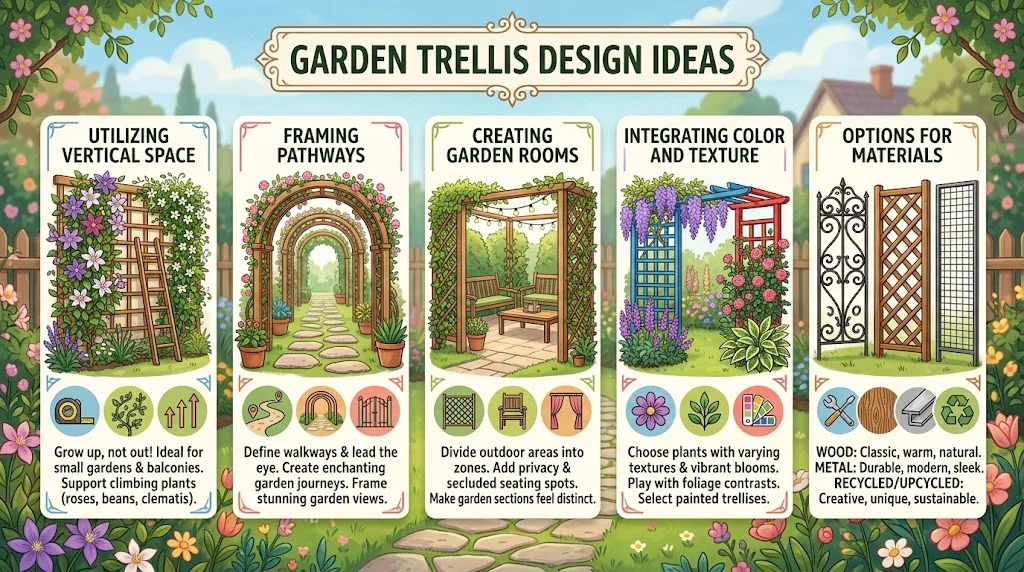
Enhancing your garden with a trellis not only adds visual appeal but also provides structure and support for climbing plants. There’s a variety of design ideas you can consider, ensuring your garden flourishes beautifully. Here are some creative ways to use trellises when planning your Wooden Arch Trellis project, making your outdoor space both functional and stunning.
Utilizing Vertical Space
Trellises allow you to maximize the vertical space in your garden. This is especially beneficial if you have a small yard or want to create diverse layers in your landscape. You can install a trellis against a wall or fence to grow climbing roses, beans, or even tomatoes. These plants will not only occupy minimal ground space but will also add height and interest to your garden.
Framing Pathways
Another innovative idea is to use trellises as frames for pathways. You can place them on either side of a path, allowing vines to grow and create a natural archway. Consider using flowering vines like wisteria or honeysuckle to create a fragrant welcome as you walk through.
Creating Garden Rooms
A trellis can function as a partition, separating different areas of your garden. This technique is great for creating ‘rooms’ in your landscape. You might use a trellis to enclose a cozy seating area or define a vegetable patch. This not only organizes your garden but also adds a sense of privacy.
Integrating Color and Texture
Trellises can be painted or stained to match your garden’s theme. Choose a vibrant color to stand out against the green of the plants, or go for a natural finish to blend seamlessly. You can also add hanging planters or decorative elements like fairy lights to enhance the design and create an inviting atmosphere.
Options for Materials
The material of your trellis plays a significant role in its overall look and durability. Here are some popular materials to consider:
- Wood: Offers a charming, classic look and can be shaped easily.
- Metal: Provides a more modern aesthetic and increased durability.
- Vinyl: Low maintenance and available in various styles.
Plant Selection for Trellises
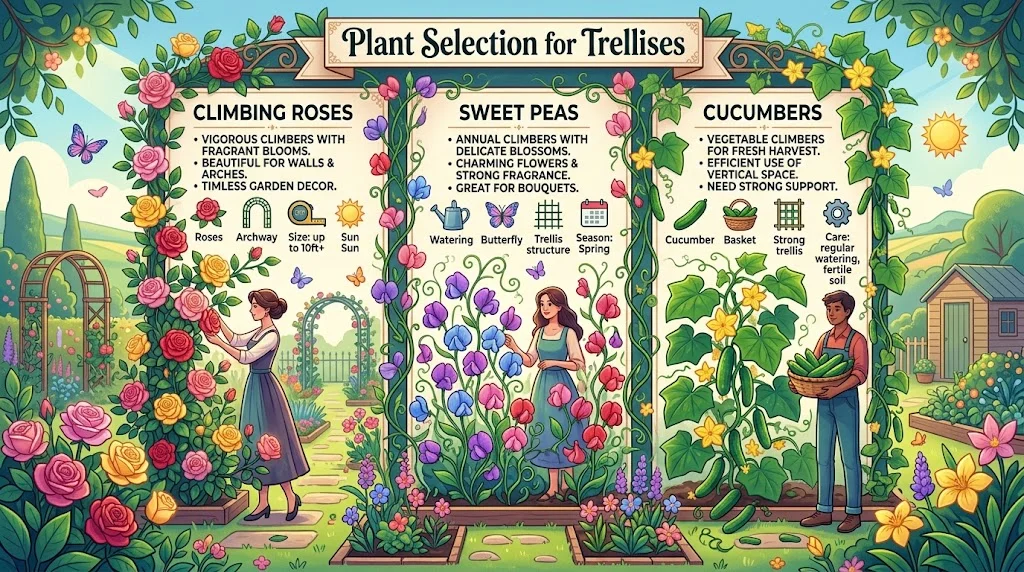
Choosing the right plants to climb your How to Build a Wooden Arch Trellis is vital. Consider these options:
| Type of Plant | Description |
|---|---|
| Climbing Roses | Beautiful and fragrant; ideal for romantic gardens. |
| Sweet Peas | Perfect for adding color; often used in seasonal gardens. |
| Cucumbers | Great for kitchen gardens; they save space while bearing fruit. |
Lighting Enhancements
Adding lighting to your trellis design can dramatically change the ambiance of your garden. You can install solar lights or string lights around and over the trellis to create a magical evening atmosphere. This not only highlights the plants but also invites you to enjoy your garden at night.
Maintenance Tips
For your trellis and climbing plants to thrive, regular maintenance is essential. Here are key practices to keep in mind:
- Pruning: Regularly trim your plants to promote growth and prevent overcrowding.
- Support: Ensure the trellis is sturdy enough to support mature plants and can withstand weather conditions.
- Watering: Deep watering is important, especially for climbing varieties.
Common Mistakes to Avoid When Constructing a Trellis
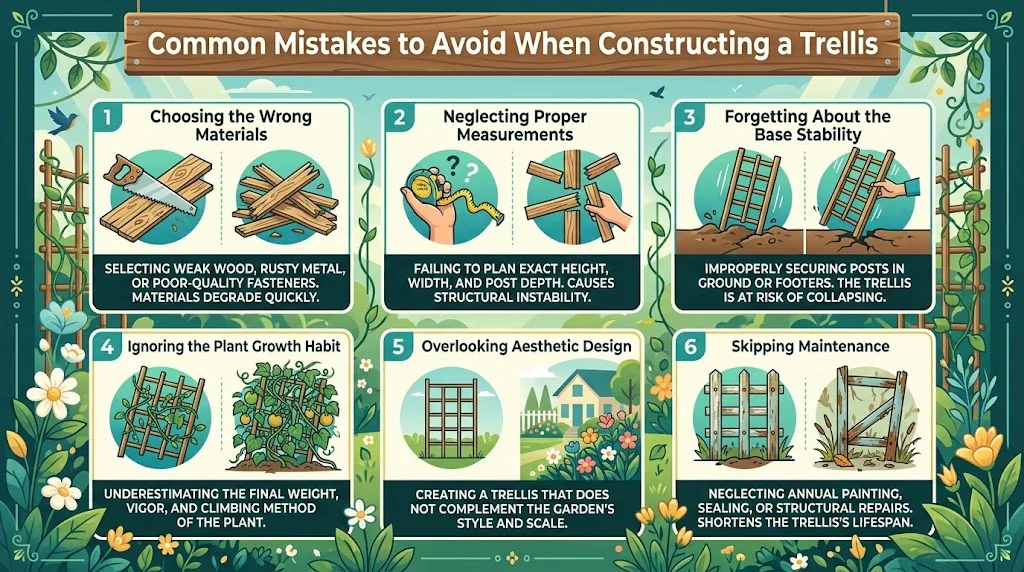
Building a trellis can be a rewarding project, allowing you to create a beautiful space for plants to climb and thrive. However, many DIY enthusiasts make mistakes along the way that can compromise the integrity and effectiveness of their Wooden Arch Trellis project. Here are some common pitfalls to avoid.
Choosing the Wrong Materials
Using inappropriate materials is one of the most frequent mistakes. While it might be tempting to go for cheaper options, they may not withstand the test of time or weather. Here’s a quick guide:
| Material | Pros | Cons |
|---|---|---|
| Wood | Natural look, customizable | Can rot if untreated |
| Metal | Strong, long-lasting | Can rust without proper coating |
| Plastic | Lightweight, resistant to rot | Less visually appealing, can fade |
Always opt for materials that complement your garden style and that can endure local weather conditions. For instance, if you live in a humid area, treated wood or metal with corrosion-resistant coatings would be a wise choice.
Neglecting Proper Measurements
Accurate measurements are crucial when building a trellis. Incorrect dimensions can lead to a structure that is either too tall or too short for your plants. Always measure the area where you plan to install the trellis and take into account the mature height of the climbing plants you intend to use.
- Measure twice, cut once: This old adage holds true here. Double-check your measurements to avoid wasting materials.
- Consider the spacing of plants: Ensure your trellis is wide enough for the climbing plants to spread out without overlap.
Forgetting About the Base Stability
A trellis needs a sturdy base to support the weight of climbing plants. Failing to secure the base can result in a wobbly structure that can collapse under weight. You can enhance the stability by:
- Putting the posts at least two feet into the ground.
- Using gravel or concrete for added fixation around the posts.
Invest time in ensuring your Wooden Arch Trellis is well anchored. This step is vital, especially when heavy plants such as cucumbers or tomatoes are grown.
Ignoring the Plant Growth Habit
Not all climbing plants behave the same way. Some are aggressive growers while others may require more encouragement. To build a functional trellis, consider the following:
- Research the growth habits of your plants: For instance, sweet peas need a different structure than morning glories.
- Use appropriate supports: Use wires or lattice to guide the plants in the right direction.
Taking these plant characteristics into account will help ensure that your trellis not only supports but also enhances the growth of your plants.
Overlooking Aesthetic Design
A trellis is not just functional; it can serve as an eye-catching feature in your garden. When building, consider the aesthetics:
- Choose a design that complements your home or garden style.
- Consider painting or staining wood to match your garden theme.
Remember, the right design can make your garden more inviting and pleasing to the eye.
Skipping Maintenance
After constructing your trellis, regular maintenance is essential. Check for any signs of wear and tear or instability. Here are a few maintenance tips:
- Inspect the structure: Check for signs of rot or rust.
- Clean debris: Clear any debris that accumulates on or around the trellis.
- Reapply protective coatings: Reapply protective coatings on wood and metal when necessary.
By being proactive, you can prolong the life of your trellis significantly. For more tips on maintaining your garden structures, visit Gardening Know How.
Maintenance Tips to Preserve Your Wooden Arch Trellis
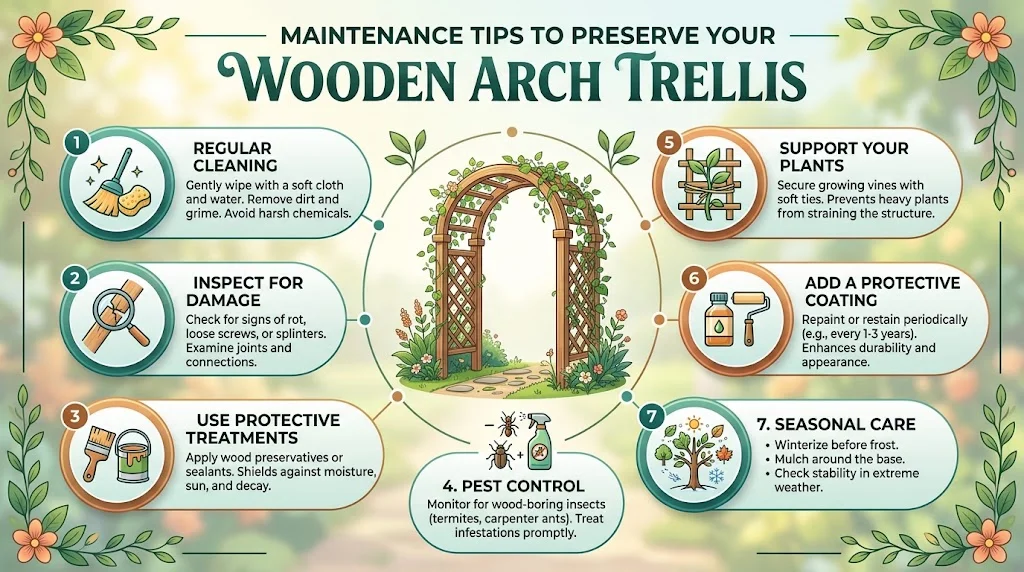
Wooden arch trellises are not only stunning features in gardens but also provide support for climbing plants. However, to keep them looking great and functioning well, regular maintenance is essential. Here are some practical maintenance tips to preserve your Wooden Arch Trellis and ensure its longevity.
Regular Cleaning
Cleaning your wooden arch trellis is crucial to prevent the build-up of dirt, mold, and mildew. Here’s how you can do it:
- Use a soft-bristle brush or cloth to gently remove debris.
- Mix a solution of mild detergent and water and use it to scrub the trellis.
- Rinse thoroughly with water to ensure no soap residue remains.
- Allow it to dry completely to prevent moisture accumulation.
Inspect for Damage
Regular inspections can help you catch potential issues early. Here’s what to look for:
- Check for signs of rot, particularly at the base and joints.
- Look for cracking or splitting in the wood.
- Examine the structure for loose connections or missing pieces.
Use Protective Treatments
Applying a protective treatment can significantly extend the life of your trellis. Consider these options:
- Wood Sealant: A high-quality wood sealant protects against water damage. Apply it every couple of years to maintain its integrity.
- Stain or Paint: If you prefer a particular look, staining or painting your trellis can add a layer of protection while also enhancing its appearance. Choose a product that is suitable for outdoor use and contains UV protection.
Pest Control
Pests can cause severe damage to wooden structures. Keep an eye out for:
- Termites: These pests can wreak havoc on your wooden arch trellis. Use a pest control treatment approved for outdoor use to deter them.
- Beetles and Other Insects: Regularly inspect for signs of infestation and treat accordingly.
For more detailed pest control methods, you can visit Purdue Extension.
Support Your Plants
As your climbing plants grow, they can place significant stress on the trellis. Here are tips to manage that:
- Trim away any dead or overgrown branches that might weigh down the structure.
- Use garden twine or plant ties to secure climbing plants gently without causing any damage.
Add a Protective Coating
To protect your Wooden Arch Trellis from the elements, applying a protective coating is advisable. Options include:
| Type of Coating | Description |
|---|---|
| Varnish | Adds a hard protective layer while enhancing the wood’s natural beauty. |
| Waterproof Sealant | Great for preventing water damage, ideal for regions with heavy rainfall. |
| Anti-fungal Treatment | Helps prevent mold and mildew, crucial for humid areas. |
Seasonal Care
Adjusting your care routine according to the seasons can help maintain your trellis. In winter, ensure that snow or ice doesn’t accumulate on it. In spring, inspect it thoroughly and make any necessary repairs. In summer, monitor the growth of foliage to prevent damage from heavy plants.
By following these maintenance tips, you can protect your Wooden Arch Trellis and keep it looking stunning for years. For more information on wooden structures and gardening, check out Family Handyman or Better Homes and Gardens.
With the right care, your Wooden Arch Trellis will remain a beautiful and functional part of your garden landscape, providing support for your favorite climbing plants and adding charm to your outdoor space.
Conclusion
Building a wooden arch trellis can transform your garden into a stunning focal point, bringing both beauty and functionality to your outdoor space. By following the step-by-step guide for your Wooden Arch Trellis project, you can confidently create a structure that supports climbing plants while adding an elegant touch to your landscape. Choosing the right wood is crucial; opt for materials that are not only aesthetically pleasing but also durable and weather-resistant to ensure longevity.
Exploring design ideas allows you to personalize your trellis to fit your garden’s style, whether you prefer a rustic charm or a modern look. Remember to plan your design carefully to avoid common mistakes that can compromise the stability and appearance of your trellis. It’s essential to pay attention to these pitfalls, such as skipping proper measurements or neglecting weather considerations.
Once your Wooden Arch Trellis is built, regular maintenance will keep it in top condition. Simple tasks like staining or sealing can protect against the elements, while an occasional check for wear and tear will extend the life of your trellis. With thoughtful planning, the right materials, and ongoing care, your wooden arch trellis will become a cherished part of your garden for years to come. Embrace this rewarding DIY project and enjoy the soothing presence of nature as it intertwines with your beautiful arch. Your garden is ready to flourish under your careful touch!