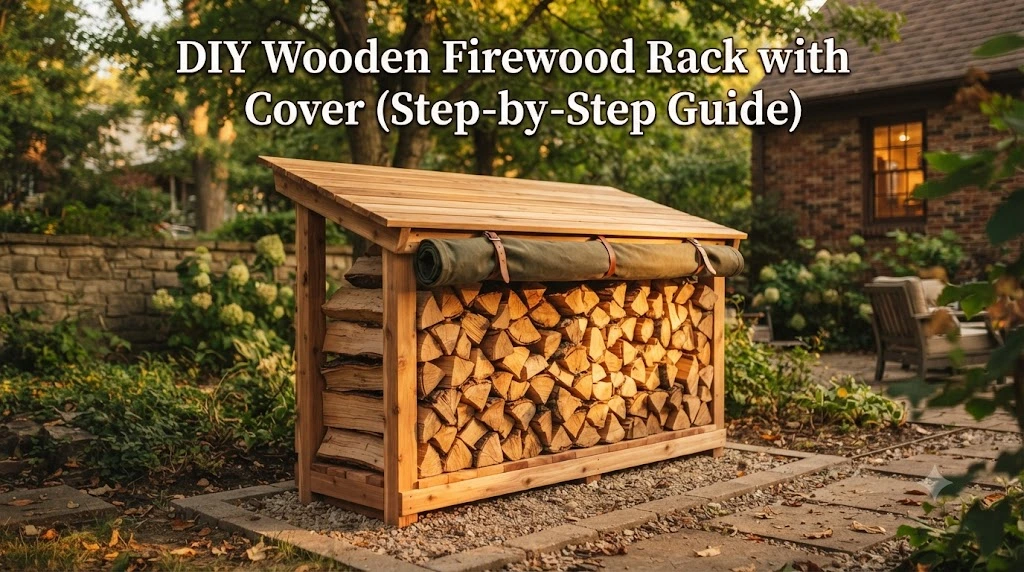
Building your own wooden firewood rack with a cover is a practical and rewarding project. Not only does it provide a useful structure for storing your firewood, but it also helps keep it dry and protected from the elements. In this guide, we’ll take you step-by-step through the process of creating a DIY Wooden Firewood Rack with Cover.
Why You Should Build a Wooden Firewood Rack
A well-constructed wooden firewood rack brings several advantages:
- Organization: Keeps your firewood tidy and organized.
- Protection: Shields firewood from rain and snow, helping it to stay dry.
- Airflow: Allows for proper airflow, aiding in drying the wood.
- Cost-effective: Building it yourself can save money compared to buying pre-made racks.
Materials You Will Need
Before starting your project, gather the following materials:
- Wood: Use rot-resistant options like cedar or pressure-treated lumber.
- Wood screws: 3-inch screws work well for this project.
- Covering material: Tarp, plastic sheeting, or dedicated firewood cover.
- Wood stain or sealant (optional): To protect the wood from the elements.
- Tools: Drill, saw, measuring tape, level, and square.
Step-by-Step Guide for Building a Firewood Rack
Follow these simple steps to create your DIY Wooden Firewood Rack with Cover:
Step 1: Determine the Size
Decide on the dimensions of your firewood rack. A common size is about 4 feet long, 4 feet high, and 2 feet wide. Adjust based on your storage needs.
Step 2: Cut the Wood
Using your saw, cut the wood according to your measurements:
- 2 pieces for the front and back: 4 feet in length
- 2 pieces for the sides: 4 feet in height
- 2 pieces for the bottom: 2 feet in width
- Additional pieces: For cross supports if necessary.
Step 3: Assemble the Frame
Start by creating the sides. Attach the front and back pieces to the side pieces using screws. Make sure everything is square. Use a level to ensure stability.
Step 4: Add Cross Supports
For added strength, attach cross supports every 12-15 inches along the height. This will help hold the wood in place and provide stability.
Step 5: Build the Base
Attach the bottom pieces to create a solid base. Ensure there are gaps between the slats for airflow.
Step 6: Apply Optional Sealant
If desired, consider applying wood stain or sealant to protect your rack from weather damage.
Step 7: Create a Cover
Using your chosen covering material, create a simple structure to cover the top of the rack. You can use hinges to make it removable or a tarp that can be secured when needed.
Step 8: Position the Rack
Place your firewood rack in a location that is easily accessible and away from direct water runoff, like under an overhang.
Maintaining Your Firewood Rack
Check your wooden rack regularly for any signs of wear or damage. A quick reapplication of sealant every few years can help maintain its integrity and appearance. Make sure to rotate your firewood, taking from the bottom first to allow for even drying.
Choosing the Right Wood for Your Firewood Rack
When building a firewood rack, selecting the appropriate wood is crucial for ensuring durability and optimal performance. Whether you’re creating a DIY Wooden Firewood Rack with Cover or purchasing one, considering the wood type can significantly affect your project’s success and the longevity of the finished product.
Here are some essential factors to keep in mind when choosing wood for your firewood rack.
Durability of Different Wood Types
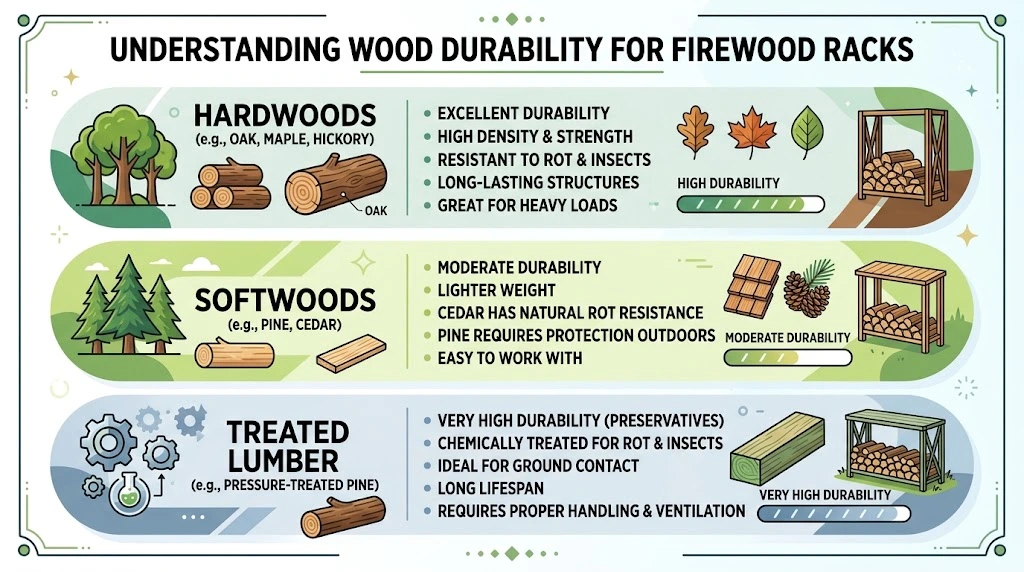
Wooden firewood racks can be made from a variety of materials, each with distinct advantages. The best choices are generally hardwoods and certain types of treated softwoods.
- Hardwoods: These are incredibly durable and resist wear over time. Examples include oak, maple, and hickory. Although initially more costly, the long-term resilience makes hardwood a wise investment.
- Softwoods: Pine and cedar are popular choices, especially when treated for outdoor use. These woods tend to be lighter and easier to work with. However, they may require more frequent replacement.
- Treated Lumber: If you opt for softwoods, select treated lumber that withstands moisture and decay. These are typically pressure-treated for waterproofing and insect resistance.
Choosing the Right Size and Thickness
Another important factor is the thickness and size of the wood you choose. Consider these tips:
- Thickness: Select wood that is at least 1 inch thick for added strength and stability. A more massive wood thickness can endure weight and pressure better than thinner options.
- Length: Choose wood lengths that fit your specific firewood needs. Measure your intended firewood size to ensure the rack accommodates the logs comfortably.
Seasoned vs. Unseasoned Wood
Using seasoned wood for your firewood rack is ideal. Seasoned wood has been dried and is less likely to warp or crack. This is particularly important if you’re building a dedicated space for storing firewood.
| Type of Wood | Seasoned Benefits | Unseasoned Drawbacks |
|---|---|---|
| Hardwoods | Better heat output, low smoke | Heavier, more expensive |
| Softwoods | Easier to split, quicker ignition | Burns faster, produces more smoke |
| Treated Lumber | Longer lifespan outdoors | Potential chemicals, less heat |
Finishing Touches and Protection
Once you’ve selected the right wood types for your DIY Wooden Firewood Rack with Cover, consider protecting it from the elements. Add a weatherproof finish or sealant to enhance durability. Here are some popular options:
- Waterproof Sealant: Use marine-grade sealants for optimal moisture resistance.
- Stain or Paint: Choose non-toxic products that are suitable for outdoor use.
- Cover: Ensure your firewood rack has a cover to shield from rain and snow. This extra layer of protection keeps your logs dry and ready for use.
Cost Considerations
Budget is an unavoidable factor when constructing your firewood rack. Typically, hardwoods come at a higher price, while treated softwoods can be more economical. Consider your budget versus what you want to achieve with your firewood storage. Investing in quality wood may save you money in the long run by reducing the need for replacements.
Creative Design Ideas for Firewood Racks with Covers
When it comes to keeping your firewood organized and protected, having a customized firewood rack with a cover can make all the difference. Not only does it add aesthetic value to your outdoor space, but it also ensures that your firewood stays dry and ready for use. If you’re looking for some creative design ideas for your DIY Wooden Firewood Rack with Cover, you’re in the right place!
Why a Covered Firewood Rack?
Before we dive into creative designs, let’s discuss why a cover is essential. Here are a few key benefits:
- Protection from Rain: Keeping your wood dry prevents rot and ensures that it burns efficiently.
- Better Organization: A rack helps keep firewood sorted and off the ground, reducing insect infestations.
- Aesthetic Appeal: A well-designed rack can enhance the beauty of your yard or patio.
Creative Design Ideas
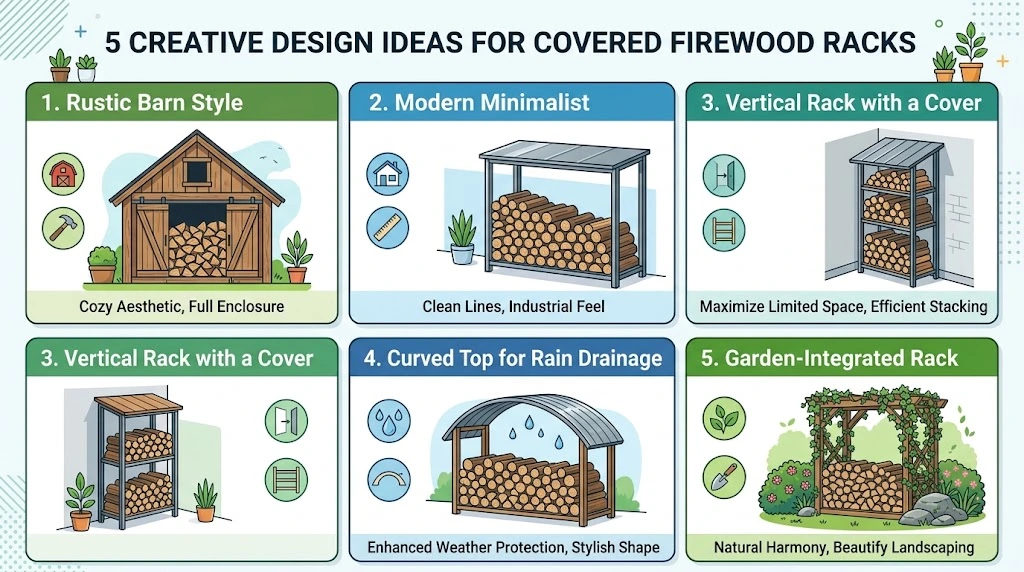
Now that you understand the advantages, here are some innovative ideas for building a firewood rack with a cover:
- Rustic Barn Style: Using reclaimed wood, you can build a traditional barn-style firewood rack. This design features a triangular roof to shed rain and snow efficiently. For an added touch, consider using barn doors for the cover that swing open, giving you easy access to your firewood.
- Modern Minimalist: If you prefer a sleek look, a simple modern design may be your style. Construct a rectangular frame using straight lines and a flat roof. Choose a light-colored wood and finish it with a weather-resistant stain. A fitted canvas cover can add a contemporary flair while protecting your wood.
- Vertical Rack with a Cover: For those with limited space, consider a vertical design. Build a tall, narrow rack that fits snugly against a wall or fence. A retractable cover can slide down when needed, allowing for easy access without taking up much room.
- Curved Top for Rain Drainage: For a distinctive touch, shape the top of your firewood rack into gentle curves. This not only looks attractive but also allows rainwater to run off easily. You can use a tarp or waterproof fabric for the cover, ensuring it stays in place during storms.
- Garden-Integrated Rack: If you have a garden, consider integrating the firewood rack into your landscape. You can build a wooden structure that blends with your garden, adorned with climbing plants or flowers. The cover can be made of wooden slats that allow airflow, ensuring your wood stays fresh.
DIY Building Materials
Here’s a quick list of materials you might need for your DIY Wooden Firewood Rack with Cover:
- Reclaimed or new lumber (for the frame)
- Wood screws and nails
- Waterproof sealant or wood stain
- Canvas or durable tarp for the cover
- Brackets and supports for stability
Assembly Tips
When assembling your firewood rack, consider the following tips:
- Make sure to measure your available space carefully to determine the optimal size for your rack.
- Choose a location that allows easy access to the wood while complementing your outdoor decor.
- Ensure that the cover is easy to take off and put back on for convenience.
Essential Tools and Materials Needed for Your DIY Project
Starting a DIY project can be exciting and fulfilling, especially when you know you have the right tools and materials on hand. Whether you’re constructing a DIY Wooden Firewood Rack with Cover or redesigning your space, having the essentials is key to a successful project. Here’s a comprehensive guide on what you’ll need for your next DIY venture.
Essential Tools
Every DIY enthusiast should have a basic toolkit. Here are some of the most essential tools that will set you up for success:
- Measuring Tape: Accurate measurements are crucial. A 25-foot measuring tape is a must-have.
- Level: Use a level to ensure that your projects are straight and even.
- Saw: Depending on your project, you might need a hand saw, circular saw, or even a miter saw for precise cuts.
- Drill: A power drill can handle everything from making holes to driving screws.
- Screwdriver Set: A variety of screwdrivers (both flat and Phillips) ensures you’re ready for any fastener.
- Hammer: This basic tool is essential for driving nails into wood.
- Pliers: Useful for gripping, twisting, and cutting wire.
- Safety Gear: Always include goggles and gloves for protection while working.
Essential Materials
Your selection of materials will greatly influence the quality of your DIY projects. For a wooden firewood rack, consider the following:
- Wood: Choose durable wood such as cedar or pine for longevity.
- Fasteners: Screws and nails hold everything together. Opt for galvanized options to prevent rust.
- Wood Glue: For added strength in your joints, wood glue is indispensable.
- Stain or Sealant: Protect your wooden project from the elements by applying a protective stain or sealant.
- Cover Material: A waterproof tarp or outdoor fabric ensures your firewood stays dry.
Preparing Your Workspace
Before starting your project, make sure your workspace is organized. A clean, safe workspace enhances productivity and reduces errors. Here are some tips:
- Clear the Area: Remove any clutter that might interfere with your work.
- Work Surface: Use a sturdy table or workbench tailored to your height.
- Lighting: Good lighting is essential. Consider using natural light or adding a clamp light if necessary.
Choosing the Right Tools for Your Project
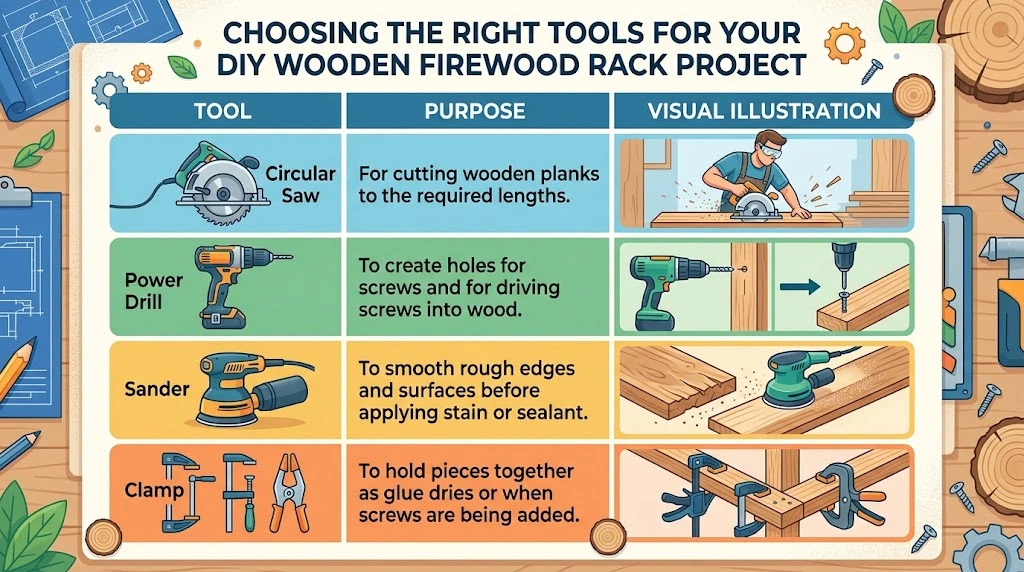
When taking on a DIY Wooden Firewood Rack, specific tools will make the task easier. Here’s a quick table comparing tools suited for various aspects of the project:
| Tool | Purpose |
|---|---|
| Circular Saw | For cutting wooden planks to the required lengths. |
| Power Drill | To create holes for screws and for driving screws into wood. |
| Sander | To smooth rough edges and surfaces before applying stain or sealant. |
| Clamp | To hold pieces together as glue dries or when screws are being added. |
For more detailed tips on specific projects and tool usage, consider visiting Wood Magazine. They have extensive resources on woodworking and DIY techniques.
Safety First
DIY projects can sometimes be risky, so always prioritize safety. Familiarize yourself with the instruction manuals for power tools, and take all necessary precautions. Additionally, consider investing in a first aid kit, as accidents can happen.
Maintenance Tips for Your Firewood Rack and Cover
Keeping your firewood rack and cover in top condition is essential for longevity and effectiveness. Whether you’ve built a DIY Wooden Firewood Rack with a Cover or purchased one, consistent maintenance will ensure it serves you well for years. By following a few straightforward tips, you can avoid unnecessary repairs or replacements. Here’s how to take care of your setup effectively.
Regular Inspection
Inspecting your firewood rack should be a routine task. Check for:
- Wear and Tear: Look at the wood for any cracks or rot.
- Stability: Ensure the structure remains sturdy and upright.
- Cover Condition: Examine the cover for any tears or fading.
By identifying potential issues early, you can make necessary fixes before they escalate into bigger problems.
Cleaning Your Firewood Rack
Cleaning is crucial for both aesthetics and integrity. Follow these simple steps:
- Remove Debris: Clear away leaves, dirt, and any other debris.
- Wash the Rack: Use a mild detergent and water to scrub down the surface, eliminating mold and mildew.
- Dry the Rack: Allow the rack to dry completely to prevent future rot.
Cleaning once every few months is usually sufficient, but do it more frequently if your location is particularly damp or dirty.
Wood Treatment
To keep your firewood rack in excellent condition, consider applying a wood preservative or sealant. This will protect against moisture and pests. Here’s how:
- Choose the Right Product: Look for eco-friendly wood treatments.
- Apply Evenly: Use a paintbrush or sprayer to apply the solution evenly.
- Allow to Dry: Make sure it dries completely before placing any wood on the rack.
Applying treatment every year, especially before the rainy season, can significantly prolong the life of your wooden firewood rack.
Cover Maintenance
Your firewood cover serves as the first line of defense against the elements. Here’s how to maintain it:
- Check for Damage: Look out for rips, tears, and fading.
- Clean Regularly: Wipe down with a damp cloth and detergent to keep mold at bay.
- Replace as Needed: If the cover is worn out or unable to protect the firewood, consider replacing it.
Ensuring that your cover remains functional and in good condition is key to protecting your firewood from rain and snow.
Organize Your Firewood
Properly organizing your firewood can help maintain a dry, usable supply. Use these tips:
- Stack Neatly: Stack logs in a crisscross pattern to allow airflow.
- Keep Off the Ground: Utilize spacers to elevate wood; this prevents moisture absorption.
- Rotate Stock: Use older logs first while maintaining a new supply to allow for proper seasoning.
Good organization of your firewood will help keep it dry and ready for use, which is especially critical during colder months.
Seasonal Maintenance
Adapting your maintenance routine with the changing seasons will extend the life of your firewood rack and cover. Here’s a guide:
| Season | Task |
|---|---|
| Spring | Inspect for winter damage; clean the rack and cover. |
| Summer | Reapply wood preservative and check the cover for wear. |
| Fall | Stock up on firewood and ensure it’s dry before winter. |
| Winter | Clear snow and ice off the cover; inspect the structure regularly. |
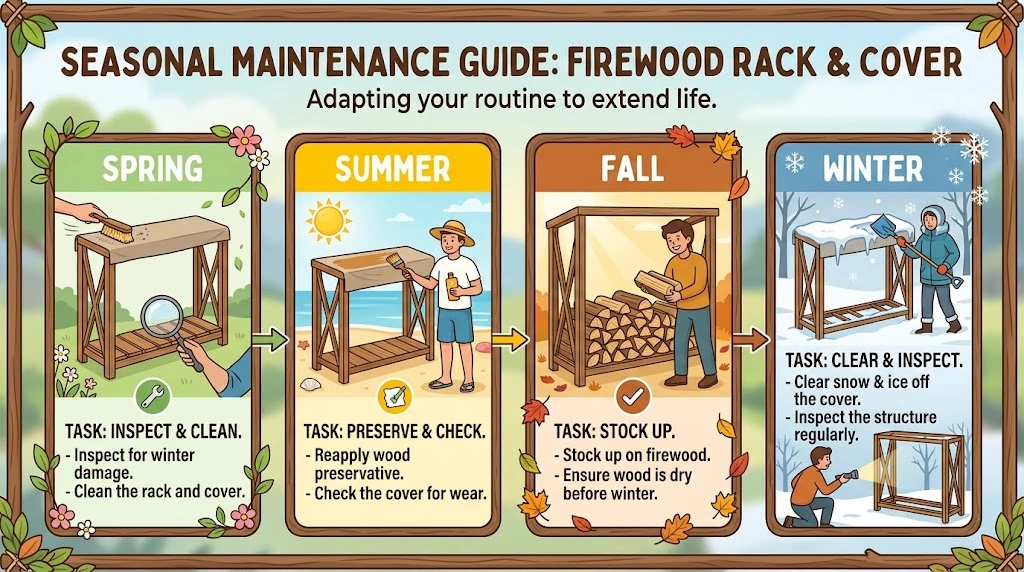
By following these seasonal guidelines, you can be sure that your firewood rack and cover are always ready for use.
For further information and resources about firewood racks and maintenance tips, visit Firewood for Life or check out Wood Magazine for expert advice.
Maintaining your DIY Wooden Firewood Rack with Cover doesn’t have to be a daunting task. With regular inspections, consistent cleaning, treatment, and seasonal care, your setup will remain robust and functional! By taking these steps, you are ensuring not just longevity but also ease of access to your firewood, making those cozy evenings by the fire all the more enjoyable.
Conclusion
Constructing a DIY Wooden Firewood Rack with Cover can be a rewarding and practical project. By following a step-by-step guide, you can create a functional piece that not only organizes your firewood but also protects it from the elements. Selecting the right wood is crucial for durability and aesthetic appeal, so consider options like cedar or pressure-treated lumber for longevity.
Getting creative with your design can help your firewood rack complement your outdoor space. Whether you choose a classic style or opt for a more modern look, the addition of a cover ensures that your wood stays dry and ready to use, enhancing both its utility and appearance.
As you embark on this DIY journey, having the essential tools and materials at hand makes all the difference. From saws and hammers to screws and brackets, gathering everything ahead of time will streamline your project and keep you focused.
Once your firewood rack is complete, regular maintenance will help extend its lifespan. Simple activities like occasional cleaning, checking for wood rot, and reapplying protective finishes can keep your rack looking great for years to come.
Embracing this project will not only enhance your outdoor space but also provide you with the satisfaction of creating something uniquely yours. Enjoy the warmth of a crackling fire, knowing your firewood is nicely stored and safeguarded. This DIY adventure is one that combines practicality with creativity, and the benefits will surely be felt during those cozy nights at home.