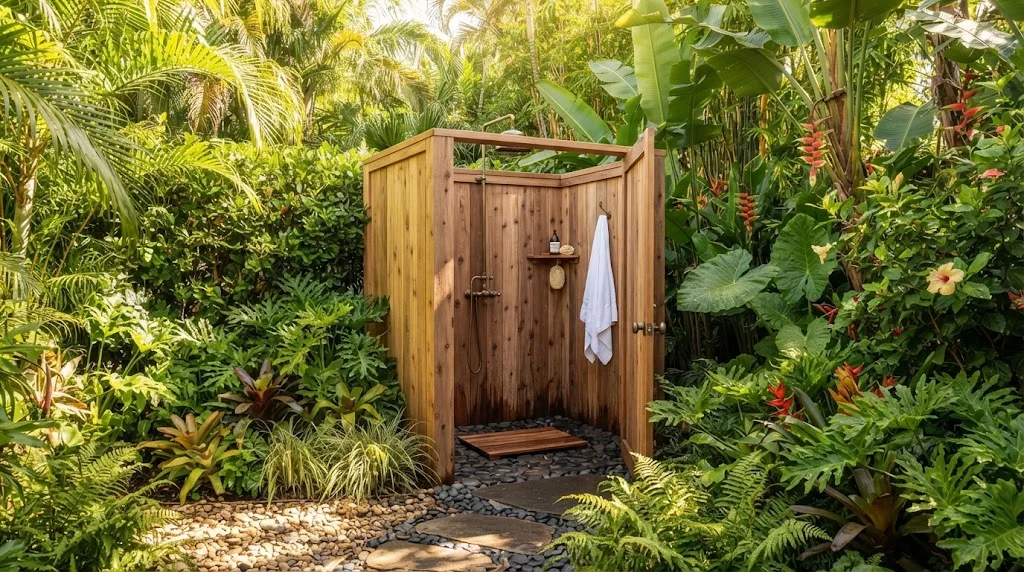
A Wooden Outdoor Shower can enhance your backyard and provide a refreshing space to rinse off after a swim or a day at the beach. By following these straightforward steps, you can create a stunning and functional shower area that fits perfectly within your outdoor oasis.
Materials You Will Need
- Pressure-treated wood (2x4s for framing, 1x6s for the walls)
- Deck screws
- Wood sealant or stain
- Showerhead and plumbing fixtures
- Water source connection (garden hose or plumbing)
- Concrete blocks or decking for the floor
- Tools: saw, drill, level, tape measure, and screwdriver
Choosing the Location
First, you need to decide where to build your outdoor shower. Look for a spot that offers privacy and sunshine. Ensure it’s close enough to a water source for easy plumbing or to connect a hose. Avoid low-lying areas to prevent water pooling around your shower.
Building the Frame
- Measure and Cut: Start by measuring the dimensions of your shower. A common size is 3 feet by 3 feet. Cut your pressure-treated wood into the necessary lengths for the frame and support posts.
- Set the Posts: Dig holes for your corner posts, ensuring they are deep enough for stability (at least one foot deep). Insert the posts and use a level to adjust them vertically. Fill the holes with concrete for added strength.
- Construct the Frame: Connect the top and bottom frame rails between the posts using deck screws. Ensure everything is level and square.
Building the Walls
After the frame is solid, it’s time to add the walls:
- Attach Wood Boards: Use the 1×6 boards to create the walls. Start from one side at the bottom and work your way up, securing boards with screws. Leave a few inches gap at the bottom for drainage.
- Seal the Wood: Once the walls are up, apply a wood sealant or stain to protect against moisture and insects. This will extend the life of your wooden shower.
Installing the Showerhead and Plumbing
Now it’s time to add the plumbing. Depending on your setup, you can connect a showerhead directly to your garden hose or run pipes from your house to your outdoor shower:
- Hook Up the Water Source: Use a garden hose if you prefer a temporary setup. If you have plumbing experience, you can install a hotter water supply from your house.
- Install the Showerhead: Mount the showerhead on the wall at a comfortable height. Ensure the fixture is secure and that there are no leaks.
Finishing Touches
Consider how you want your shower floor to be. You can use:
- Concrete blocks
- Wooden decking
- Gravel for drainage
Ensure that the floor allows water to drain efficiently, preventing any pooling. think about adding hooks for towels and a small shelf for soap and other essentials.
Safety Considerations
Before you start using your outdoor shower, make sure the area is safe:
- Check for sharp edges or protruding screws.
- Ensure proper water drainage to prevent slips.
- Consider privacy options such as cladding with bamboo or outdoor curtains.
Enjoying Your New Outdoor Shower
Your new wooden outdoor shower is now ready to use! Enjoy the refreshing experience and the look of your outdoor space. Make sure to keep it maintained by regularly checking for wear and tear, especially any rotting wood.
Essential Tools and Materials Needed for Your Outdoor Shower Project
Building a wooden outdoor shower is an exciting project that can enhance your outdoor space and bring a touch of luxury to your home. To get started, you need to gather the right tools and materials. Here’s a list to help you prepare for your project.
Essential Tools
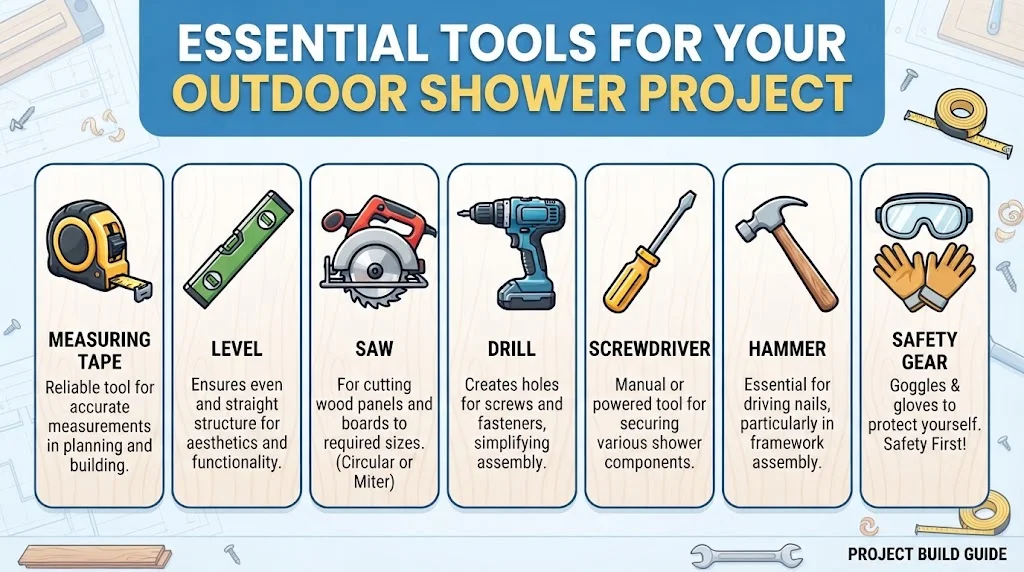
- Measuring Tape: A reliable measuring tape is essential for accurate measurements while planning and building your shower.
- Level: A level ensures that your structure is even and straight, which is crucial for both aesthetics and functionality.
- Saw: You will need a circular saw or miter saw to cut wood panels to the required sizes. Choosing the right saw can make your cuts cleaner and easier.
- Drill: A cordless drill will help you create holes for screws and other fasteners, making assembly much simpler.
- Screwdriver: A good quality screwdriver—either manual or powered—will assist in securing various components of the shower.
- Hammer: For driving nails into wooden parts, a hammer is a must-have tool, especially for framework assembly.
- Safety Gear: Don’t forget safety goggles and gloves to protect yourself while working. Safety should always be your top priority.
Primary Materials
The materials you choose are just as important as the tools. Here’s a detailed list of the key materials needed to build your outdoor shower:
- Wood: The finest choice for your shower is pressure-treated lumber, as it resists moisture and decay. You will need boards for the frame, walls, and floor. Common sizes include 2x4s for the structure and 1x4s for wall panels.
- Shower Head and Plumbing Kit: Invest in a quality showerhead that can withstand outdoor elements. Look for a plumbing kit that includes all necessary pipes, fittings, and hardware for a complete installation.
- Water Source Connection: Whether you’re drawing from a garden hose or plumbing into your home supply, make sure you have the right connectors and hoses.
- Decking Material: Consider using non-slip decking material for the shower floor, ensuring safe use even when wet. Materials like Trex or other composite materials are excellent choices.
- Sealer or Stain: Apply a protective wood sealer or stain to prevent water damage. This will help maintain the look of your wood and extend its lifespan.
- Fasteners: Make sure to use corrosion-resistant screws and nails, as they will hold up better in outdoor conditions.
Optional Accessories
You might want to include some added features for convenience and comfort:
- Storage Bench: A bench can provide a place to sit while changing or storing your shower essentials.
- Privacy Screen: Consider adding more wooden panels or a lattice panel for privacy.
- Hanging Hooks: Install hooks for towels or shower accessories to keep everything handy.
Additional Considerations
While gathering your tools and materials, think about the location of your outdoor shower. Ensure it’s close to your water source and has ample drainage. You may also want to plan for landscaping around the entry to provide a more inviting atmosphere.
Before you start construction, check local building codes or neighborhood regulations regarding outdoor shower setups. This will save you time and hassle in the long run.
Design Ideas for a Stylish and Functional Outdoor Shower
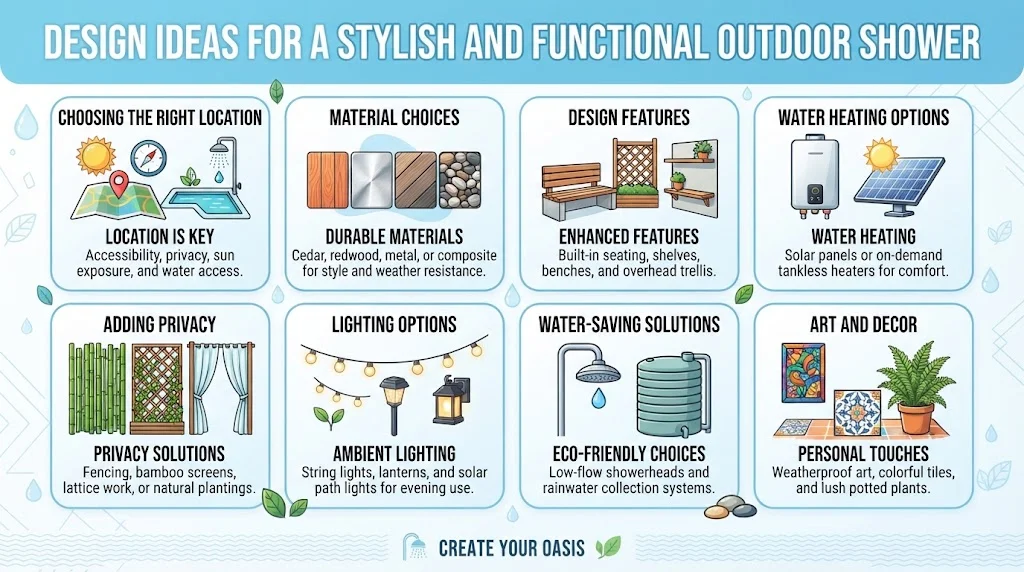
Outdoor showers are becoming increasingly popular for homeowners looking to blend functionality with style. They offer a refreshing way to rinse off after a swim or gardening, providing a convenient solution for outdoor living spaces. Here are some design ideas that will help you create a stylish and functional outdoor shower.
Choosing the Right Location
When considering locations, think about accessibility and convenience. A shower close to the pool or beach is ideal for easy rinsing. Make sure the area is private enough for personal comfort. Look for spots near existing plumbing or consider installing a water supply system if needed.
Material Choices
Picking the right materials can elevate your outdoor shower’s look. Here are some options:
- Wood: Naturally blends with outdoor settings. Cedar and redwood are popular choices due to their durability and resistance to moisture.
- Metal: Stainless steel or galvanized metal can create a modern look, resistant to rust and wear.
- Composite Materials: These can mimic wood while offering greater durability and less maintenance.
Design Features
Unique design features can enhance both the visual appeal and functionality of your outdoor shower:
- Sunshade: Install a wooden trellis or canvas awning to provide shade and protection from the weather.
- Seating: Adding a bench or stool allows you to relax while enjoying the outdoors.
- Storage Solutions: Include shelves or hooks for towels, toiletries, and bathing essentials.
Water Heating Options
If you plan to use your outdoor shower year-round, consider heating options:
- Solar Heating: Utilize the sun’s energy to warm your water, eco-friendly and cost-effective.
- Instant Water Heaters: Compact and efficient, these can provide hot water on demand.
Adding Privacy
To maintain a sense of privacy, think about these barriers:
- Fencing: Tall wooden fences or bamboo screens can provide a natural look while ensuring seclusion.
- Plantings: Use tall plants or hedges to create natural barriers that blend beautifully with the landscape.
Lighting Options
Good lighting enhances safety and ambiance. Consider these types:
- LED String Lights: Creates a cozy atmosphere that’s perfect for evening showers.
- Solar-Powered Lights: Energy-efficient and easy to install, they provide illumination without additional wiring.
Water-Saving Solutions
Sustainability is key in today’s designs. Here are ways to make your outdoor shower eco-friendly:
- Low-Flow Showerheads: These reduce water usage while still providing a powerful shower experience.
- Rainwater Harvesting: Collect rainwater in a tank for use in your shower, helping to conserve municipal water supply.
Art and Decor
Items like artwork, decorative tiles, or even themed accessories can make your outdoor shower unique:
- Artwork: Hang weatherproof pieces that reflect your personality and interests.
- Colorful Tiles: Using vibrant tiles can add charm and style to your shower floor or walls.
Transforming your outdoor shower into a stylish and functional space is achievable with thoughtful design choices. Utilizing appropriate materials, adding decorative features, ensuring privacy, and considering sustainability will result in an inviting retreat. With these tips, you can enhance your outdoor bathing experience.
Common Mistakes to Avoid When Building a Wooden Outdoor Shower
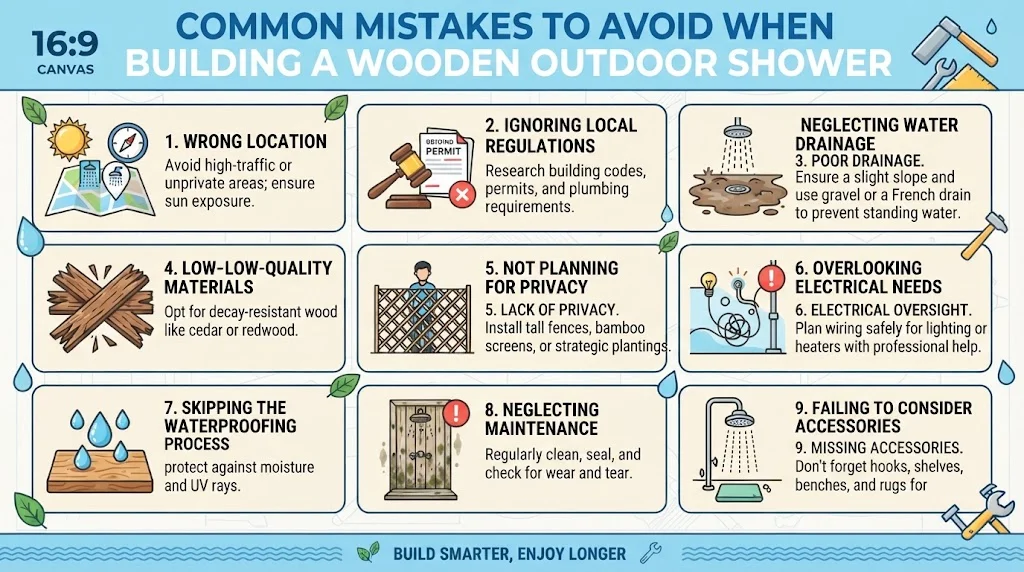
Building a wooden outdoor shower can be an exciting project that enhances your backyard experience. However, several common mistakes can lead to frustration and extra costs. Here’s what you should pay attention to as you work on your outdoor shower.
Choosing the Wrong Location
One of the biggest mistakes is selecting a poor location for your outdoor shower. When deciding where to place it, think about accessibility and privacy. Avoid spots that are too close to neighbors or busy areas. Instead, look for a secluded area where you can relax. Also, consider the sunlight. Placing your shower in a sunny spot helps keep it warm and dry, making it more enjoyable to use.
Ignoring Local Regulations
Before you start building, check your local building codes. Some areas have regulations regarding outdoor plumbing installations. Failing to adhere to these rules can result in fines or requiring you to dismantle your work. Take the time to research what’s allowed and necessary permits you may need.
Neglecting Water Drainage
Proper drainage is essential for any outdoor shower. If water doesn’t drain well, you might create a muddy mess that could attract pests or damage your yard. Ensure your shower is positioned on a slight slope away from your home and consider using gravel or drainage tiles. Here’s a simple guide to effective drainage options:
| Drainage Option | Description |
|---|---|
| Gravel | Allows water to seep through while providing a stable base. |
| French Drain | A trench filled with gravel that redirects water from your shower. |
| Drainage Tiles | Special pipes that help carry away excess water effectively. |
Using Low-Quality Materials
When building a wooden outdoor shower, it’s tempting to use lower-cost materials to save money. However, low-quality wood will not hold up against moisture and weather. Opt for decay-resistant wood, such as cedar or redwood. These materials are more durable and will help your shower last longer.
Not Planning for Privacy
Your outdoor shower should feel like a personal space. Failing to incorporate privacy features can make using it uncomfortable. Consider adding walls or screens to shield yourself from view while maintaining airflow. Natural elements like bamboo or lattice can provide both privacy and an appealing aesthetic.
Overlooking Electrical Needs
If you plan to install lighting or an outdoor water heater, consider your electrical wiring needs during the initial design phase. Avoid placing wiring in areas where it may become exposed to moisture. Waterproof outdoor outlets are a must, but always consult a professional electrician to ensure safety.
Skipping the Waterproofing Process
Waterproofing may seem like an unnecessary step, but it’s crucial for the longevity of your wooden outdoor shower. Applying a quality sealant helps protect the wood from water damage and prevents mold and mildew. Reapply the sealant yearly for optimal protection.
Neglecting Maintenance
After your outdoor shower is complete, putting it together is just the beginning. Regular maintenance is key to keeping it in great shape. Clean the shower floor and walls periodically to remove soap scum and other debris. Check for damage to the wood and reapply sealant as needed.
Failing to Consider Accessories
Enhancing your outdoor shower with accessories can elevate your experience. Think about adding things like:
- Showerhead: Choose a fixed or handheld showerhead based on your preference.
- Storage Shelves: Include shelves for toiletries or towels.
- Hooks: Handy for hanging clothes or towels.
- Outdoor Rugs: Add comfort underfoot and enhance the look.
By avoiding these common mistakes, you can create a beautiful and functional wooden outdoor shower that you will enjoy for years.
Maintaining Your Wooden Outdoor Shower for Longevity and Durability
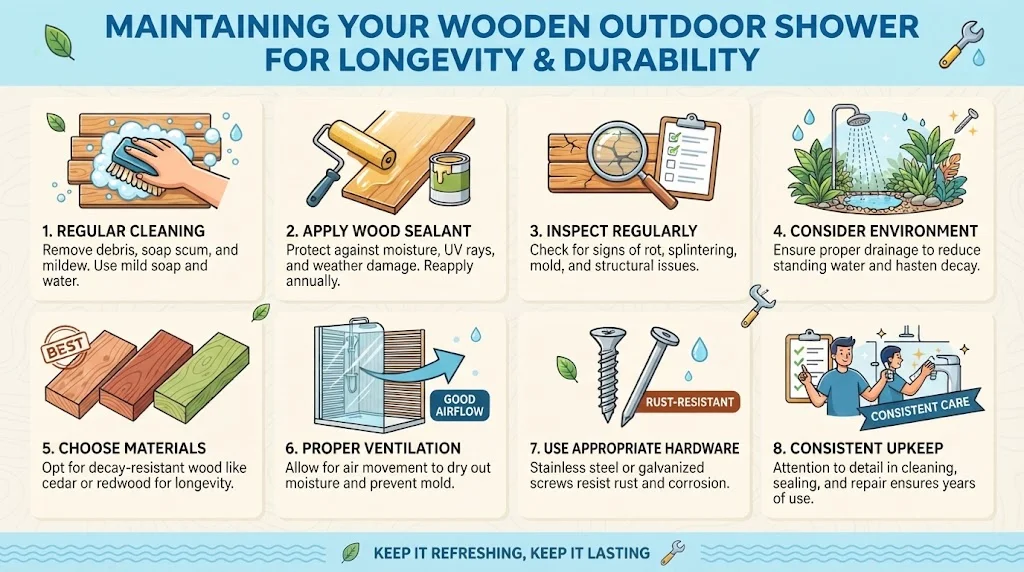
Owning a wooden outdoor shower can provide a refreshing bathing experience and enhance your backyard’s appeal. However, without proper maintenance, your wooden shower can quickly deteriorate. To ensure its longevity and durability, follow these essential tips.
Regular cleaning
One of the most crucial aspects of maintaining your wooden outdoor shower is regular cleaning. Debris, soap residue, and minerals can accumulate, affecting the wood and surrounding area. To clean effectively:
- Mix a solution of warm water and mild soap.
- Use a soft brush or cloth to scrub the wood surfaces gently.
- Rinse thoroughly with clean water to remove any soap residue.
- Allow it to dry completely before applying any protective treatments.
Applying a suitable wood sealant
Another important step in maintenance is applying a suitable wood sealant. This helps protect the wood from moisture, UV rays, and general wear and tear. Look for a sealant specifically designed for outdoor use. Follow the manufacturer’s instructions for application, but typically, the process involves:
- Sanding the wooden surfaces lightly to remove rough spots.
- Wiping off dust and debris with a damp cloth.
- Applying the sealant with a brush or roller, ensuring even coverage.
- Allowing it to dry as recommended, which usually takes a few hours.
Inspecting regularly
Inspecting your shower regularly is essential for spotting potential issues early. Check for signs of rot, splintering, or mold. If you notice any of these problems, address them immediately. Treat rot with a wood-hardening solution, and replace any severely damaged sections. For instance, if you encounter mold, clean it off with a mixture of vinegar and water, as this can help kill the spores.
During the winter months, it’s vital to winterize your outdoor shower to prevent freezing and potential damage. Follow these steps:
- Turn off the water supply to your shower.
- Drain all water from the pipes and fixtures.
- Consider using an insulated cover to protect the wood from harsh weather.
Consider the environment
Additionally, to extend the life of your wooden outdoor shower, consider the environment around it. Ensure proper drainage to reduce standing water, which can hasten wood decay. You can also landscape around the area to improve aesthetics and functionality. Mulch, rocks, or tiles can be practical choices that enhance drainage.
Choose your materials
Furthermore, the materials you choose significantly influence the longevity of your structure. High-quality, pressure-treated wood, such as cedar or redwood, can resist moisture and insects better than untreated wood. Investing in the right materials at the outset can save you time and money in repairs down the line.
Proper Ventilation
Keeping your outdoor shower area properly ventilated is another essential factor. Good airflow helps prevent moisture buildup, which can contribute to mold and decay. Consider adding vents or leaving gaps at the top of your shower to encourage air movement. This will aid in drying out any moisture that makes its way in.
Using the appropriate fasteners and hardware
Using the appropriate fasteners and hardware can also enhance the durability of your wooden shower. Stainless steel or galvanized screws are ideal as they resist rust and corrosion, especially in damp environments. Be cautious of using regular screws, as they can quickly deteriorate, compromising the overall integrity of your shower.
Consistent upkeep and attention to detail
Consistent upkeep and attention to detail can significantly prolong the lifespan of your wooden outdoor shower. Regular inspections, cleaning, and application of protective sealants can keep it in excellent condition for years. Emphasizing quality materials, proper ventilation, and appropriate fasteners ensure your investment remains enjoyable and functional.
For more resources on maintaining wooden outdoor structures, you can visit Family Handyman or seek advice from experts at Houzz. With diligent care and maintenance, your wooden outdoor shower will be a favorite spot for relaxation and renewal.
Conclusion
Building a Wooden Outdoor Shower can elevate your backyard experience, providing a refreshing retreat that is both practical and aesthetically pleasing. By following a step-by-step guide, you can create a space that meets all your needs. Remember to gather essential tools and materials beforehand to ensure a smooth building process. With various design ideas to choose from, your outdoor shower can complement your home and landscape, making it a charming addition to your outdoor oasis.
While constructing your shower, keep in mind the common mistakes to avoid, such as improper drainage or neglecting weatherproofing. Paying attention to these details can save you time, money, and frustration in the long run. Once your outdoor shower is complete, maintaining it will be crucial for its longevity. Regular cleaning, sealing the wood, and checking for any signs of wear can help your shower withstand the elements for years to come.
By taking these considerations into account, you can enjoy the luxury of your outdoor shower while ensuring it remains a functional and stylish part of your outdoor living area. Embrace the experience of building your own wooden outdoor shower; it’s a rewarding project that not only enhances your home but also adds to your quality of life. So gather your materials, unleash your creativity, and dive into this exciting project that will surely impress family and friends alike!