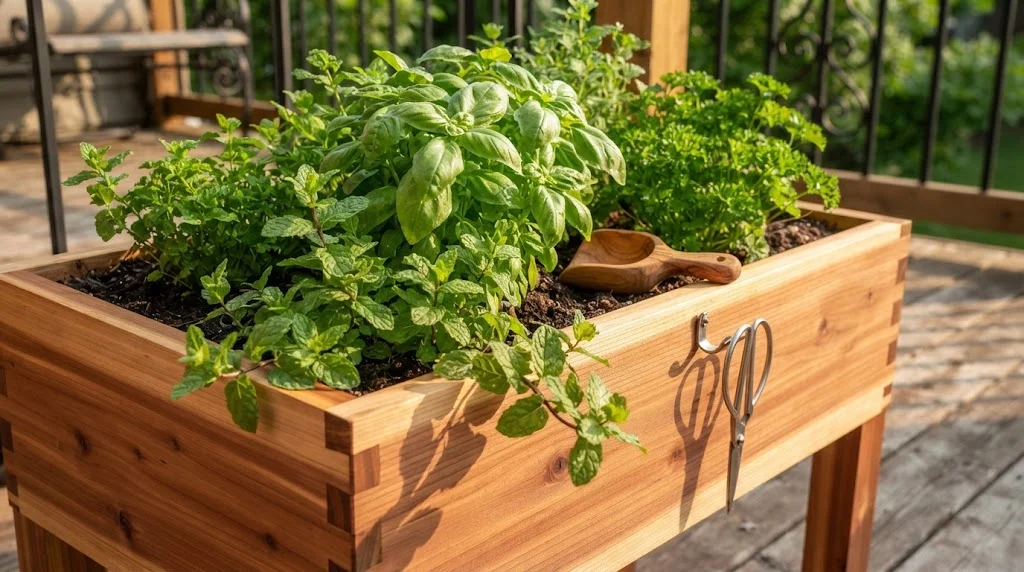
Creating a DIY Wooden Planter Box for Deck is a rewarding project that adds charm and greenery to your outdoor space. Not only does it enhance the visual appeal, but it also provides a perfect spot for growing your favorite flowers, herbs, or vegetables. This guide will walk you through each step to make a beautiful and functional planter box that fits your deck’s aesthetic.
Materials Needed
- Untreated or treated wood boards (e.g., cedar, pine, or redwood)
- Wood screws or nails
- Drill or hammer
- Saw (hand saw or power saw)
- Sandpaper
- Wood stain or sealant (optional)
- Landscape fabric
- Soil and plants of your choice
Step-by-Step Process
1. Plan Your Design
Start by deciding how large you want your planter box to be. The size will depend on your available space and the plants you intend to grow. A good starting size is 4 feet long, 1 foot wide, and 1 foot tall. Sketch your design or use an online planner to visualize how it will look on your deck.
2. Gather Your Materials and Tools
Make sure you have all the materials listed above. Choosing untreated wood is suitable for a natural look, while treated wood can protect against weather damage. Aim for species like cedar for its durability and resistance to rot.
3. Cut the Wood
Using your saw, cut the wood into the following pieces:
- 2 pieces at 4 feet long (for the sides)
- 2 pieces at 1 foot long (for the ends)
- 1 piece at 4 feet long (for the base)
- Optional: 4 corner posts of desired height
Make sure to wear safety goggles and take your time while cutting to ensure clean edges.
4. Assemble the Box
Start assembling the sides. Connect the ends to the sides using wood screws or nails. Pre-drilling holes can prevent the wood from splitting. Once the sides are firmly attached, fix the base on the bottom. If using corner posts, attach them before adding the base.
5. Sanding and Finishing
Sand the edges and surfaces of the box to remove any rough spots. This ensures a smooth finish that’s safe for handling and planting. If you desire, apply wood stain or sealant to enhance the look and protect the wood.
6. Add Drainage
To prevent water buildup, drill several small holes in the bottom of the planter. Then, line the inside with landscape fabric to keep soil in and allow for water drainage.
7. Fill with Soil and Plant
Now it’s time to add your soil. Use quality potting mix appropriate for the types of plants you wish to grow. After the soil is in, plant your chosen flowers, herbs, or vegetables, ensuring they have enough space to thrive.
8. Placement and Care
Position your planter box in a spot on your deck that receives adequate sunlight for the selected plants. Regularly water your plants and maintain appropriate care to help them flourish. Consider using a watering can or a gentle spray to avoid flooding.
Choosing the Right Wood for Your Outdoor Planter Box
Creating a beautiful outdoor planter box begins with selecting the right wood. Not all types of wood are suited for outdoor use, especially when they are exposed to rain, sun, and varying temperatures. When choosing wood for your outdoor planter box, consider durability, aesthetics, and safety for your plants.
One important factor is the wood’s resistance to decay. Here are some popular choices:
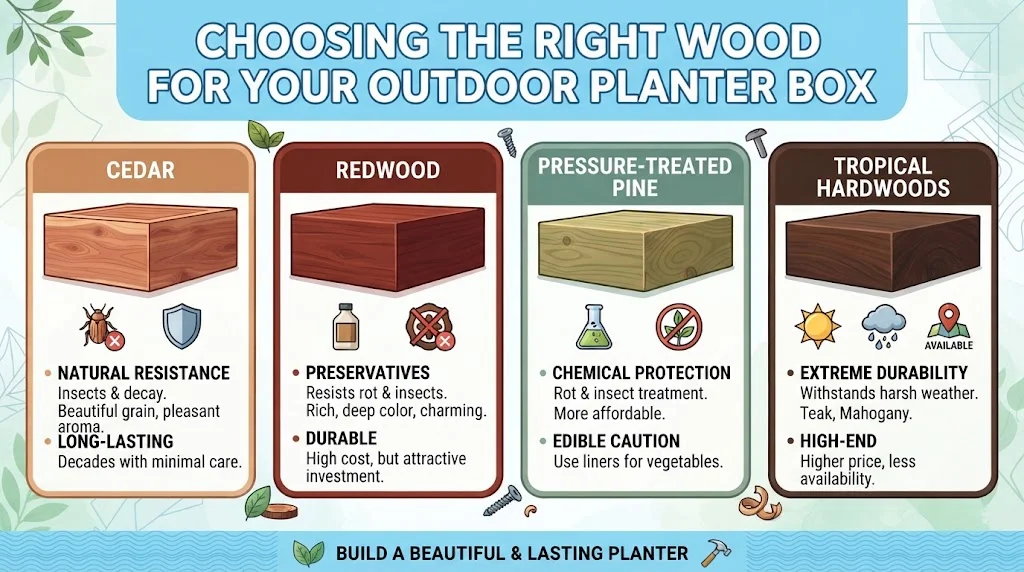
- Cedar: This wood is naturally resistant to insects and decay. It also has a pleasant aroma and a beautiful grain, making it an attractive choice for any deck. Cedar can last for decades with minimal maintenance.
- Redwood: Like cedar, redwood features natural preservatives that help it resist rot. Its natural beauty and rich color add charm to your outdoor space. However, it can be more expensive than cedar.
- Pressure-Treated Pine: This wood is treated with chemicals to protect against rot and insects. While it’s often more affordable, it’s essential to use safe barriers if you’re growing edible plants, as the chemicals may leach into the soil.
- Tropical Hardwoods: Woods like teak and mahogany are extremely durable and can withstand harsh weather. However, they come with a higher price tag and may not be as readily available as other options.
Beyond the type of wood, think about the finish. Sealing your planter box can help it last longer and maintain its beauty. Here are some recommended finishes:
- Natural Oils: Products like teak oil can enhance the wood’s natural color and provide some protection against moisture.
- Sealants: A good sealant will create a barrier against the elements. Look for a clear sealant that’s safe for plant life.
- Paint: Using outdoor paint can give a pop of color, but ensure it’s non-toxic to plants.
Wood thickness is another consideration. Thicker wood will typically offer more durability and better insulation for your plants. A minimum of 1-inch thickness is advisable for the sides and bottom of your planter box.
When planning your design, consider how the wood will interact with the soil and the environment. Here’s a breakdown of the best practices:
| Wood Type | Durability | Cost | Environmental Impact |
|---|---|---|---|
| Cedar | High | Moderate | Sustainable |
| Redwood | High | High | Moderate |
| Pressure-Treated Pine | Moderate | Low | Environmental concerns due to chemicals |
| Tropical Hardwoods | Very High | Very High | May contribute to deforestation |
One often overlooked aspect is drainage. Regardless of your wood choice, ensure the planter box has adequate drainage holes. This will prevent water from accumulating, which can lead to root rot and decay, even in the toughest woods. Using a plastic liner can also help protect against moisture exposure.
Consider local climate
As you work on your outdoor planter box, think about your local climate. In wet regions, moisture-resistant woods are essential. Conversely, in dry climates, wood that can withstand sun exposure is ideal. Always research your wood source to confirm it’s sustainably harvested.
Choosing the right wood
Ultimately, choosing the right wood for your outdoor planter box enhances its longevity, aesthetics, and functionality. Consider your local conditions, the plants you wish to grow, and the visual impact you want to create in your outdoor space. For further guidance, resources such as Popular Mechanics provide in-depth insights on building planter boxes tailored to your needs.
Enhancing Your Deck Aesthetics with Custom Planter Designs
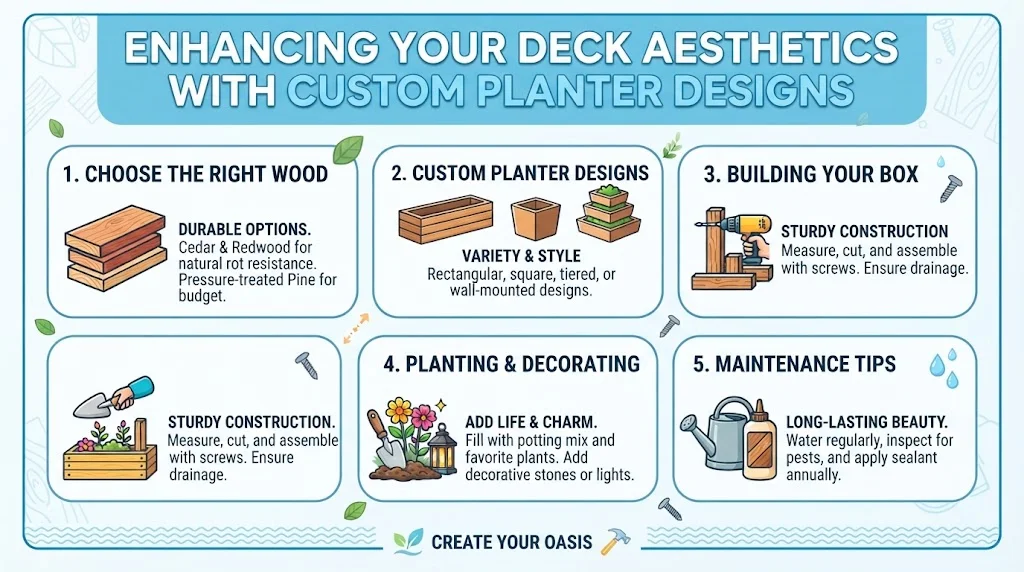
Transforming your deck into a visually appealing oasis can be effortlessly achieved with custom planter designs. Planter boxes not only add greenery but also enhance the overall aesthetic of your outdoor space. With a little creativity and DIY effort, you can create unique wooden planter boxes that suit your style and complement your deck.
Choosing the Right Wood for Your Planter Box
When creating a wooden planter box, selecting the right type of wood is essential. Here are some great options:
- Cedar: Naturally resistant to decay and insects, cedar is an excellent choice that also has a pleasant aroma.
- Redwood: Similar to cedar, redwood offers durability and a beautiful appearance, making it perfect for outdoor projects.
- Pressure-treated Pine: More budget-friendly, pressure-treated pine is a common choice, though it should be lined to protect plants from chemicals.
Designing Your Custom Planter Boxes
Your custom planter box can be designed in a variety of shapes and sizes. Here are some popular styles to consider:
- Rectangular: Classic and versatile, perfect for long rows of flowers or herbs.
- Square: Great for smaller spaces or as corner accents on your deck.
- Tiered: Multi-level planters add dimension and interest, allowing for a variety of plants.
- Wall-mounted: These planters can save space and create visual appeal without taking up deck surface area.
Creating Your Wooden Planter Box
Once you’ve selected your wood and design, it’s time to build your planter box. Here’s a simple step-by-step guide:
- Gather Your Materials: You’ll need wood planks, wood screws, a drill, saw, measuring tape, wood stain or paint, and a paintbrush.
- Measure and Cut: Based on your chosen design, measure and cut the wood to required lengths for the bottom, sides, and back of the box.
- Assemble the Box: Assemble the sides, bottom, and back using wood screws, ensuring a sturdy construction.
- Sand and Finish: Sand any rough edges and apply wood stain or paint to enhance its look and protect it from outdoor elements.
- Add Drainage: Drill holes in the bottom for proper drainage to keep your plants healthy.
Planting and Decorating Your Planter Box
Once your custom planter box is ready, you can fill it with soil and your favorite plants. Here are some popular choices:
- Flowers: Petunias, marigolds, or geraniums add vibrant colors.
- Herbs: Basil, mint, or thyme offer a fragrant and functional touch.
- Vegetables: Consider cherry tomatoes or peppers for an edible garden.
Decorate your planter box with decorative stones, fairy lights, or even trellises for climbing plants to increase its visual appeal.
Maintaining Your Planter Box
Proper maintenance will ensure your planter boxes remain beautiful over time. Some tips include:
- Watering: Ensure consistent watering, checking the moisture level regularly.
- Fertilizing: Use organic fertilizer to promote healthy plant growth.
- Inspecting for Pests: Keep an eye out for any signs of pests and take immediate action if needed.
With a bit of creativity and effort, your deck can become a stunning retreat filled with life through the addition of custom wooden planter boxes. For more ideas and inspiration on enhancing your outdoor space, visit Houzz or check gardening articles at Better Homes & Gardens.
Now is the perfect time to get started on your DIY journey, making your deck not just a place to relax but a thriving space brimming with character and greenery.
Best Plants to Include in Your DIY Planter Box
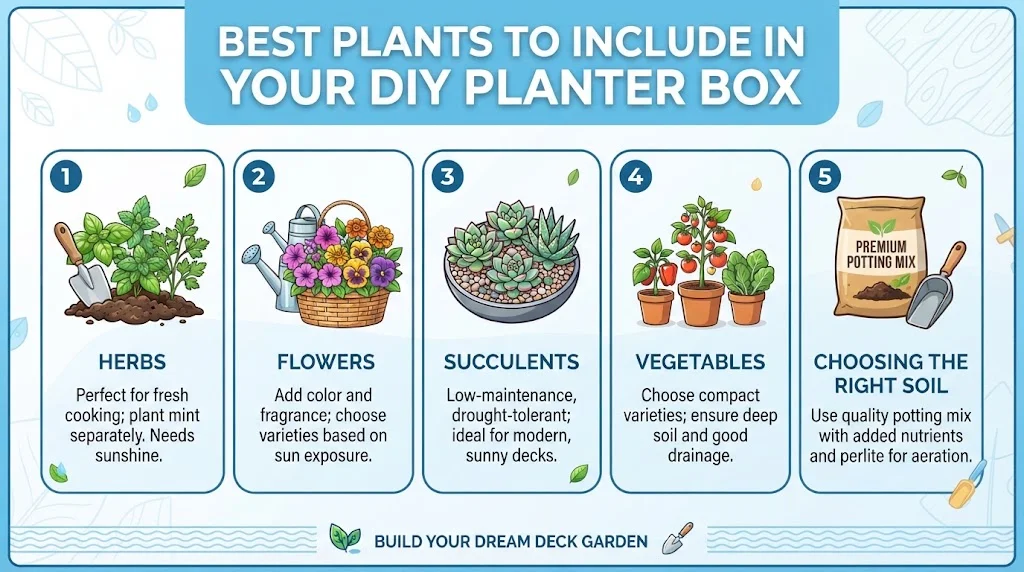
Creating a DIY Wooden Planter Box for Deck for your deck opens up endless possibilities for your gardening creativity. Choosing the right plants is crucial to ensure your planter box thrives and becomes a stunning focal point. The best plants to include come in various sizes, colors, and textures to enrich your outdoor space. Here are some great options to consider:
Herbs
Herbs are perfect for planter boxes, as they do not require much space and provide fresh ingredients for your cooking. Here are a few popular options:
- Basil: A versatile herb that loves sunshine and works well in warm weather.
- Mint: Grows vigorously, so it’s best to plant it in its own section to prevent it from taking over.
- Parsley: A hardy herb that can grow in partial shade, making it ideal for many deck locations.
- Thyme: Prefers dryer soil and full sun; it’s also drought-resistant.
Flowers
Adding flowers to your DIY Wooden Planter Box for Deck can bring vibrant colors and fragrances. Here are some excellent flowering plants:
- Pansies: These cheerful flowers come in various colors and are resilient in cooler temperatures.
- Petunias: Great for a long blooming season, they thrive in bright sun and can hang over the edge of your planter.
- Marigolds: Not only are they bright and cheerful, but they also help repel some pests.
- Geraniums: Perfect for sunny decks, these hardy flowers come in several colors and bloom all summer.
Succulents
Succulents are a low-maintenance choice for those who prefer a more modern look. They require little water and thrive in sunny spots. Consider these popular types:
- Aloe Vera: Not only decorative, but it also has medicinal properties.
- Jade Plant: Known for its thick, glossy leaves, making it an easy plant for beginners.
- Hens and Chicks: These charming plants spread easily and come in various shapes and colors.
- Sedum: These are excellent for spilling over the edges of the planter and require minimal care.
Vegetables
If you want to grow your own food, consider incorporating vegetables into your DIY Wooden Planter Box for Deck. The following veggies are ideal:
- Cherry Tomatoes: Compact varieties grow well in pots and are perfect for sunny locations.
- Radishes: Fast-growing and easy to care for, they are ideal for small spaces.
- Leafy Greens: Spinach and lettuce thrive in cooler weather and can be grown closely together.
- Peppers: Both sweet and hot peppers do well in containers and love warm weather.
Choosing the Right Soil
When creating your DIY Wooden Planter Box for Deck, it’s essential to use high-quality potting soil. This type of soil provides the necessary nutrients and drainage for your plants. Consider adding a slow-release fertilizer to give your plants an extra boost.
Watering and Maintenance
Once your plants are settled in, regular watering is key. Monitor the moisture level in the soil and adjust your watering schedule based on the plant types and weather conditions. Most importantly, keep an eye out for pests or diseases to keep your deck garden healthy and vibrant.
For more in-depth gardening references, check out The Old Farmer’s Almanac and Gardening Know How. These websites offer a wealth of knowledge suitable for beginners and experienced gardeners alike.
Whether you’re looking to grow herbs for your kitchen, vibrant flowers to brighten your deck, or even fresh vegetables, there’s a plethora of plants that can flourish in your Wooden Planter Box. Select the ones that resonate with you, and enjoy watching your garden thrive right where you relax!
Maintenance Tips for Wooden Planter Boxes on Decks
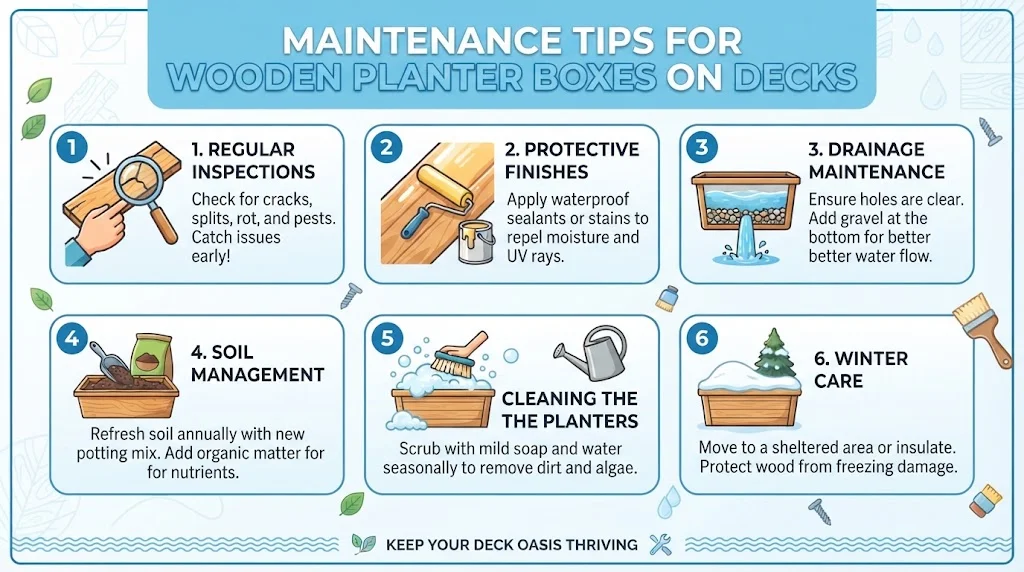
Wooden planter boxes are a delightful addition to any deck, bringing a touch of nature to your outdoor space. However, maintaining these planter boxes is essential to ensure they last for years and continue to enhance your deck’s aesthetic appeal. Below are some practical maintenance tips to keep your wooden planter boxes looking great.
Regular Inspections
Inspecting your wooden planter boxes should be part of your seasonal routine. Check for any signs of damage, including:
- Cracks or splits in the wood
- Rot or signs of moisture accumulation
- Pests, such as insects or termites
- Loose nails or hardware
Finding and addressing these issues early can save you from costly repairs later on.
Protective Finishes
Applying a protective finish can significantly extend the lifespan of your wooden planter boxes. Here are some recommendations:
- Waterproof sealants: These help protect against moisture, which can lead to rot and decay.
- Wood stains: Choose a stain that offers UV protection to prevent fading from the sun’s rays.
- Regular reapplication: Plan to reapply these finishes annually or as needed based on weather exposure.
Drainage Maintenance
Proper drainage is crucial for the health of the plants in your wooden planter boxes and the integrity of the wood itself. Here are a few tips to maintain drainage:
- Ensure there are holes in the bottom of the planter boxes to let excess water escape.
- Use a layer of gravel or small stones at the bottom of the box to facilitate drainage.
- Check the drainage holes regularly for clogs and clean them out as needed.
Soil Management
What you put into your planter boxes can affect their longevity. Here are some ideas on soil management:
- Choose quality soil: Use potting soil designed for container gardening, ensuring it has good drainage properties.
- Rotate plants: Frequently changing the types of plants in your boxes can prevent nutrient depletion in the soil.
- Fertilize appropriately: Use organic fertilizers to promote healthy plant growth without harming the wood.
Cleaning the Planters
Routine cleaning prevents dirt and algae buildup, which can decay wood over time. Follow these steps for effective cleaning:
- Remove all plants and soil from the box.
- Use a soft brush and a mixture of warm water and mild soap to scrub the surfaces.
- Rinse thoroughly with water.
- Allow the planters to dry completely before replanting.
Winter Care
During colder months, special care is needed to protect your wooden planter boxes:
- If possible, move your planters indoors or to a sheltered location to prevent freeze damage.
- Use mulch in the planters to insulate the soil and protect the root systems of the plants.
- Drain excess water from the boxes to avoid ice formation, which can damage the wood.
By following these maintenance tips, you can keep your wooden planter boxes on your deck in excellent shape. Regular care will enhance their longevity and keep your outdoor space looking beautiful.
If you’re looking for further resources, consider checking out these websites:
Conclusion
Creating a DIY Wooden Planter Box for Deck for your deck not only enhances your outdoor space but also serves as a rewarding project that reflects your personal style. As you embark on this crafting journey, remember to select the right wood to ensure durability and resistance against the elements. Utilizing weather-resistant materials, like cedar or redwood, will help your planter withstand rain and sunlight for years to come.
With custom designs, you can elevate your deck aesthetics. Think about shapes and sizes that complement your deck’s style while providing ample space for your chosen plants. Selecting the best plants for your wooden planter box is just as essential. Whether you prefer vibrant flowers, fragrant herbs, or lush greenery, taking into account sunlight, water needs, and growth habits will lead to a thriving planter.
Proper maintenance of your DIY Wooden Planter Box for Deck can extend its lifespan and keep your plants healthy. Regularly checking for any signs of wear, treating the wood, and ensuring proper drainage will keep your outdoor gardening project looking fresh and flourishing.
Ultimately, a DIY Wooden Planter Box for Deck is not just about adding greenery; it’s about creating a space where nature and home intersect beautifully. Embrace the creativity involved in choosing designs, plants, and upkeep, and watch as your outdoor retreat becomes a stunning oasis that you and your family will enjoy for seasons to come. Let your deck shine with the beauty of a well-crafted planter box, and enjoy the connection to nature it brings.