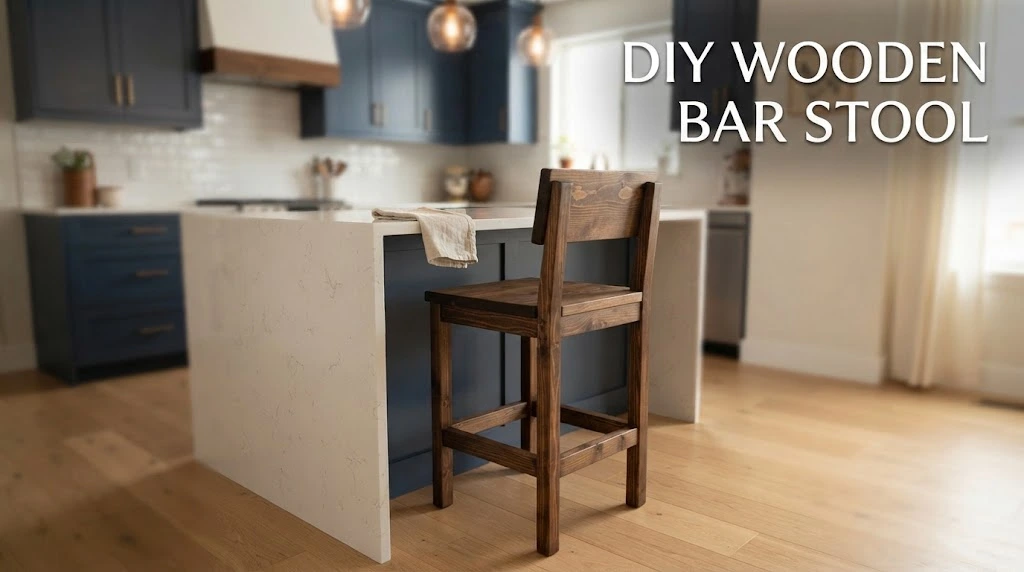
Creating a Diy Wooden Bar Stool with Backrest can be a fulfilling project that enhances the look of your home. Not only do you get to customize it to fit your style, but you also gain a functional piece of furniture that is perfect for your kitchen or bar area. Follow this step-by-step guide to build your very own bar stool.
Materials Needed
- Wooden boards (1x4s and 2x4s for the structure)
- Screws (1.5-inch wood screws)
- Wood glue
- Sandpaper (120 and 220 grit)
- Stain or paint (optional)
- Varnish or sealant
- Drill
- Saw (miter or circular saw)
- Measuring tape
- Clamps
Step 1: Gather Your Tools and Materials
Before you start, ensure you have all your materials in one place to streamline the building process. Measuring your space to determine how tall you want the bar stool will guide your cuts. Most bar stools range from 28 to 30 inches in height.
Step 2: Cut Your Wood Pieces
Using your saw, cut the wooden boards into the following pieces:
- Four legs (30 inches long)
- Two horizontal supports (24 inches long)
- One seat (24×24 inches)
- One backrest board (24 inches long)
- Four support brackets (optional, but recommended for stability)
Step 3: Assemble the Base
Start by attaching the horizontal supports between the legs. Position two legs vertically and attach the horizontal support about 8-10 inches from the bottom using screws and wood glue. Repeat this with the other two legs.
Step 4: Attach the Seat
Once the base is stable, place the seat board on top of the frame. Center it and secure it to the legs using screws. Use clamps to hold the parts in place while you drill.
Step 5: Build and Attach the Backrest
To create a comfortable backrest, cut your backrest board and securely attach it to the rear legs of the stool at a 90-degree angle. You can adjust the angle for comfort by propping it at a slight back tilt. Drill it in place with screws, ensuring it is sturdy and can support weight.
Step 6: Sand and Finish Your Stool
Once your stool is assembled, use sandpaper to smooth out rough edges. Start with 120 grit sandpaper and finish with 220 grit for a smooth surface. You can choose to stain or paint your stool at this point. Allow it to dry completely.
Step 7: Seal the Finish
After the stain or paint has dried, apply a coat of varnish or sealant to protect your Diy Wooden Bar Stool with Backrest from scratches and spills. Allow this to cure as directed on the label.
Design Customizations
Feel free to put your own unique spin on your stool! Adding a cushion to the seat can enhance comfort. You can also experiment with color combinations or even engravings for a personalized touch. There are numerous tutorials and ideas at Wood Magazine that can inspire your designs.
Tips for Success
- Always measure twice before cutting to avoid mistakes.
- Choose a sturdy type of wooden material, like oak or pine, for durability.
- Consider using a finish that complements your interior styling.
- If you’re new to woodworking, don’t hesitate to seek help or advice from experienced builders.
Creating a Diy Wooden Bar Stool with Backrest is not just about crafting furniture; it’s an opportunity to enhance your living space with a personal touch. Enjoy the process and take pride in your craftsmanship. For more related projects, check out Ana White’s woodworking plans. Happy building!
Essential Tools and Materials Needed for Your Bar Stool Project
Creating your own Diy Wooden Bar Stool with Backrest can be a rewarding project that not only enhances your home decor but also offers a fun and creative outlet. One of the keys to a successful project lies in having the right tools and materials. Here’s what you’ll need to gather before you start building your bar stool.
Essential Tools
Having the right tools is crucial to ensure smooth and efficient progress. Here’s a list of the most essential tools you’ll need:
- Measuring Tape: Accurate measurements are vital for any woodworking project. Invest in a sturdy measuring tape to ensure precision.
- Square: A framing square helps to ensure that your angles are perfect, creating a solid base for your bar stool.
- Power Drill: A power drill simplifies the task of making holes and driving screws, speeding up your build significantly.
- Saw (Circular or Jigsaw): Depending on the complexity of your design, you might need a circular saw for straight cuts or a jigsaw for more intricate shapes.
- Sander: A good quality sander (orbital or belt) helps smooth out the wood, ensuring a sleek finish on your bar stool.
- Clamps: Clamps will hold your pieces in place while the glue dries or while you’re screwing them together, adding stability to your construction.
- Safety Glasses and Ear Protection: It’s essential to protect your eyes and ears when using power tools.
Wood and Materials
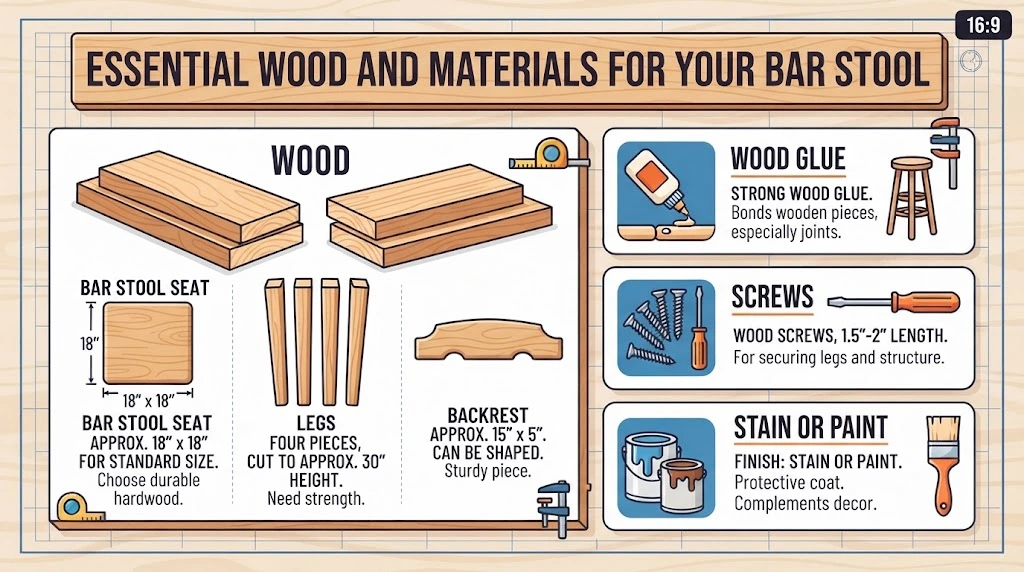
Along with the right tools, selecting appropriate materials is equally important. Here’s a breakdown of what you’ll need:
- Wood: Choose solid wood like oak, maple, or pine, which can provide strong support and a beautiful finish. Generally, you will need:
- Bar Stool Seat: Approximately 18” x 18” for a standard size.
- Legs: Four pieces cut to a height of about 30”.
- Backrest: A sturdy piece, approximately 15” x 5”, that can be shaped to your preference.
- Wood Glue: A strong wood glue will provide a solid bond between wooden pieces, especially the joints.
- Screws: Choose screws that are suited for wood, typically 1.5”-2” long for securing the legs.
- Stain or Paint: To finish your bar stool, you’ll need a protective finish that can complement your decor. Stains and sealants are available at your local hardware store.
Other Essentials
Don’t overlook these additional items that can make your DIY experience smoother:
- Sandpaper: Various grits (60, 120, 220) for initial shaping and final finishing.
- Brushes or Rags: For applying stain or finish, good-quality brushes and clean rags will help you achieve an even coat.
- Level: A level will help ensure everything is even, particularly important for the legs of your stool.
Planning Your Project
Before jumping into your Diy Wooden Bar Stool with Backrest project, spending some time on planning can help avoid mistakes. Draw your stool’s design with measurements annotated. Consider checking out resources like Wood Magazine, which can provide designs and ideas.
Design Considerations for Comfort and Aesthetics in Bar Stools
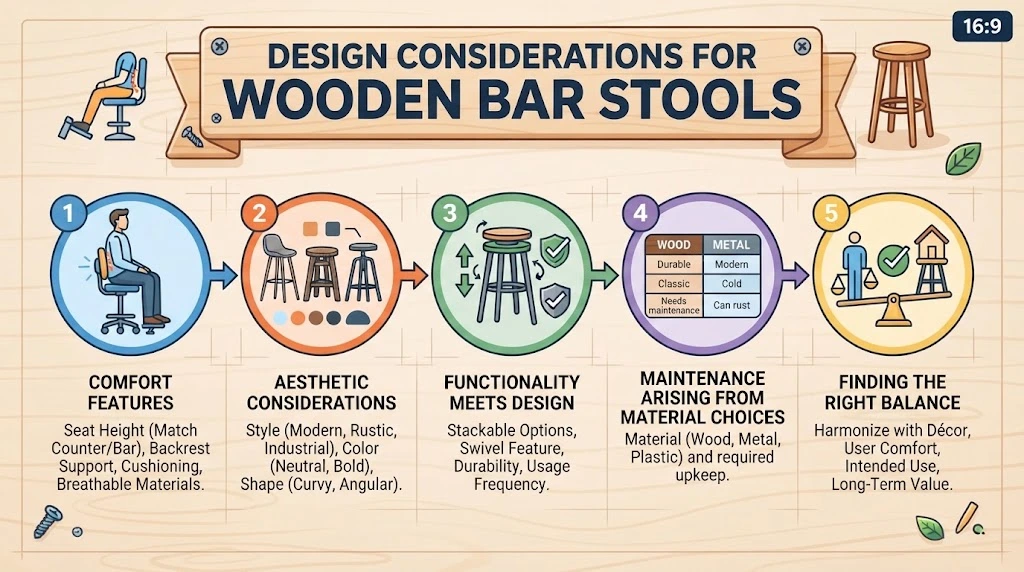
When you think about bar stools, comfort and aesthetics play crucial roles in the design process. Selecting the right stool involves careful consideration of both elements to ensure you have a functional yet stylish addition to your space. Here are some key factors to keep in mind.
Comfort Features
Comfort comes first, especially if you plan to use your bar stools frequently. Factors that contribute to comfort include:
- Seat Height: Make sure the seat height matches the counter or bar height. Standard bar stools usually range from 28 to 32 inches in seat height, while counter stools are typically 24 to 27 inches.
- Backrest: A bar stool with a backrest offers better support, which can make sitting for extended periods much more enjoyable.
- Cushioning: Look for stools with well-padded seats. A thicker cushion can dramatically enhance comfort levels.
- Materials: Choosing breathable materials will help prevent discomfort during warmer months. Leather, fabric, and certain synthetic materials provide varying levels of comfort.
Aesthetic Considerations
Aesthetics are equally important. You want your bar stools to harmonize with your overall décor. Think about the following design aspects:
- Style: Consider the style of your space—modern, rustic, or industrial—and choose a bar stool that complements it. For instance, sleek metal stools work well in modern designs, while wooden stools fit better in rustic themes.
- Color: Color plays a big role in how your stools will look within the existing décor. Neutral colors offer versatility, while bold colors can add a pop to your space.
- Shape: The shape of the stool can contribute to overall design aesthetics. Curvy designs may evoke a softer look, whereas angular designs can lend a modern feel.
Functionality Meets Design
Good design should not only focus on looks but also functionality. Consider how the stools will be used:
- Stackable Options: If you need to save space, look for stackable stools that can be easily stored away when not in use.
- Swivel Feature: Swivel stools can enhance the user experience, allowing for easy movement without needing to shift the entire stool.
- Durability: Choose materials that will stand the test of time, especially if the stools will experience heavy use. Wooden and metal options often provide better durability than plastics.
Maintenance Arising from Material Choices
The materials you choose for your bar stools can affect how much upkeep they require. Easier-to-clean materials like vinyl or treated wood may be preferable for high-traffic areas. Additionally:
| Material | Pros | Cons |
|---|---|---|
| Wood | Classic look, durable | Needs maintenance, can scratch easily |
| Metal | Durable, modern aesthetic | Can be cold to the touch, may rust over time |
| Plastic | Lightweight, easy to clean | May not be as sturdy, less stylish |
Finding the Right Balance
Achieving the right balance between comfort and aesthetics is crucial. When choosing a bar stool, think about how you will use it, the overall design of your space, and what will make you comfortable. A well-chosen bar stool can elevate your dining experience while adding character to your home.
For further inspiration and details about bar stool designs, you can visit Elle Decor or check out Houzz for various styles.
Tips for Customizing Your Wooden Bar Stool to Fit Your Space
Customizing a wooden bar stool to fit your space can be a fun and rewarding DIY project. Whether you’re looking to match existing decor or create a focal point in your kitchen or dining area, there are plenty of tips and tricks to guide you through the process. Here’s how you can personalize your wooden bar stool effectively.
First, assessing the size of the area where you plan to place your bar stool is crucial. Measure your available space, including the height of your bar or countertop. Remember, the standard bar stool height ranges from 28 to 30 inches, with an ideal distance of 10 inches between the seat of the stool and the underside of the counter. Having these measurements in mind helps ensure that your customized stool fits perfectly.
Next, consider the style of your bar stool. You can choose a classic design or go for something modern or eclectic. Here are some styles you might consider:
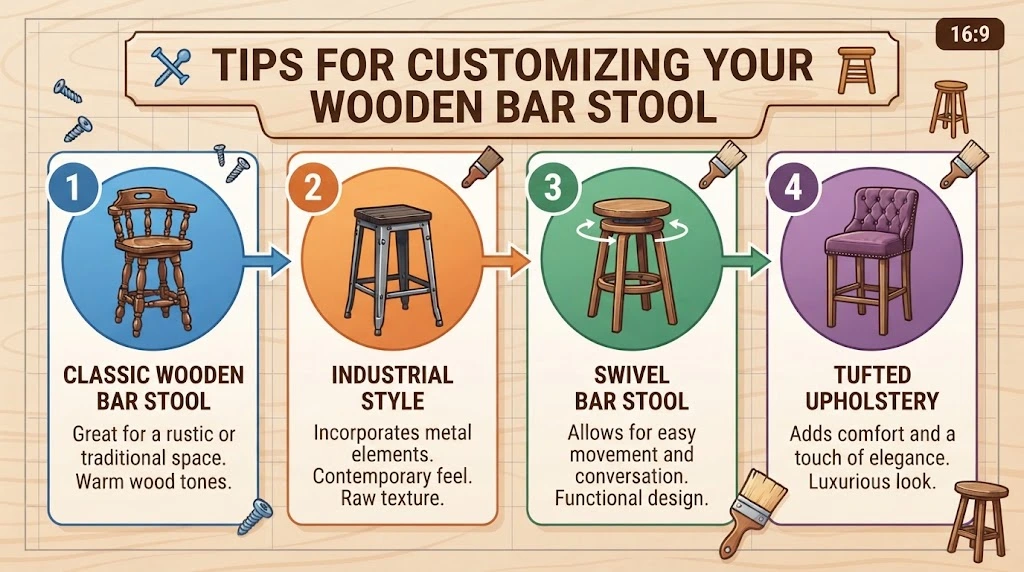
- Classic Wooden Bar Stool: Great for a rustic or traditional space.
- Industrial Style: Incorporates metal elements for a more contemporary feel.
- Swivel Bar Stool: Allows for easy movement and conversation.
- Tufted Upholstery: Adds comfort and a touch of elegance.
Once you decide on the design, it’s time to think about the color. You can either stick with the natural wood finish or opt for paint or stain to enhance or change the look. If you’re going for a unique color, consider using chalk paint or a spray paint made for wood. These are easy to use and provide a lovely finish. Don’t forget to apply a sealant when you’re done to protect the surface from wear.
Adding a backrest to your wooden bar stool is another excellent way to enhance comfort and support. When designing the backrest, consider the height and style that works best for you. Here are some options:
- Curved Backrest: Offers ergonomic support for your back.
- Flat Backrest: Maintains a minimalist look while providing support.
- Full-Width Backrest: Perfect for added comfort, especially for longer sitting periods.
Another customization option is adding footrests. Footrests can help in more comfortable seating and enhance the overall look of your bar stool. You can use the same wood as the stool, or choose a contrasting color for added style. Install it about 12 inches off the ground for a comfortable position.
Consider using cushions or pads for additional comfort. You can create custom cushions using fabric that matches your decor. Use Velcro to secure them to the wooden seat, ensuring they stay in place while providing the comfort you desire.
A few additional tips to keep your project manageable:
- Gather Your Materials: Before you start, gather everything you need including wood, fasteners, paint or stain, tools, and finishing materials.
- Follow Safety Procedures: Always wear safety glasses and a mask while cutting wood or working with chemicals like paint and sealers.
- Practice Patience: Take your time with each step to ensure you’re producing high-quality work.
When you’re ready to start, resources like Wood Magazine or Ana White can provide excellent guidance and inspiration for your Diy Wooden Bar Stool with Backrest project.
In the end, customizing your wooden bar stool to fit your space is about expressing your style and creating something functional for your home. With some time and creativity, you can build a piece that complements your kitchen or bar area impeccably. Whether you focus on the design, color, or functionality, the finished product will not only be a great addition to your space but also a source of pride in your craftsmanship.
Maintenance and Care for Long-lasting Wooden Bar Stools
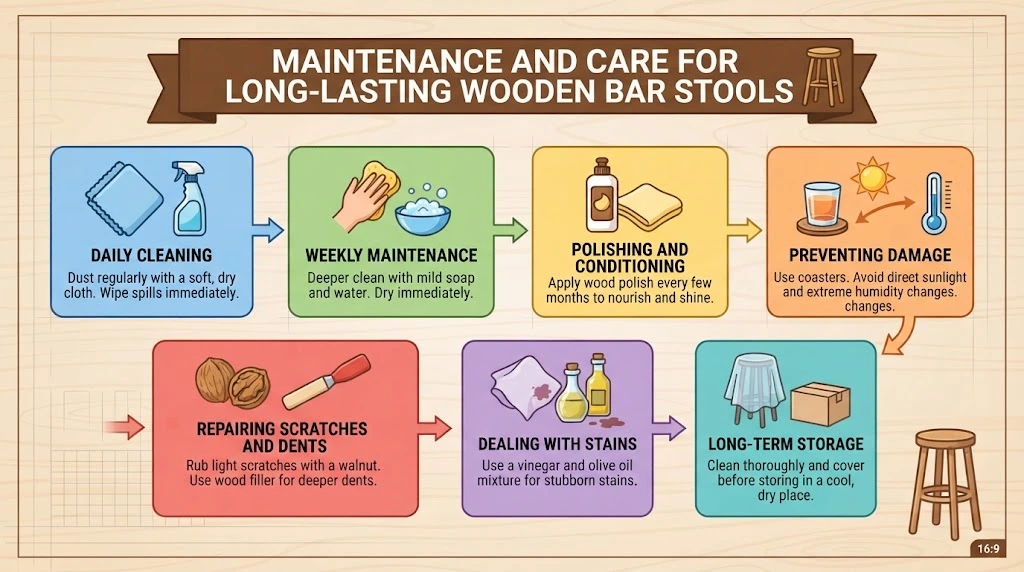
Wooden bar stools are an excellent choice for adding warmth and charm to your space, whether in a home bar, kitchen, or dining area. However, maintaining these pieces effectively is crucial for longevity and continued aesthetic appeal. With the right care, your wooden bar stools can last for years, providing comfort and style. Below are essential tips and techniques to help you maintain your wooden bar stools.
Daily Cleaning
Begin by regularly dusting your wooden bar stools. Use a soft, dry cloth or a microfiber duster to remove dust and debris. Make this a part of your daily routine to prevent dirt buildup, which can scratch the surface over time. When spills happen, quickly wipe them with a damp cloth. Be sure not to saturate the wood; excess moisture can lead to warping.
Weekly Maintenance
Once a week, you should perform a deeper clean:
- Use a soft cloth dampened with a mild soap and water solution.
- Wipe the surfaces gently, ensuring that water does not pool.
- Rinse the cloth and wipe again with clean water to remove any soap residue.
- Dry immediately with a soft, dry cloth.
Polishing and Conditioning
Every few months, it’s beneficial to polish and condition the wood.
- Choose a wood polish that is suitable for your stool’s finish.
- Apply a small amount to a cloth and rub it into the wood in the direction of the grain.
- This helps to nourish the wood and enhances its natural shine.
Preventing Damage
It’s essential to take steps to prevent damage from occurring in the first place. Here are some tips to consider:
- Use Coasters: Always place coasters under drinks to avoid water rings and stains.
- Avoid Direct Sunlight: Position your bar stools away from direct sunlight to prevent fading and cracking.
- Monitor Humidity Levels: Wood can expand or contract with changes in humidity. Try to keep indoor humidity levels stable.
Repairing Scratches and Dents
Even with the best care, wear and tear may occur. Here are some steps to repair minor scratches and dents:
For light scratches, rub a walnut over the affected area. The oils from the nut can help to conceal minor blemishes.
If you encounter deeper scratches, consider using a wood filler. Apply it to the scratch, let it dry, and then sand it down to match the surrounding surface.
Dealing with Stains
If you have stains that won’t budge, try using a mixture of equal parts vinegar and olive oil. Gently rub the mixture onto the stained area and wipe it clean with a soft cloth.
Long-Term Storage
When it comes time to store your wooden bar stools—especially during seasonal changes—consider the following:
- Clean thoroughly before storing to prevent dust accumulation.
- Use protective covers to shield stools from dust and moisture.
- Store in a cool, dry place away from sunlight.
Statement
By incorporating these maintenance tips into your routine, you can ensure your wooden bar stools remain a beautiful and functional part of your home for many years. If you’re looking for further insights on maintaining wooden furniture, visit websites like Wood Magazine or Popular Woodworking.
Maintaining your wooden bar stools is not just about keeping them clean but also protecting their finish and integrity. With a little effort, you’ll enjoy the beauty and comfort of your wooden bar stools for a long time!
Conclusion
Building a Diy Wooden Bar Stool with Backrest is not only a rewarding project but also a practical addition to your home. By following the step-by-step guide, you can create a beautiful and functional piece that fits perfectly in your space. With the right essential tools and materials, you’ll find that crafting your bar stool is easier than you might think.
Consideration of design elements for both comfort and aesthetic appeal is crucial; after all, a well-designed stool enhances your space while providing the support you need. Customization tips allow you the freedom to tailor the bar stool to your specific style and needs, ensuring it matches your decor and personal taste.
To keep your wooden bar stool looking fresh and new, regular maintenance and care are essential. Simple steps like cleaning and applying protective finishes can extend the life of your project, allowing you to enjoy your handiwork for years to come.
As you step back and admire your completed bar stool, you’ll appreciate the time and effort you invested in this project. Whether used for seating at a bar, kitchen island, or as additional seating for gatherings, your DIY creation will not only serve a purpose but also become a conversation starter. Embrace the journey of woodworking; your homemade Diy Wooden Bar Stool with Backrest is sure to bring comfort and style to your home.