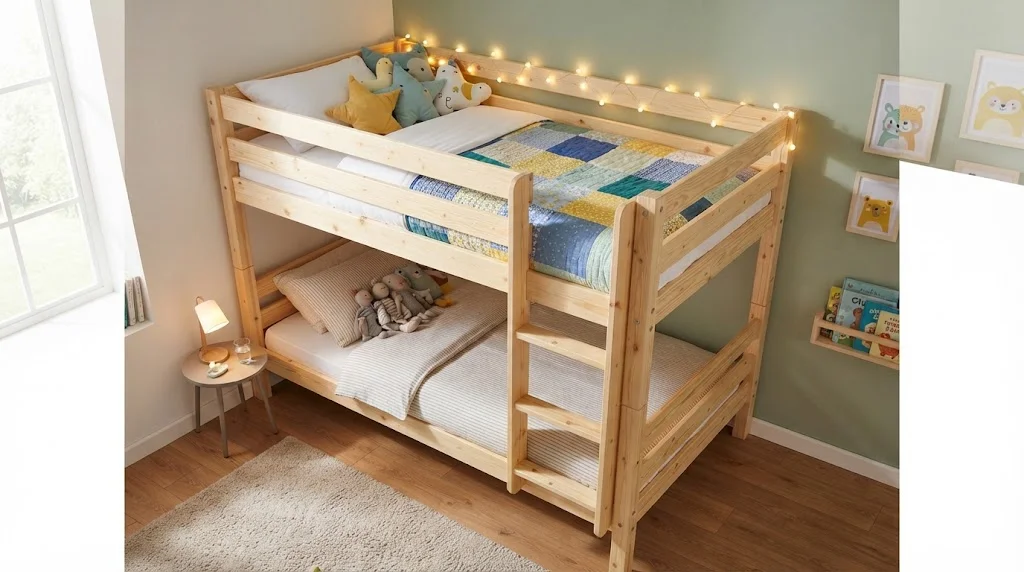
Building a DIY Wooden Bunk Bed can be a rewarding project that not only saves you money but also allows you to customize every aspect to fit your child’s room. With a little time and effort, you can create a functional and stylish sleeping space. Here’s a step-by-step guide to help you through the process of constructing your own bunk bed.
Materials Needed
- 4 pieces of 2×4 lumber (for the bed frame)
- 4 pieces of 2×6 lumber (for the mattress supports)
- 2 sheets of plywood (for the top and bottom bunks)
- Wood screws (2.5 inches)
- Wood glue
- Sanding paper or an electric sander
- Paint or wood finish (optional)
- Measuring tape
- Drill
- Saw (circular or hand saw)
- Level
Step 1: Measuring and Cutting the Wood
Start by measuring the dimensions of the desired bunk bed. A standard twin mattress is about 38 inches wide by 75 inches long. Cut your lumber accordingly:
For the bed frame, cut two pieces of 2×4 lumber to 75 inches and two pieces to 38 inches.
For the mattress supports, cut four pieces of 2×6 lumber to 38 inches.
For the plywood, cut to fit on top of the supports, or you can use full sheets for either bunk.
Step 2: Assemble the Frame
Lay your cut 2×4 pieces on a flat surface. Using wood screws, assemble the rectangle of the bed frame by connecting the ends of the 75-inch pieces to the 38-inch pieces. Ensure everything is square by measuring from corner to corner.
Step 3: Add the Supports
Space the 2×6 supports evenly across the width of the frame. Secure each with wood screws, making sure they are level and aligned. This will provide a sturdy foundation for the mattress.
Step 4: Build the Second Bunk
Repeat the assembly process for the second bunk. However, this time, you need to think about adding safety features. You may want to incorporate a ladder and guardrails.
Step 5: Create the Ladder
For the ladder, cut two additional pieces of 2×4 lumber to 48 inches (for the sides of the ladder) and several smaller pieces to serve as rungs. Space the rungs evenly about 12-15 inches apart for easy climbing. Attach the rungs securely between the two side pieces.
Step 6: Sand and Finish the Bed
Once your frame is assembled, use sanding paper to smooth all edges, removing any splinters. You can also opt for paint or wood finish to enhance the aesthetics of your bunk bed while adding a protective layer.
Step 7: Assemble the Bunk Bed
With the individual components finished, you can now stack the bunks. Ensure the structure is stable, and double-check that everything is securely fastened. Use a level to confirm that both bunks are even.
Essential Tools and Materials for Your Bunk Bed Project
Building a wooden bunk bed is an exciting project that can save you money and provide a personalized touch to your child’s room. Before diving into the construction phase, it’s essential to gather the right tools and materials. This will ensure that your project runs smoothly and yields a sturdy, safe bunk bed. Below, you’ll find the essential tools and materials you’ll need for your bunk bed project.
Tools Needed for Your Bunk Bed Project
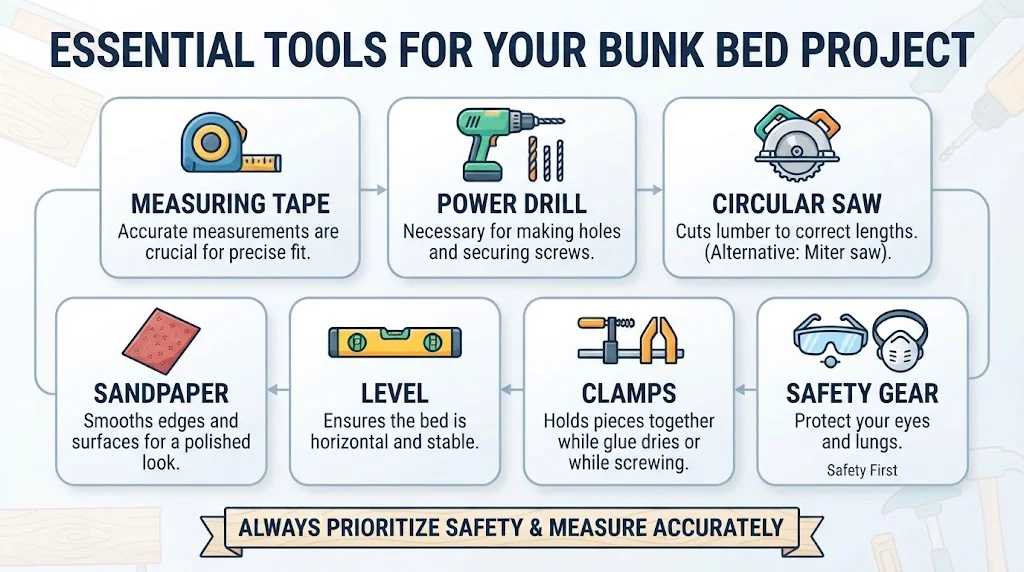
- Measuring Tape: Accurate measurements are crucial for any woodworking project. A measuring tape helps you ensure that all parts fit together precisely.
- Power Drill: A power drill is necessary for making holes and securing screws. Make sure to have a variety of drill bits ready.
- Saw: A circular saw or a miter saw will help you cut lumber to the correct lengths. A handsaw can also work, but a power saw will save time.
- Sandpaper: Use sandpaper for smoothing edges and surfaces. This will give your bed a polished, finished look.
- Level: A level ensures that your bunk bed is perfectly horizontal and stable. This is especially important for safety.
- Clamps: These are helpful for holding pieces together while the glue dries or while you screw them together.
- Safety Gear: Don’t forget your safety glasses and dust mask to protect your eyes and lungs while you work.
Materials Required for Your Bunk Bed
Lumber: Choose high-quality wood like pine, oak, or plywood. The amount you need will depend on your design. A common choice is:
| Type of Wood | Dimensions (inches) | Quantity |
|---|---|---|
| 2×4 | 96 | 10 |
| 2×6 | 96 | 6 |
| Plywood | 4×8 | 2 |
- Screws: Use wood screws that are appropriate for the type of wood you are using. Typically, 2.5-inch screws are ideal for joining the frame.
- Wood Glue: For added strength, wood glue will help bond pieces together.
- Wood Finish: Choose a non-toxic finish or paint to protect the wood and ensure a safe sleeping environment for your kids.
Where to Find Quality Materials
When you’re ready to gather your materials, local hardware stores often have everything you need. Websites like Home Depot and Lowe’s provide an extensive selection of tools and building supplies. Additionally, you might find unique pieces or discounted options at specialty lumberyards or local sawmills.
For your bunk bed project, be sure to not rush through the selection process. Quality materials will make a significant difference in the durability and safety of your finished product.
Building Plan Resources
To complement your tools and materials, consider looking for detailed building plans. Websites like Instructables offer free resources and user-uploaded plans for DIY Wooden Bunk Bed projects.
Best Practices for Safety
Always prioritize safety during your building project. Familiarize yourself with the tools before use and ensure any sharp edges are sanded down. It’s also wise to keep all tools and materials stored securely, especially if children are present in the home.
By gathering the right tools and materials, you can embark on a successful DIY Wooden Bunk Bed project. Remember to take your time, measure accurately, and most importantly, have fun while building a special space for your children!
Safety Considerations When Constructing a Bunk Bed
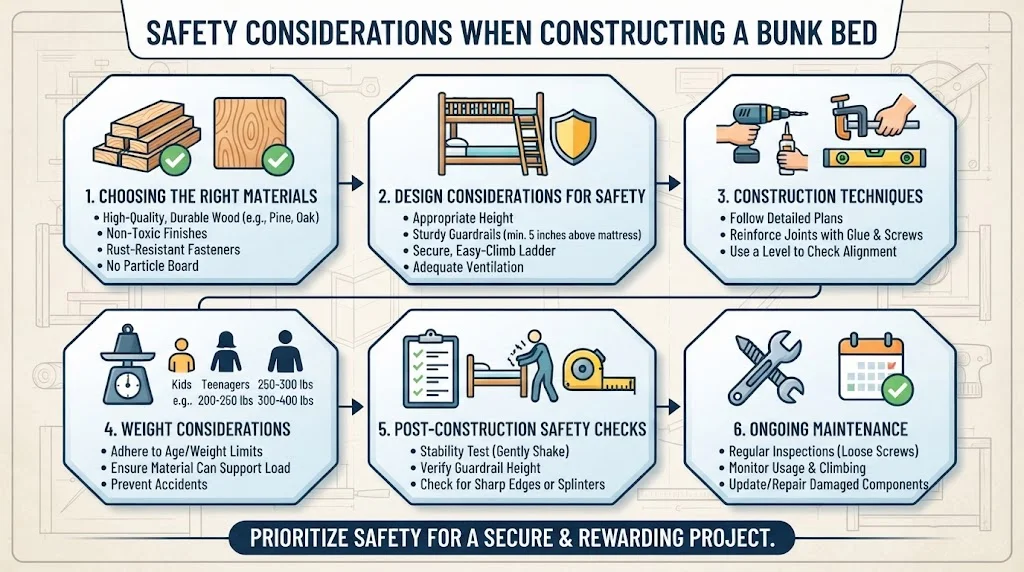
Building a bunk bed can be an exciting project, but it comes with its own set of safety considerations. Prioritizing safety will ensure that the bunk bed serves its purpose without exposing anyone to unnecessary risk. Below are essential aspects to keep in mind during the construction process.
Choosing the Right Materials
One of the first steps in ensuring safety is selecting the appropriate materials for the bunk bed. Opt for high-quality, durable wood, such as pine or oak, that can withstand the weight of the occupants. Avoid using particle board, as it is less sturdy and may not provide the required support over time. Pay particular attention to:
- Wood Quality: Ensure that all wood is free from cracks and defects.
- Finish: Use non-toxic finishes and sealants to minimize harmful fumes.
- Fasteners: Select screws, brackets, and other fasteners made from rust-resistant metal.
Design Considerations for Safety
When sketching your bunk bed design, it’s important to include safety features that protect those using it. Here are some key design aspects to consider:
- Height Limitations: Ensure the height of the top bunk is appropriate according to the age of the users.
- Guardrails: Install guardrails on both sides of the top bunk to prevent falls. The guardrail should be a minimum of 5 inches above the mattress.
- Sturdy Ladders: Build a ladder that allows for easy access to the top bunk without wobbling or instability.
- Ventilation: Design the bunk bed with adequate ventilation to keep the air quality healthy.
Construction Techniques
Correct construction techniques play a significant role in the overall safety of the bunk bed. Follow these tips during assembly:
- Follow Plans: Use a detailed plan with measurements and instructions to avoid compromising safety.
- Reinforce Joints: Use wood glue along with screws in joints and fasten connections securely.
- Level Check: Regularly check that the bed frame is level as you build to ensure stability.
Weight Considerations
Understanding and adhering to weight limits is essential for safety. Here’s a breakdown:
| Age Group | Maximum Weight Limit (lbs) |
|---|---|
| Kids (up to 12 years) | 200-250 |
| Teenagers (13-19 years) | 250-300 |
| Adults | 300-400 |
Consider the maximum weight limit and ensure the materials can accommodate this load to prevent accidents.
Post-Construction Safety Checks
After building the bunk bed, perform a thorough inspection to ensure safety:
- Stability Test: Gently shake the bed to confirm it doesn’t wobble.
- Guardrail Height: Verify that guardrails are intact and at the right height.
- Finish Inspection: Check for any sharp edges or splinters that may pose a risk.
Ongoing Maintenance
Even after construction, ongoing maintenance is crucial for safety. Follow these practices:
- Regular Checks: Periodically inspect for loose screws and tighten as necessary.
- Monitor Usage: Ensure users follow safe climbing practices on the ladder.
- Update Materials: Replace any damaged components, such as mattresses or guardrails.
Creative Design Ideas for Customizing Your Bunk Bed
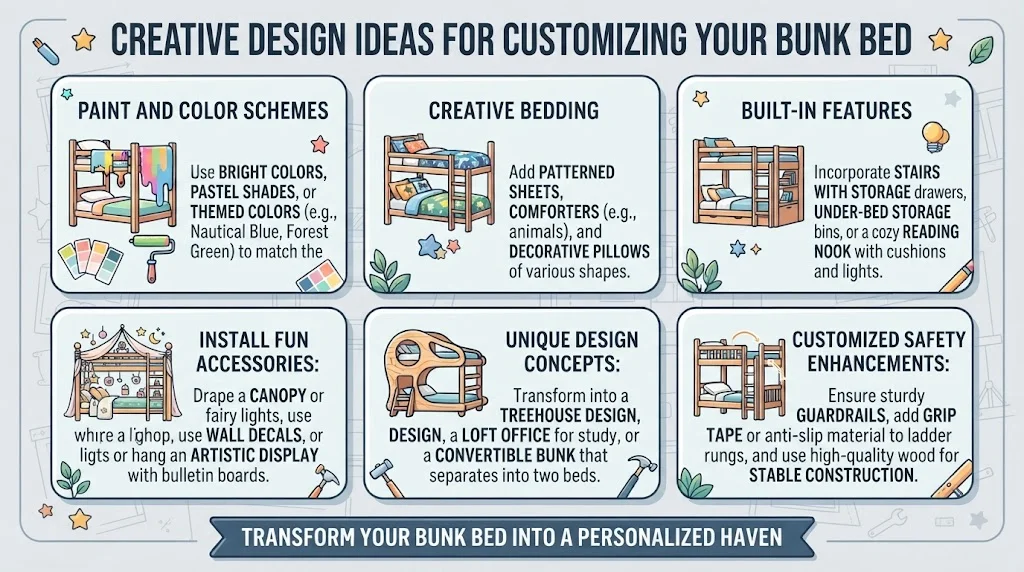
Bunk beds are not only a practical solution for saving space, but they also provide an exciting and creative area for kids (and sometimes adults) to sleep and play. If you want to make your bunk bed stand out, consider some creative design ideas that can transform it into a unique, personalized space. Here are some inspiring customization options for your bunk bed.
Paint and Color Schemes
One of the easiest ways to customize your bunk bed is through paint. A fresh coat can change the entire appearance of the bed. Here are some ideas:
- Bright Colors: Choose vibrant hues to make the bed pop, especially if your room is neutral.
- Pastel Shades: Soft colors can create a calming atmosphere, perfect for a child’s sleeping space.
- Themed Colors: Match the bed colors with your child’s favorite theme, like nautical blues and whites or forest greens and browns.
Creative Bedding
Your choice of bedding can greatly affect the overall look of your bunk bed.
- Patterned Sheets: Use fun patterns that reflect your child’s interests, such as superheroes, animals, or outer space.
- Comforters: A themed comforter can serve as a focal point and tie the entire room together.
- Pillows: Add decorative and supportive pillows in various shapes and sizes.
Built-In Features
Additions to your bunk bed can enhance functionality and aesthetics:
- Stairs with Storage: Replace the ladder with stairs that include built-in drawers for toys or books.
- Under-Bed Storage: Utilize the space underneath to fit storage bins or a trundle bed for sleepovers.
- Reading Nook: Create a cozy corner with cushions, lights, and a bookshelf on the side of the upper bed.
Install Fun Accessories
Accessorizing your bunk bed can bring it to life:
- Canopy: Drape fabric or fairy lights to create a whimsical canopy effect.
- Wall Decals: Personalize the area with removable stickers or decals that match your child’s interests.
- Artistic Displays: Hang a bulletin board or clipboards to display your child’s artwork or photos.
Unique Design Concepts
If you’re feeling especially creative, consider these unique ideas:
- Treehouse Design: Build the bunks to resemble a treehouse, complete with faux tree trunks.
- Loft Office: Use the upper bunk as an office space for a hybrid work and rest environment.
- Convertible Bunk: Design a bunk that can convert into two separate beds easily, offering flexibility for guests.
Customized Safety Enhancements
Safety is essential, particularly for children. Enhance the safety of your bunk bed with these features:
- Guardrails: Ensure that the upper bunk has sturdy guardrails to prevent falls.
- Anti-Slip Ladder: Cover the ladder rungs with grip-enhancing material to make climbing safe.
- Sturdy Construction: Choose high-quality wood and proper joinery to ensure the bed’s stability.
DIY enthusiasts will find that many of these ideas can be executed at home, allowing you to create a bunk bed that reflects the personalities of those who will use it. You can get more tips on DIY customization from DIY Network or explore endless possibilities on HGTV.
Tips for Maintaining and Decorating Your DIY Bunk Bed
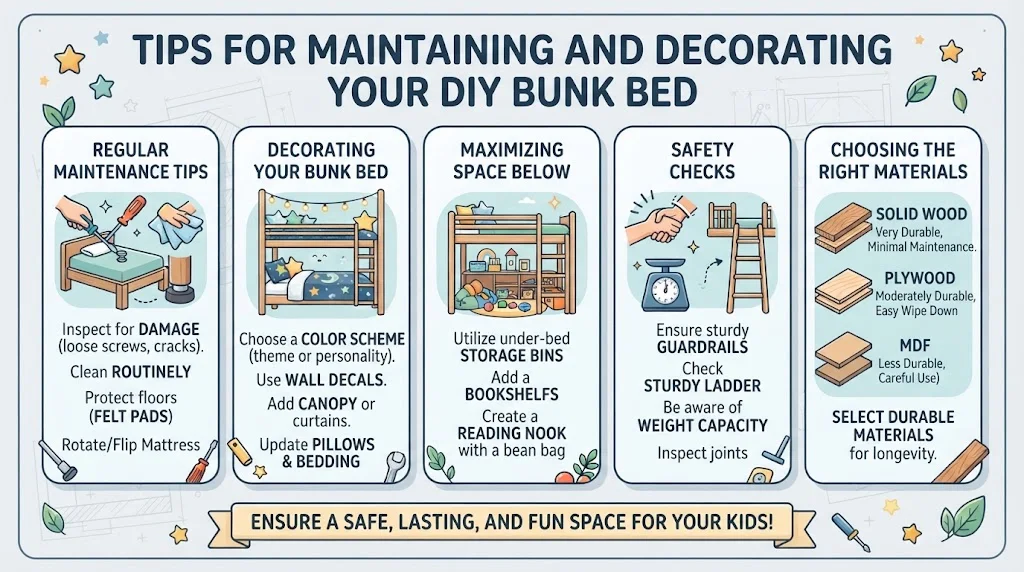
Creating a DIY Wooden Bunk Bed is a rewarding project that not only saves money but also allows for customization based on your space and style. However, maintaining and decorating your bunk bed can enhance its longevity and aesthetic appeal. Here are some tips to achieve both.
Regular Maintenance Tips
Keeping your DIY bunk bed in top shape requires some care and attention. Here are essential maintenance tips:
- Inspect for Damage: Regularly check for any loose screws, cracks, or signs of wear. Tighten any loose components promptly to ensure safety.
- Clean Routinely: Dust your bunk bed with a soft cloth and use a mild detergent mixed with water for tougher stains. Ensure all surfaces are clean to avoid buildup.
- Protect Against Scratches: Consider using felt pads on the legs to protect your floors and prevent scratching when moving the bed.
- Check the Mattress: Rotate and flip the mattress periodically to maintain even wear. Keep it clean by using a mattress protector.
Decorating Your Bunk Bed
Transforming your bunk bed with creative decorating ideas can create a personalized space that your kids will love. Here are some decoration ideas:
- Color Scheme: Choose a color scheme that fits the theme of the room or your child’s personality. Paint the bunk bed in bright colors or soft pastel tones for a playful or serene look.
- Wall Decals: Use fun wall decals or stickers around the bunk bed. This can add a vibrant feel without permanent alterations.
- Canopy or Curtains: Adding fabric can create a cozy nook. Consider stringing fairy lights or hanging curtains around the upper bed for a whimsical look.
- Pillows and Bedding: Update the bedding with matching pillows and blankets that reflect your child’s interests, like superheroes or princesses.
Maximizing Space Below the Bunk Bed
If your bunk bed features space underneath, utilize it wisely:
- Storage Bins: Use clear storage bins to keep toys and other items organized and easily accessible.
- Bookshelves: Installing a small bookshelf can create a mini-library for bedtime stories.
- Reading Nook: Add a small bean bag chair for a cozy reading corner.
Safety Checks
Safety should always be a priority. When assembling or updating your bunk bed:
- Guardrails: Ensure the top bunk has sturdy guardrails to prevent falls.
- Sturdy Ladder: Check that the ladder is secure and easy to climb. Consider adding grip tape for better traction.
- Weight Capacity: Be aware of the weight limits for both the ladder and the mattress, ensuring they suit your needs.
Choosing the Right Materials for Durability
Selecting high-quality materials is essential for long-lasting durability:
| Material | Durability | Maintenance |
|---|---|---|
| Solid Wood | Very Durable | Minimal |
| Plywood | Moderately Durable | Easy Wipe Down |
| MDF (Medium-Density Fiberboard) | Less Durable | Careful use recommended |
Additional Resources
For more detailed tutorials and design inspiration, visit these sites:
By following these maintenance and decorating tips, you can ensure your DIY Wooden Bunk Bed project not only lasts for years but also remains a delightful centerpiece in your child’s room.
Conclusion
Building a DIY Wooden Bunk Bed is not just a project; it’s an opportunity to infuse creativity and functionality into your space. With the step-by-step guide provided, you are equipped with the knowledge to embark on this rewarding venture. Gather your essential tools and materials to ensure a smooth construction process; remember, the right equipment makes all the difference. Prioritize safety throughout each stage of building. Taking precautions such as reinforcing railings and ensuring a sturdy design will keep your bunk bed safe for everyone.
Don’t forget that personalization is key. Whether you want a classic look or a playful theme, there are endless creative design ideas to explore. Adding a splash of color or integrating storage solutions can elevate your bunk bed from simple to spectacular.
After construction, maintaining the bed is crucial. Regular checks for wear and tear will prolong its life and ensure that it remains a central part of your home. Decorative touches can also help transform your bunk bed into a cozy haven for sleep and play, allowing you to express your style.
By taking the plunge into this DIY Wooden Bunk Bed project, you not only create a functional furniture piece but also a unique space that echoes your personality. Enjoy the process, unleash your creativity, and take pride in what you have built. Engaging in such projects enriches your skills and creates cherished memories for years to come.