
Creating your own DIY Wooden Headboard with Integrated Lights is a fun and rewarding project. To start, gather your materials. Here’s a list of what you’ll need:
- Wood panels (choose your preferred type, such as pine or plywood)
- Wood screws
- LED strip lights (available at any hardware or lighting store)
- Plywood for the back support
- Wood stain or paint (depending on the desired finish)
- Sandpaper
- Drill and drill bits
- Measuring tape
- Level
- Paint or varnish brush
- Wire or electrical tape
Determine Dimensions
Before cutting your wood, think about the dimensions of your headboard. Measure your bed width to ensure a perfect fit. A standard queen bed is 60 inches wide and a king is 76 inches. Aim for a height that suits your style—anything between 48 to 60 inches is typical.
Cut the Wood to Size
Using your saw, cut the wood panels according to your measured dimensions. You can choose a sleek rectangular shape or get creative with a shaped design. Make sure to cut the back support plywood as well, which will be the anchor for the headboard.
Sanding and Finishing
Smooth down the edges and surfaces of your cut wood with sandpaper. This will make your headboard safe to touch and enhance its overall appearance. Once sanded, you can apply wood stain or paint to match your bedroom décor. Apply at least two coats for a rich finish, allowing it to dry completely each time.
Installing the LED Strip Lights
To create an inviting atmosphere, integrating lights into your headboard is key. Use LED strip lights for an easy installation. For a glow effect, you can place the strips along the back edges of the headboard, where they will shine against the wall.
Wiring the Lights
Follow the manufacturer’s guidelines to connect the lights properly. Ensure you have access to a power source or battery pack. Tuck any excess wiring neatly behind the headboard to keep it looking clean and tidy.
Assembling the Headboard
With all the components ready, it’s time to put everything together. Start by securing the back support plywood to the wall using screws and anchors for safety. Then, attach the headboard wood panels to the back support using screws. It’s best to use a level to ensure your headboard is straight.
Final Touches
After assembling, double-check that the LED lights work properly. Make sure to securely fasten any loose wires using wire tape. You can enhance the look by adding decorative elements, such as pictures or wall art, above the headboard.
Safety Considerations
When working with electricity, ensure that your connections are secure and insulated. Avoid overloading circuits and check with a professional if you’re unsure. If you want to delve deeper into safety tips, check out Electrical Safety First.
Creative Ideas for Customizing Your Wooden Headboard
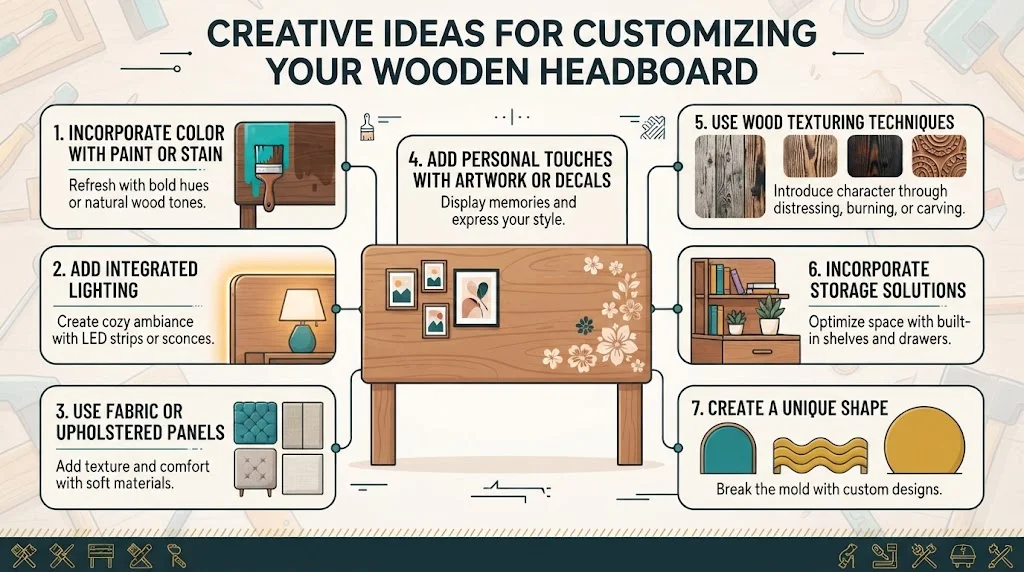
Enhancing your living space can be both fun and rewarding, especially when it comes to customizing a wooden headboard. With creativity and the right tools, you can transform a simple wooden headboard into a unique masterpiece that reflects your personality. Here are some inspiring ideas to get you started on your DIY Wooden Headboard with Integrated Lights project.
Incorporate Color with Paint or Stain
One of the easiest ways to customize your wooden headboard is by adding color. You can choose to paint it in a bold hue or opt for a more subtle stain to bring out the natural grain of the wood. Here’s how to do it:
- Choose Your Color: Think about what colors complement your bedroom’s decor.
- Prep the Surface: Sand the wood to create a smooth surface for painting.
- Apply Paint or Stain: Use brushes or rollers for an even finish.
- Seal It: Finish with a protective coat to ensure durability.
Add Integrated Lighting
One creative and functional addition to your wooden headboard is integrated lighting. Soft LED lights can create a cozy atmosphere in your bedroom. Follow these steps to install lights:
- Choose Your Lights: Select LED strip lights or wall sconces that match your design aesthetic.
- Positioning: Decide where you want the lights to be—mounted on the headboard or embedded within it.
- Wiring: If you’re handy, conceal the wiring behind the headboard for a clean look.
Use Fabric or Upholstered Panels
To give your headboard a plush, luxurious feel, consider adding fabric or upholstered panels. This can be a great way to soften the look of a wooden headboard. Here’s how:
- Choose Your Fabric: Select a fabric that complements your decor. Velvet, linen, or cotton can work beautifully.
- Cut Panels: Create fabric panels to fit the dimensions of your headboard.
- Attach Fabric: Use a staple gun to secure the fabric tightly to the back of the headboard.
Add Personal Touches with Artwork or Decals
Another fun way to personalize your wooden headboard is by incorporating artwork or decals. This idea offers endless possibilities:
- Wall Decals: Easy to apply, wall decals can add a whimsical touch.
- Framed Art: Hang small pieces of art directly above or mount them onto the headboard.
- Photographs: Create a unique gallery with framed photographs that reflect your memories.
Use Wood Texturing Techniques
Textures can create visual interest. Consider these wood texturing techniques:
- Distressing: Use special tools to give your headboard a vintage look.
- Burning: A technique called shou sugi ban gives the wood a beautiful charred finish.
- Carving: Add designs or patterns by hand or with power tools for a bespoke look.
Incorporate Storage Solutions
Maximize your space by integrating storage into your headboard design. Storage options can include:
- Built-in Shelves: Use shelves on either side for books or decorative items.
- Drawers: Include drawers at the base for additional storage.
Create a Unique Shape
The standard rectangular shape of headboards can be enhanced significantly. Consider designing your headboard in shapes like:
- Arched: An arched design can add a touch of elegance.
- Round: A circular design can create a modern vibe.
Choosing the Right Materials for Your DIY Headboard Project
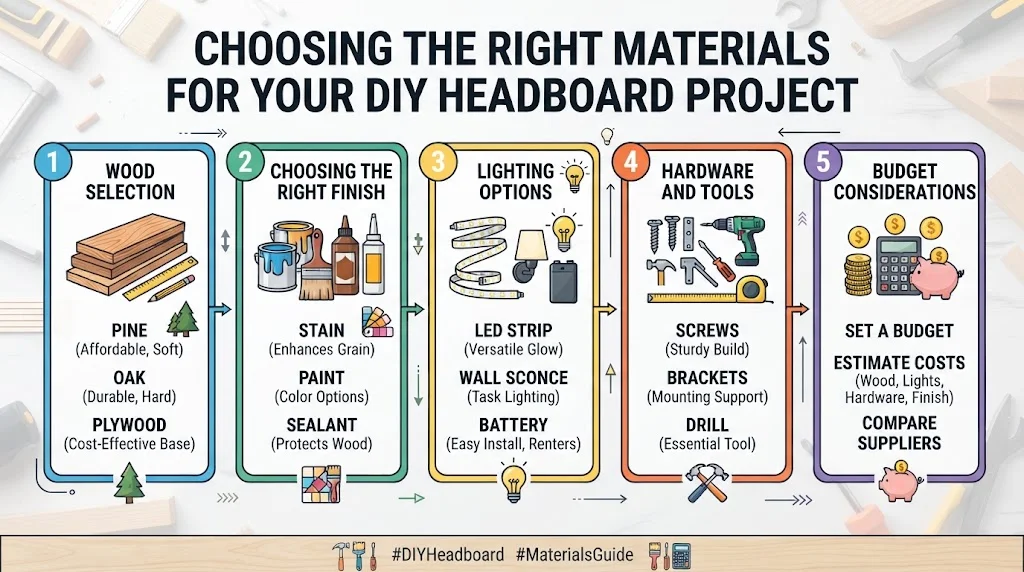
Creating a DIY Wooden Headboard with Integrated Lights can be an exciting and rewarding project. The right materials are crucial for both the aesthetics and functionality of your headboard. Here’s a guide to help you choose wisely.
Wood Selection
The type of wood you select will influence the overall look and sturdiness of your headboard. Common choices include:
- Pine: This is a softwood that is easy to work with, making it ideal for beginners. It’s affordable and readily available at most hardware stores.
- Oak: A durable hardwood, oak provides a beautiful grain and superior strength. It’s more expensive but worth the investment if longevity is a priority.
- Maple: Another hardwood, maple has a fine texture and a light finish that can add a fresh look to your space.
- Plywood: If you’re looking for a cost-effective solution, high-quality plywood can give you the right look without breaking the bank.
Choosing the Right Finish
The finish you apply can greatly enhance the appearance of your headboard. Here are some finishes to consider:
- Stain: A wood stain will enhance the natural grain and color of the wood. Choose lighter stains for a contemporary feel or dark stains for a classic look.
- Paint: If you want to add a pop of color or go with a specific theme, paint is a flexible option. Ensure you use a primer for better adhesion.
- Sealant: To protect your headboard from scratches and moisture, apply a clear sealant over the stain or paint. This will prolong its life and keep it looking fresh.
Lighting Options
Integrating lights into your headboard elevates it from a simple piece to a functional design element. Here are some suitable lighting options:
- LED Strip Lights: These are versatile, energy-efficient, and easy to install. They come in various colors and can be attached directly to the wood.
- Wall Sconces: If you prefer a more traditional style, consider adding wall sconces to your headboard. They provide excellent task lighting for reading.
- Battery-Operated Lights: Ideal for renters or those not wanting to deal with wiring, these lights can be attached easily to the headboard.
Hardware and Tools
Your DIY project will also require some important hardware and tools to ensure everything comes together smoothly:
| Item | Description |
|---|---|
| Screws | Use wood screws that are appropriate for the thickness of your wood. This ensures a sturdy construction. |
| Brackets | These can help support the weight of your headboard, especially if you plan to integrate heavy lights. |
| Plywood Base | Use a sturdy base to mount your headboard elements. Plywood can provide a solid structure. |
| Drill | A drill is essential for making pilot holes for screws, especially in hardwood. |
Budget Considerations
It’s important to set a budget before starting your project. Here’s a rough estimate of what you might expect to spend:
- Wood: $50-$150 depending on type and quantity
- Lighting: $20-$100 depending on style
- Hardware: $10-$50 for screws, brackets, and other materials
- Finishing Supplies: $15-$50 for stains, paints, and sealants
For more detailed plans and inspiration, consider visiting Better Homes & Gardens and DIY Network. These resources offer extensive guides and creative ideas that can help you throughout your project.
Selecting the right materials for your DIY Wooden Headboard with Integrated Lights is essential for achieving a beautiful and functional piece. By carefully considering your wood, finishes, lighting options, hardware, and budget, you’ll create a stunning focal point for your bedroom.
The Benefits of Adding Integrated Lighting to Your Bedroom Design
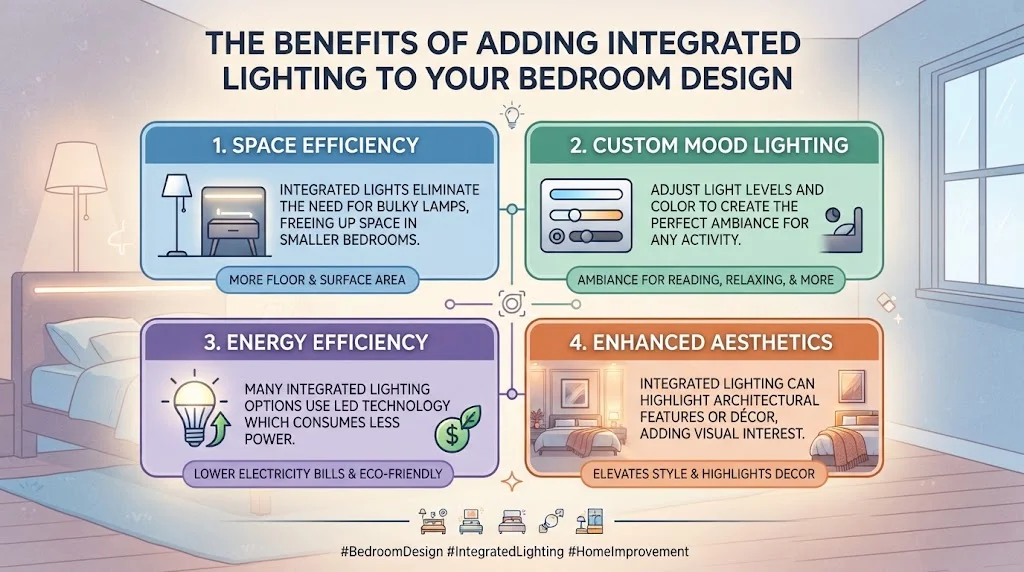
Your bedroom isn’t just a place to sleep; it’s a sanctuary where you unwind and recharge. Integrated lighting can enhance the functionality and aesthetic appeal of this personal space. By incorporating lights into your bedroom design, you create a welcoming atmosphere that balances both style and practicality.
Customizable environment
One of the main benefits of integrated lighting is its ability to provide a customizable environment. You can easily adjust the light intensity and color to suit your mood or activity. Whether you’re curling up with a book, enjoying a lazy morning, or getting ready for a night out, you can tailor the lighting to perfectly match your needs. This flexibility transforms your room from a basic sleeping area into a versatile space that adapts to your lifestyle.
Space saver
Integrated lighting serves as a space saver as well. Traditional table lamps and floor lamps can take up valuable space, especially in smaller rooms. By incorporating lights into the headboard design or ceiling fixtures, you free up surface area while still enjoying effective illumination. This is particularly beneficial in bedrooms with limited square footage, where every inch counts. In this way, DIY projects, like a DIY Wooden Headboard with Integrated Lights, can offer both beauty and function.
| Benefit | Description |
|---|---|
| Space Efficiency | Integrated lights eliminate the need for bulky lamps, freeing up space in smaller bedrooms. |
| Custom Mood Lighting | Adjust light levels and color to create the perfect ambiance for any activity. |
| Energy Efficiency | Many integrated lighting options use LED technology which consumes less power. |
| Enhanced Aesthetics | Integrated lighting can highlight architectural features or décor, adding visual interest. |
Energy efficiency
Energy efficiency is another significant advantage. Many modern integrated lighting solutions utilize LED bulbs, which use less energy than traditional incandescent lights. This feature helps you save money on your electricity bill while also being friendlier to the environment. As consumers globally become more eco-conscious, finding ways to incorporate energy-efficient options in your home becomes increasingly important.
Improve the overall aesthetics
They also improve the overall aesthetics of the room. Soft, diffused lighting creates a warm, inviting atmosphere, while targeted task lighting can draw attention to specific features in the room, such as artwork or your favorite readings. Installing integrated lights above, around, or within furniture creates a contemporary look that can elevate the style of your bedroom significantly.
Safety
Safety should also be a primary consideration when designing your bedroom. Utilizing integrated lighting reduces the chances of accidents in poorly lit areas. Having lights that illuminate pathways or specific areas, such as near the bed or closet, helps you navigate your space comfortably, especially at night. This is particularly useful for children and the elderly, ensuring everyone enjoys a safe environment.
Various types available
When planning your integrated lighting, consider the various types available. Recessed lights provide a sleek appearance, while wall sconces can add a touch of elegance. Additionally, taping LED strips along the back of a headboard or underneath a bed frame can create a beautiful glow that enhances your room’s atmosphere. To gain more inspiration and see how integrated lighting can fit into your design, visit sites like Ohio Times for creative ideas and practical advice.
Integrated lighting
The versatility of integrated lighting is second to none, being suitable for various decor styles, from modern to rustic. No matter your aesthetic preference, you can find options that seamlessly blend with your bedroom’s overall look. As you plan your lighting design, keep your personal style and functional needs foremost in mind.
Integrated lights into your bedroom design presents numerous benefits ranging from enhanced aesthetics to improved safety and energy efficiency. As you start your project, consider the various lighting solutions available to create a bedside retreat you will love for years to come. Your bedroom should be a haven, and thoughtful integrated lighting can help you achieve that ambiance.
Tips for Ensuring Safety and Functionality in DIY Lighting Projects
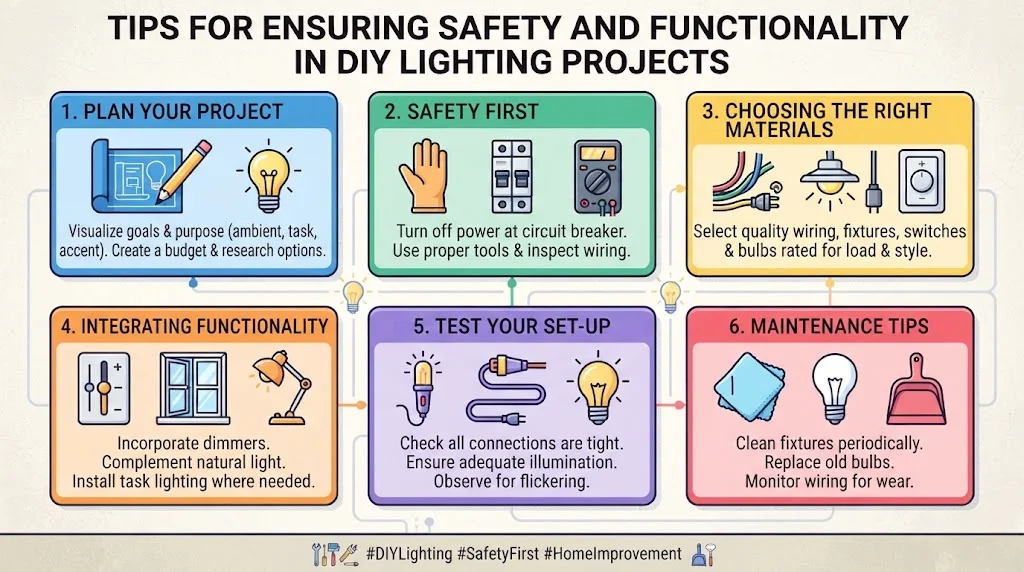
Undertaking DIY lighting projects can be an exciting way to customize your living space, but ensuring safety and functionality is paramount. Here are some key tips to keep in mind while working on these projects.
Plan Your Project
Start by visualizing how you want your space to look and function. Consider the purpose of your lighting—are you aiming for ambient, task, or accent lighting? A well-thought-out plan can help you avoid common pitfalls.
- Identify Your Needs: List specific areas that need lighting and decide on appropriate types of fixtures.
- Create a Budget: Determine how much you are willing to spend and allocate resources accordingly.
- Research Options: Explore various lighting styles and technologies. Websites like Lighting Direct can provide you with ideas and options.
Safety First
Your safety should always come first during DIY lighting projects. Follow these safety guidelines:
- Turn Off Power: Before starting any electrical work, ensure that the power is shut off at the circuit breaker.
- Use Proper Tools: Equip yourself with the right tools. A multimeter can help check for electricity, while wire strippers and screwdrivers are essential for installation.
- Inspect Wiring: Ensure that all wiring is in good condition. Damaged wires should be replaced to prevent electrical fires.
- Work in Dry Conditions: Avoid working in wet areas, as moisture increases the risk of electrical shock.
Choosing the Right Materials
Selecting quality materials is essential for both safety and aesthetics. Consider the following when purchasing materials:
| Material | Considerations |
|---|---|
| Wiring | Use wires rated for the appropriate voltage and gauge that can carry the load without overheating. |
| Light Fixtures | Choose fixtures that match your chosen style and are compatible with your light bulbs and wattage. |
| Switches and Dimmers | Select switches that can handle the electrical load and are suitable for the lights you are using. |
Integrating Functionality
Once you have your design and materials ready, focus on how to make your lighting functional. Here are some strategies:
- Use Dimmers: Installing dimmer switches allows you to control brightness levels, enhancing mood and atmosphere.
- Plan for Natural Light: Arrange your lighting to complement natural light sources in your space.
- Install Task Lighting: For areas such as kitchens or offices, ensure that you have adequate task lighting to avoid eye strain.
- Consider Integrated Lighting: For projects like a DIY Wooden Headboard with Integrated Lights, plan the layout carefully to optimize both style and functionality.
Test Your Set-Up
Before finalizing your project, conduct a thorough test of the lighting setup:
- Check Connections: Ensure all connections are tight and secure to prevent any electrical hazards.
- Inspect Light Quality: Turn on your lights and assess whether they provide adequate illumination for your intended use.
- Observe for Flickering: Flickering lights may indicate a problem with the fixture or wiring, so address these issues before using the setup regularly.
Maintenance Tips
Regular maintenance will keep your lighting project looking and functioning well. Consider the following:
- Clean Fixtures: Dust and clean light fixtures periodically to maintain their brightness and aesthetic appeal.
- Check Bulbs: Regularly inspect light bulbs and replace any that are burnt out or dim.
- Monitor Wiring: Keep an eye on the wiring for any signs of wear or damage.
By following these tips, you can create beautiful DIY lighting projects that enhance your home’s style while ensuring a safe and functional outcome. Always follow safety protocols and don’t hesitate to consult a professional if you encounter any challenges.
Conclusion
Creating a DIY Wooden Headboard with Integrated Lights not only enhances the aesthetic appeal of your bedroom but also adds functionality to your space. Throughout this guide, you’ve learned how to design a stunning headboard step-by-step, allowing your creativity to shine. Customizing your headboard can reflect your personal style, whether you opt for a rustic finish or a sleek modern design.
Choosing the right materials is crucial. Selecting durable wood and quality lighting components ensures that your headboard will stand the test of time while providing a warm and inviting glow. Remember the importance of integrating lights thoughtfully, as they can illuminate your space, making it both stylish and practical for reading or relaxing before bed.
Safety is paramount when undertaking a DIY lighting project. By following tips for safe installation, you can enjoy your new headboard with peace of mind. This careful approach not only encourages confidence but also ensures the functionality of your lighting setup, preventing any hazards in your cozy retreat.
As you embark on your DIY Wooden Headboard with Integrated Lights project, remember that the possibilities are endless. Embrace your creativity, prioritize safety, and look forward to enjoying your personalized bedroom haven. A headboard with integrated lights will surely become a focal point, providing both comfort and charm to your space. Take the plunge and start building your dream headboard today—your bedroom transformation awaits!