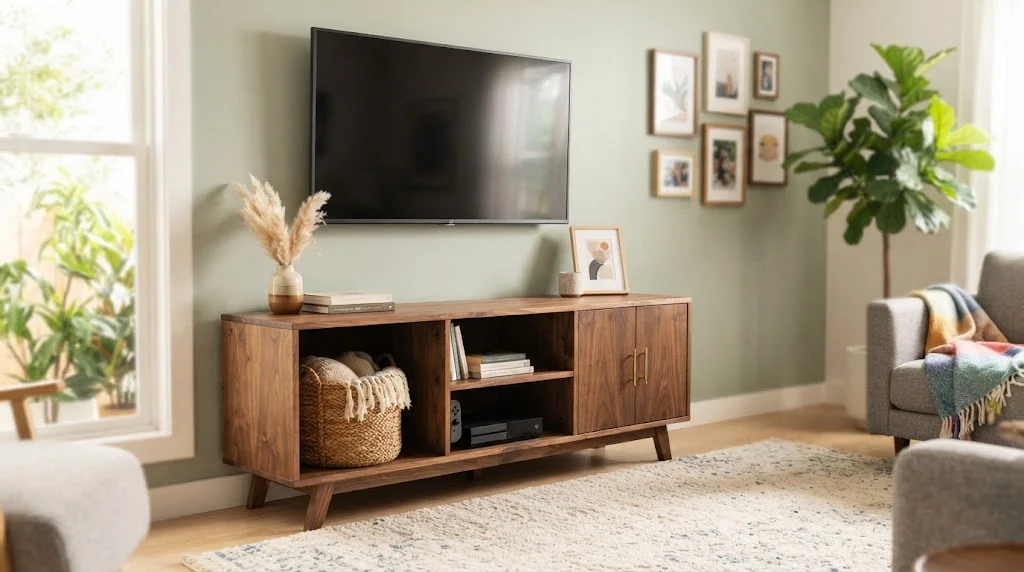
Creating a DIY Wooden TV Stand with Storage can transform your living space while showcasing your personal style. This guide will provide you with a step-by-step process, making it easier for you to craft a functional and attractive piece of furniture. With just a few materials and tools, you can create a beautiful TV stand that meets your needs and fits your style.
Materials Needed
- Wood planks (your choice of hardwood or softwood)
- Wood screws
- Wood glue
- Sandpaper (various grits)
- Wood finish or paint
- Measuring tape
- Power drill
- Saw (circular or miter saw)
- Clamps
Step-by-Step Building Process
Step 1: Measure Your Space
Begin by measuring the space where you plan to place your TV stand. Consider not only the width of your TV but also the height and any additional items you want to store. A common height for a TV stand is around 24 to 30 inches, allowing for comfortable viewing.
Step 2: Plan Your Design
Sketch a simple design for your TV stand. Include dimensions for the top surface, shelves, and any compartments for storage. Make sure to think about how you want to arrange items like gaming consoles, cables, and DVDs.
Step 3: Cut the Wood
Using your saw, cut the wood planks according to your design. You will usually need several pieces for the top, sides, shelves, and back panel. Always double-check your measurements to avoid errors.
Step 4: Sand the Edges
After cutting the wood, sand any rough edges to ensure a smooth finish. Start with a coarser grit and progress to finer grits to achieve a polished look. Sanding is essential for both aesthetics and safety.
Step 5: Assemble the Stand
Begin assembling the pieces of your TV stand. Start by attaching the sides to the top piece using wood screws and wood glue. Make sure everything is level as you work. If your design includes shelves, be sure to measure suitable heights between them. Use clamps to hold everything in place while the glue dries.
Step 6: Add Back Panel and Storage Features
If your design calls for a back panel, attach it now. This adds stability to the stand and can also hide unsightly cables. You can also include drawer slides or hinge hardware here if you’re planning for storage compartments. Remember to measure carefully to ensure proper fit.
Step 7: Finish Your Stand
Once assembled, it’s time to apply your finish. Whether you choose a stain, paint, or clear coat, this step enhances the beauty of the wood and protects it from wear and tear. Allow the finish to dry completely before using the stand.
Step 8: Place Your TV and Accessories
Carefully place your TV on the stand and organize your devices within the storage areas. Keep cables tidy and out of sight with cable ties or management solutions to create a clean and organized look.
Tips for Success
- Consider adding a few decorative elements like plants or framed photos on top of your TV stand to personalize your space.
- Always wear safety gear while working with power tools to prevent injuries.
- If you’re new to woodworking, consider practicing on scraps before cutting your final pieces.
Building your own DIY Wooden TV Stand with Storage can be a rewarding project. Not only will you save money, but you’ll also have a unique piece that reflects your style. For more woodworking tutorials and ideas, explore Wood Magazine for expert advice and designs.
Essential Tools and Materials for Your DIY TV Stand Project
Creating a DIY Wooden TV Stand with Storage is a rewarding project that can elevate your living space while providing essential functionality. To get started, it’s crucial to have the right tools and materials. Below, we explore the key tools and materials you will need to ensure your project runs smoothly from start to finish.
Essential Tools
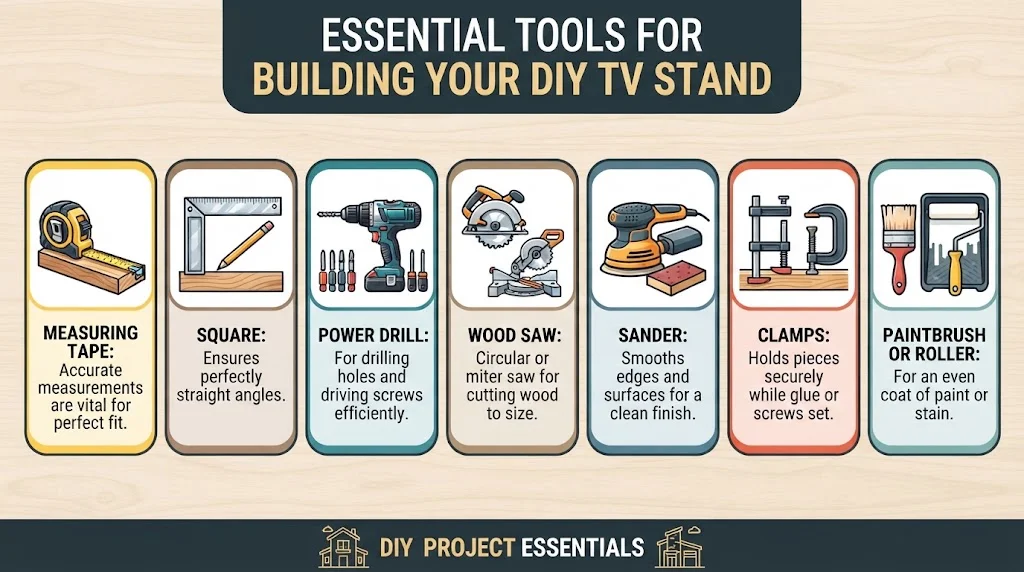
Utilizing the right tools can greatly impact the quality and efficiency of your DIY project. Here’s a list of essential tools required for building your TV stand:
- Measuring Tape: Accurate measurements are vital. A measuring tape will help you ensure that all parts of your stand fit perfectly together.
- Square: A carpenter’s square is essential for making sure your angles are straight, leading to a professional look.
- Power Drill: A power drill will be used for drilling holes and driving screws. It’s a time-saver compared to manual options.
- Wood Saw: Depending on your design, you may need a circular saw or a miter saw for cutting your wood to size.
- Sander: A power sander or sandpaper will help smooth the edges and surface of the wood for a clean finish.
- Clamps: Using clamps is a smart way to hold everything in place while the glue or screws set.
- Paintbrush or Roller: If you choose to paint or stain your stand, having a brush or roller will help you get an even coat.
Necessary Materials
Alongside tools, having the right materials is just as important. Below is a list of essential materials for your wooden TV stand project:
- Wood Boards: Choose between plywood, solid wood, or MDF. Plywood is economical, while solid wood provides a lovely finish.
- Wood Glue: Good quality wood glue will help in securing joints that are not screwed.
- Screws: Use screws for added strength, especially in load-bearing areas. Select wood screws that are appropriate for your wood thickness.
- Stain or Paint: Pick a color or finish that matches your decor. Stains can highlight wood grain while paint provides full coverage.
- Varnish or Sealant: A protective layer will keep your TV stand looking great for years to come.
- Hardware: This includes hinges, handles, and drawer slides if your design incorporates storage features.
Safety Gear
Don’t forget safety while working on your DIY project. This ensures a smooth process without any accidents. Here are some key safety tools:
- Safety Goggles: Protect your eyes from dust and debris.
- Dust Mask: Handle sawdust and fumes from paints or stains safely.
- Ear Protection: Use earplugs or earmuffs if you are using loud power tools.
Project Planning
Before diving into your DIY Wooden TV Stand with Storage project, planning is key. Create a detailed sketch or blueprint that outlines dimensions, storage compartments, and overall aesthetics. This ensures that you purchase the right quantities of materials.
Helpful Resources
If you need additional guidance, consider visiting some helpful websites that provide tutorials and design inspiration:
- Ana White – Offers plans and resources for building a variety of furniture, including TV stands.
- Family Handyman – A site rich in DIY tips and practical projects specifically for furniture.
- Wood Magazine – Provides project ideas and project plans for your wooden creations.
With the right tools, materials, and some planning, your DIY Wooden TV Stand with Storage will become a stunning centerpiece in your home. Enjoy the craftsmanship and the satisfaction of creating something uniquely yours!
Creative Design Ideas for Customizing Your Wooden TV Stand
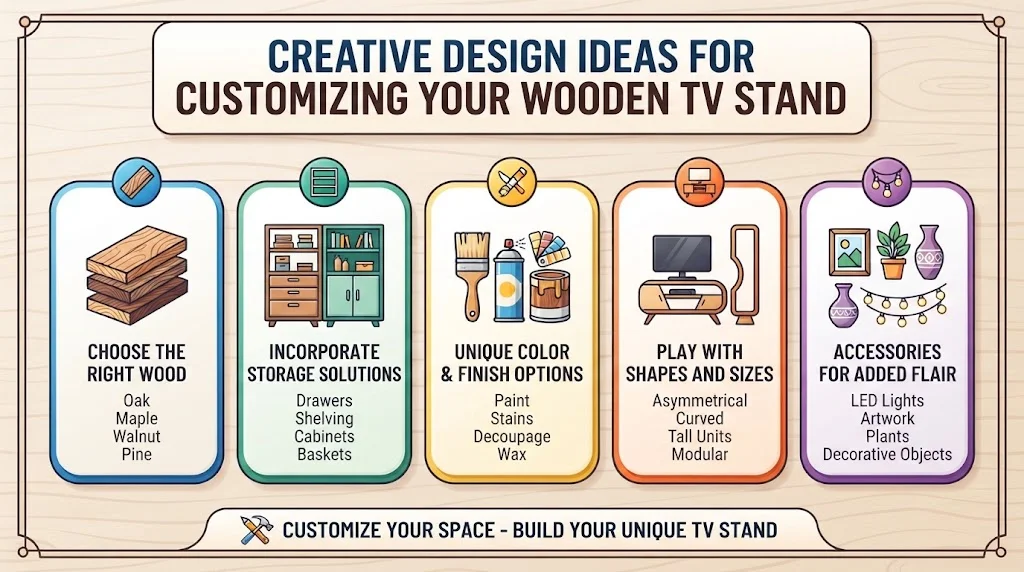
When it comes to furnishing your living room, a custom wooden TV stand can add both style and function. Not only does it accommodate your television, but it also offers an opportunity to infuse creativity and personality into your space. Here are some creative design ideas to help you customize your wooden TV stand, making it a true reflection of your aesthetic.
Choose the Right Wood
Your choice of wood can significantly impact the overall look of your TV stand. Here are a few options you might consider:
- Oak: Durable and perfect for a rustic feel.
- Maple: Light-colored with a smooth finish, ideal for modern decor.
- Walnut: Rich in color, offering a classic and elegant touch.
- Pine: Budget-friendly and versatile, often used for DIY projects.
Choosing the right wood not only affects the appearance but also the longevity of your stand.
Incorporate Storage Solutions
When customizing your wooden TV stand, consider various storage options. Efficient storage can keep your space organized and decluttered. Below are some ideas for integrating storage:
- Drawer Units: Add a few drawers to hide away remotes, chargers, and other accessories.
- Open Shelving: Display your favorite books, plants, or decorative items while keeping essentials handy.
- Cabinets: Sliding or hinged doors can conceal gaming consoles, DVDs, and cables.
- Baskets: Use stylish wicker or fabric baskets on shelves for a cozy, organized look.
Unique Color and Finish Options
The finish of your wooden TV stand can change its entire vibe. Here are some techniques you can apply:
- Paint: A bold color can make your TV stand a centerpiece. Consider hues that complement your room.
- Stain: Enhance the natural beauty of the wood with different stains, from light honey to deep espresso.
- Decoupage: Personalize the surface using fabrics or patterned papers for a unique touch.
- Wax or Oil Finishes: These provide a natural look while protecting the wood.
Play with Shapes and Sizes
Don’t feel restricted to traditional designs. Change the shape and size to suit your needs:
- Asymmetrical Designs: Create a modern look with varying shelf heights and widths.
- Circular or Curvy Shapes: These can soften the lines in your space, contributing to a more welcoming atmosphere.
- Tall Units: If you’re short on floor space, consider vertical designs to maximize storage.
This flexibility allows you to create something functional and tailored to your preferences.
Accessories for Added Flair
Adding the right accessories can elevate the overall appearance of your wooden TV stand:
- LED Strip Lights: Place around the edge to give your stand a modern, illuminated look.
- Artwork: Incorporate framed photos or art pieces above the stand to draw the eye upward.
- Plants: Adding greenery can breathe life into your stand, making it more inviting.
- Decorative Objects: Use vases, sculptures, or books to express your personality.
The beauty of a DIY Wooden TV Stand with Storage lies in its ability to be customized to fit your individual style. For those looking for more inspiration or step-by-step guides on how to create these stunning pieces, you can find valuable resources at Popular Woodworking and Ana White. Utilize these ideas to transform a simple TV stand into a focal point of your living room!
Maximizing Storage Space in Small Living Rooms with DIY Solutions
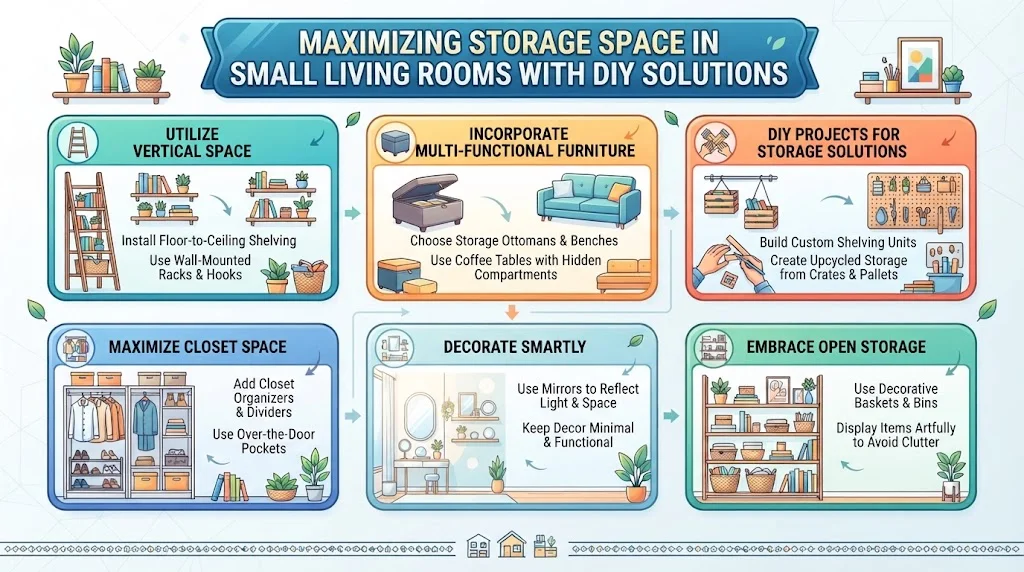
Small living rooms can be a challenge, especially when it comes to maximizing storage space. However, with some creativity and DIY solutions, you can not only optimize your layout but also add a personal touch to your decor. Here are some expert tips and creative ideas to help you capitalize on every bit of available space.
Utilize Vertical Space
One of the most effective ways to maximize storage in a small living room is to go vertical. You can do this by using wall-mounted shelves or cabinets. Here are a few ideas:
- Install floating shelves: These are perfect for displaying books, plants, or decorative items without taking up floor space.
- Use tall bookshelves: They draw the eye upward and provide abundant space for storage.
- Consider a wall-mounted entertainment center: This can combine shelving for books and media storage, freeing up important floor space.
Incorporate Multi-Functional Furniture
Multi-functional furniture is a game changer for small living rooms. Not only does it save space, but it can also help you maintain a tidy environment. Consider the following:
- Storage Ottomans: These can serve as footrests, additional seating, or even side tables while hiding away blankets or magazines.
- Sofa Beds: Perfect for guests, sofa beds bring dual functionality without consuming much space.
- Coffee Tables with Storage: Opt for tables with drawers or compartments to store remote controls, coasters, and games.
DIY Projects for Storage Solutions
Creating your own storage solutions not only allows you to customize your space but can also be budget-friendly. Here are some DIY project ideas:
- DIY Wooden TV Stand with Storage: Build a stylish TV stand with shelves or compartments for storing media, while seamlessly integrating with your living room aesthetic. For detailed guidance on how to create one, visit DIY Network.
- Under-Couch Storage: Build wooden boxes fitted to slide under the couch. This is an ideal spot for less frequently used items.
- Corner Shelves: Construct corner shelving units that can house books, plants, or decorative items without encroaching on available floor space.
Maximize Closet Space
While closets are often overlooked, optimizing their use can dramatically improve storage capacity. Here are a few strategies:
- Use Vertical Organizers: Add shelves or hanging organizers to make the most of vertical space.
- Seasonal Rotate: Store off-season items in bins on higher shelves.
- Door Hooks: Utilize the back of closet doors for extra storage with hooks or shelving units.
Decorate Smartly
Design choices can also influence how spacious your living room feels. Consider these tips:
- Light Colors: Light-colored walls and furniture can make a small room feel larger and more open.
- Mirrors: Strategically placed mirrors reflect light and create an illusion of depth.
- Minimal Accessories: Keep decor simple and organized to avoid a cluttered appearance.
Embrace Open Storage
Open storage is not just a stylish trend; it can also be a practical solution for small spaces. Here are some ideas:
- Open Shelving Units: Use stylish open shelving for books or collectibles that double as decoration.
- Baskets and Bins: Assign specific storage for items that are frequently used and keep them on display in a stylish manner.
Remember, the goal is to blend functionality with aesthetics. By incorporating these DIY tips and maximizing your living room’s storage, you create a more inviting and functional space that suits your style. For more ideas on maximizing small living spaces, check out resources at Apartment Therapy and Houzz.
Finishing Touches: Painting and Staining Your Wooden TV Stand
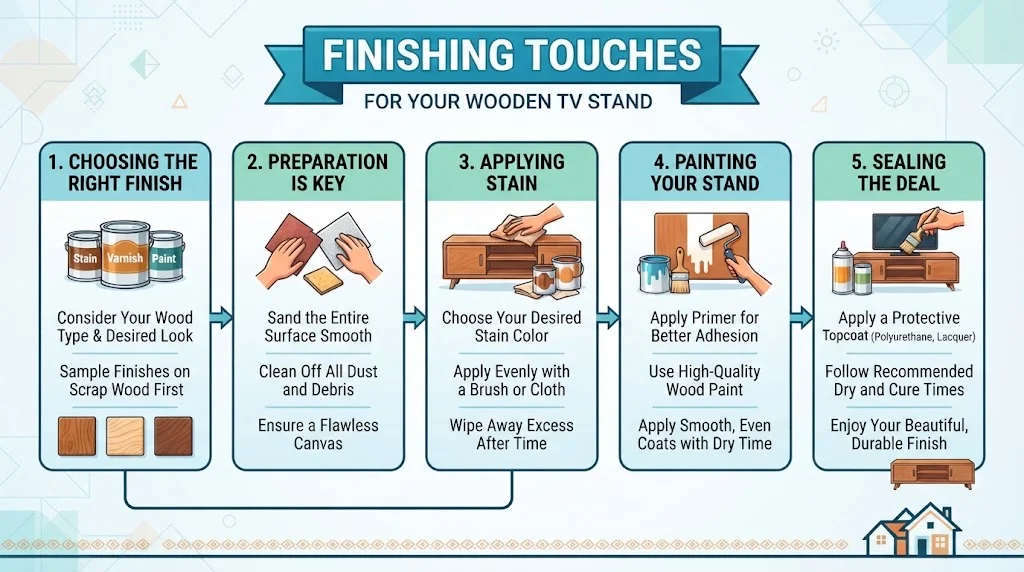
When you create a DIY wooden TV stand, finishing touches like painting and staining can really set your piece apart. Not only do these final steps enhance the look of your stand, they also offer protection against wear and tear. Here’s a guide to help you choose the best methods for painting and staining that beautiful stand you’ve built.
Choosing the Right Finish for Your Wooden TV Stand
Before diving into painting or staining, it’s crucial to choose the right type of finish. Below are the most popular options:
- Paint: Ideal if you want a solid color, paint can hide imperfections and offers a smooth finish. It’s available in various sheens, from matte to gloss.
- Stain: If you want to showcase the natural beauty of the wood, a stain is the way to go. It enhances wood grain while adding color.
- Polyurethane: This protective layer can be added over paint or stain to shield the surface from scratches, spills, and moisture.
Preparation is Key
Proper preparation is essential for achieving a professional-looking finish. Follow these steps:
- Sanding: Start by sanding your wooden TV stand with 120-grit sandpaper. Smooth out any rough spots and ensure a flat surface. Then, switch to a finer 220-grit sandpaper to finish.
- Cleaning: After sanding, wipe down the surface with a damp cloth to remove dust particles. Allow it to dry completely before proceeding.
- Priming (for paint): If you choose to paint your stand, applying a wood primer can help the paint adhere better and enhance the color.
Applying Stain to Your Wooden TV Stand
If you decide to stain your TV stand, here’s how to go about it:
- Choose the Stain: Select a stain that suits your wood type and desired finish. You might want to test it on a scrap piece of wood first.
- Application: Use a foam brush or a lint-free cloth to apply the stain. Work in the direction of the grain, ensuring even coverage. The longer you let the stain sit, the darker the color will be.
- Wipe Off Excess: After applying the stain, wait a few minutes and wipe off any excess with a clean cloth. This prevents blotchiness.
- Let It Dry: Allow the stain to dry for the manufacturer’s recommended time, usually about 24 hours before applying a topcoat.
Painting Your Wooden TV Stand
For those looking to paint, follow these tips for a flawless finish:
- Choose the Right Paint: Opt for acrylic latex paint for easy application and cleanup. If you want a glossy finish, consider an oil-based paint.
- Brush or Spray?: Determine if you’ll use a brush or a spray can. Spraying can give a more uniform finish, while a brush allows for detailed work.
- Apply Multiple Coats: You may need two to three coats of paint for full coverage. Allow each coat to dry according to the instructions on the can.
Sealing the Deal
Whether you stain or paint your wooden TV stand, sealing it is essential. A good seal protects your finish and prolongs the life of your furniture. Consider these sealants:
- Polyurethane: This clear finish offers excellent protection and is available in different sheens.
- Shellac: A natural option that dries quickly and provides a beautiful, warm tone.
To apply the sealant, use a brush or foam applicator, ensuring even coverage. Allow it to dry completely before using your newly finished TV stand.
Resources for Further Learning
For more in-depth guides and tips on woodworking and finishing techniques, visit Wood Magazine or Popular Woodworking. These websites offer a wealth of information that can help refine your skills.
Finishing touches like painting and staining can dramatically enhance your DIY wooden TV stand. With the right techniques and patience, you’ll create a stunning piece that will last for years. Happy crafting!
Conclusion
Building your own DIY Wooden TV Stand with Storage not only enhances your living space but also allows you to express your personal style. By following the step-by-step guide, you can create a sturdy and functional piece that fits your specific needs. Remember to gather the essential tools and materials, as they are key to executing your project seamlessly.
Creative design ideas can truly set your wooden TV stand apart. Whether you prefer a rustic charm or a sleek modern look, the options are endless. Take advantage of the space you have by maximizing storage, especially in smaller living rooms. Clever storage solutions like adjustable shelves and hidden compartments can help keep your area organized and clutter-free.
As you finalize your project, the finishing touches of painting and staining will elevate the overall appearance of your stand. Choosing the right color can complement your décor and create a cohesive look. Don’t forget to allow adequate time for drying and curing, as this will enhance the durability of your finish.
Ultimately, this DIY project can be both rewarding and practical, providing you with a customized TV stand that caters to your storage needs while perfectly fitting your space. So grab those tools and materials, unleash your creativity, and start building your very own wooden TV stand with storage. You’ll enjoy not only a functional piece of furniture but also the pride of having crafted it yourself.