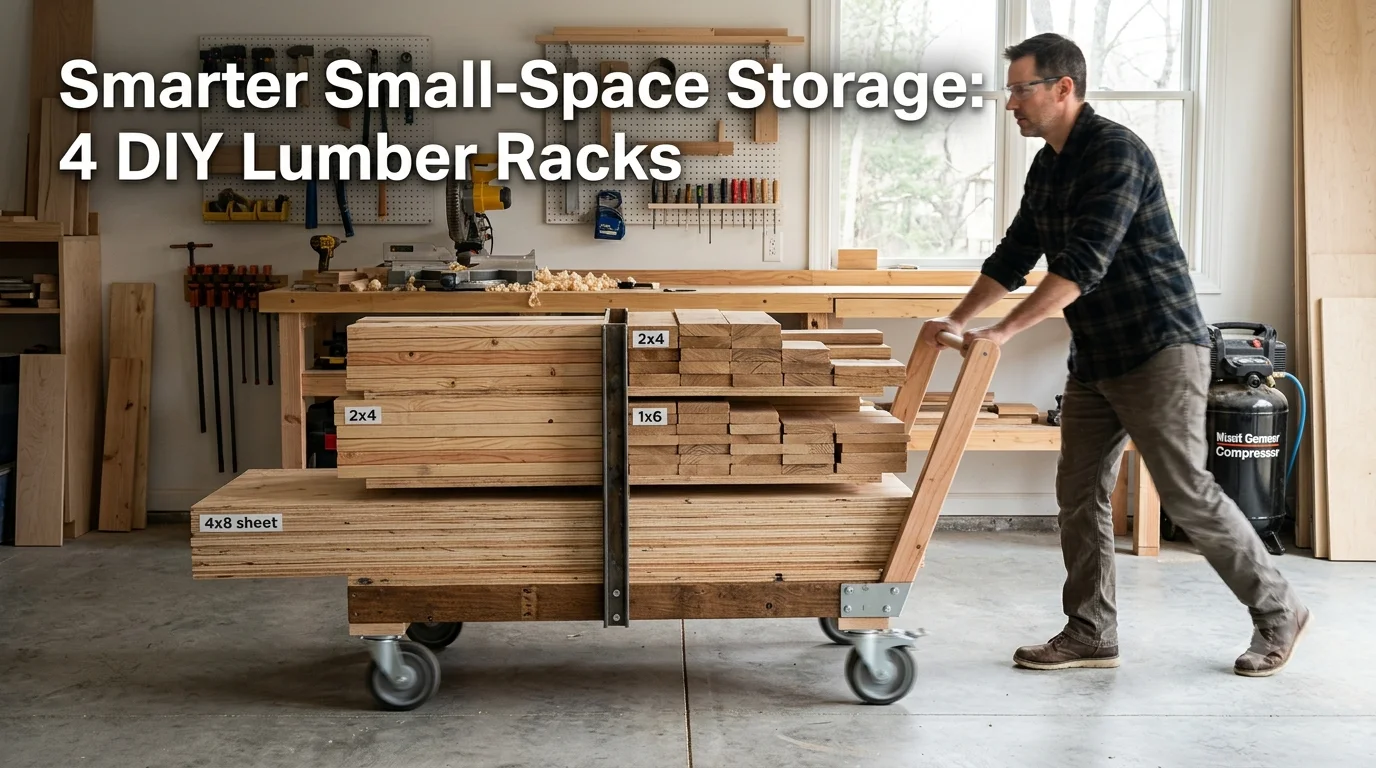
If you’re a DIY enthusiast looking to maximize storage in a compact workspace, a lumber rack is an essential addition. Having a dedicated area for your lumber not only declutters your environment but also keeps your materials easily accessible for future projects. Here are some creative plans for DIY Lumber Rack Plans for Small Spaces that will keep your wood organized and your workshop functional.
Vertical Lumber Racks
When floor space is limited, going vertical is your best option. A vertical lumber rack uses wall space efficiently and can be built using minimal materials.
Materials Needed: 2×4 lumber, wood screws, brackets, and wall anchors.
Steps to Build:
- Cut two vertical 2x4s to your desired height.
- Attach horizontal 2x4s at intervals along the vertical pieces for support.
- Secure the rack to a sturdy wall using brackets and wall anchors for safety.
This style of rack not only holds lumber but can also accommodate other tools or equipment, adding versatility to your workshop.
Lean-To Lumber Rack
A lean-to lumber rack is another efficient option for small spaces. It takes up minimal floor area and leans against a wall, making it ideal for tight spots.
Materials Needed: Plywood or reclaimed wood for the base, 2x4s, screws, and brackets.
Steps to Build:
- Construct a base with plywood that will support the rack.
- Build the back support using 2x4s at a slight angle against the wall.
- Create shelves for the lumber and secure them to the back support.
This design is highly adaptable—it can hold everything from sheets of plywood to small offcuts, making it an excellent storage solution.
Mobile Lumber Rack
A mobile lumber rack can provide even more flexibility in your workspace. With wheels attached, you can easily move it around your workshop as needed.
Materials Needed: 2x4s, plywood, caster wheels, screws, and paint for finishing.
Steps to Build:
- Construct a robust frame using the 2x4s.
- Add a plywood base for stability.
- Attach caster wheels to the bottom corners for portability.
- Finish with paint for aesthetics.
This DIY option allows you to easily adjust your workspace based on current projects, making it perfect for dynamic environments.
Wall-Mounted Lumber Rack
For those who want to conserve even more floor space, a wall-mounted lumber rack can be an ideal solution. This allows you to keep your lumber off the ground while still being easily accessible.
Materials Needed: 1×2 or 2×4 lumber, screws, and wall anchors.
Steps to Build:
- Cut the lumber into appropriate lengths based on the size of your wall.
- Attach the horizontal pieces to the wall at standard intervals.
- Space vertical supports evenly to hold lumber securely.
This type of rack is especially beneficial in extremely compact areas where every inch matters.
Regardless of which DIY lumber rack design you choose, ensure you have all tools and materials ready before starting your project. For detailed plans and additional ideas, consider visiting sites like Wood Magazine and Family Handyman. These resources offer a wealth of knowledge and inspiration for small-space solutions.
Building a lumber rack can be a fulfilling DIY project, providing both practical benefits and enhancing your space’s organization. Remember, it’s not just about storing lumber—it’s about creating a functionally designed area that works for you.
By implementing one of these creative lumber rack plans, you can make the most of your small space while keeping your materials organized and easily accessible. Happy building!
Essential Materials for Building Your Lumber Rack
Building your own lumber rack can significantly enhance your workspace, especially when you’re limited on space. Having a dedicated area for storing lumber not only keeps your workshop organized but also makes it easier to find the materials you need. But before you dive into construction, it’s essential to know what materials you will need to create a sturdy and functional lumber rack.
Key Materials for Your Lumber Rack
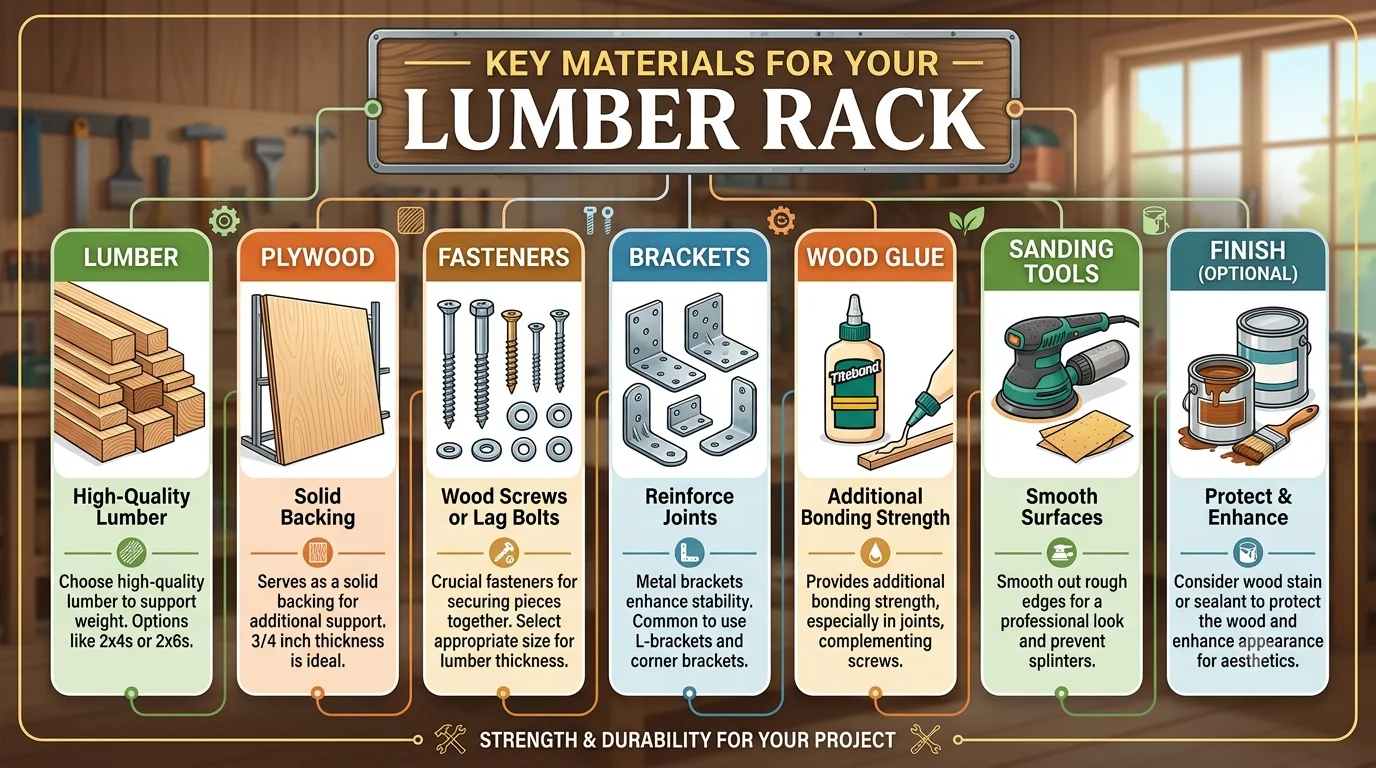
When planning your lumber rack, consider these essential materials that will contribute to its strength and durability:
- Lumber: Choose high-quality lumber that can support the weight of your materials. Common options include dimensional lumber such as 2x4s or 2x6s.
- Plywood: Plywood can serve as a solid backing for your rack, providing additional support. A thickness of 3/4 inch is often ideal.
- Wood Screws or Lag Bolts: These fasteners are crucial for securing the pieces together. Be sure to select screws appropriate for the thickness of your lumber.
- Brackets: Metal brackets can enhance the stability of your rack. L-brackets or corner brackets are commonly used to reinforce joints.
- Wood Glue: While screws offer structural integrity, wood glue adds additional bonding strength, especially in joints.
- Sandpaper or a Sander: Smooth out rough edges and surfaces for a professional look and to prevent splinters.
- Finish (optional): If you like aesthetics, consider a wood stain or sealant to protect the wood and enhance its appearance.
Choosing the Right Lumber
The choice of lumber is critical when building your rack. Here are a few options explained:
| Type of Lumber | Characteristics |
|---|---|
| Softwood (e.g., Pine) | Easy to work with and economical. Suitable for lightweight storage. |
| Hardwood (e.g., Oak) | Extremely durable and heavy. Great for holding heavier materials. |
| Plywood | Versatile and affordable. Useful for shelving or backing support. |
Tools Needed for Construction
In addition to the materials, having the right tools will make the building process smoother. Here is a list of essential tools you will need:
- Circular Saw: Ideal for making quick and accurate cuts.
- Drill/Driver: Essential for driving screws and making pilot holes.
- Measuring Tape: For precise measurements to ensure all pieces fit correctly.
- Level: To make sure your rack is straight and balanced, avoiding any wobbling.
- Clamps: Important for holding pieces together for drilling or screwing.
Where to Purchase Materials
To get started on your lumber rack project, you’ll want to source your materials. Local hardware stores or lumberyards are great places to begin. For convenience, many online retailers have wood supplies as well:
Building a lumber rack can save you space and enhance your work environment. By selecting the right materials and tools, you can create a reliable storage solution that meets your needs while maximizing the efficiency of your small workspace. Don’t forget to plan dimensions based on the available space and the type of lumber you intend to store. Happy building!
Space-Saving Tips for Organizing a Small Workshop
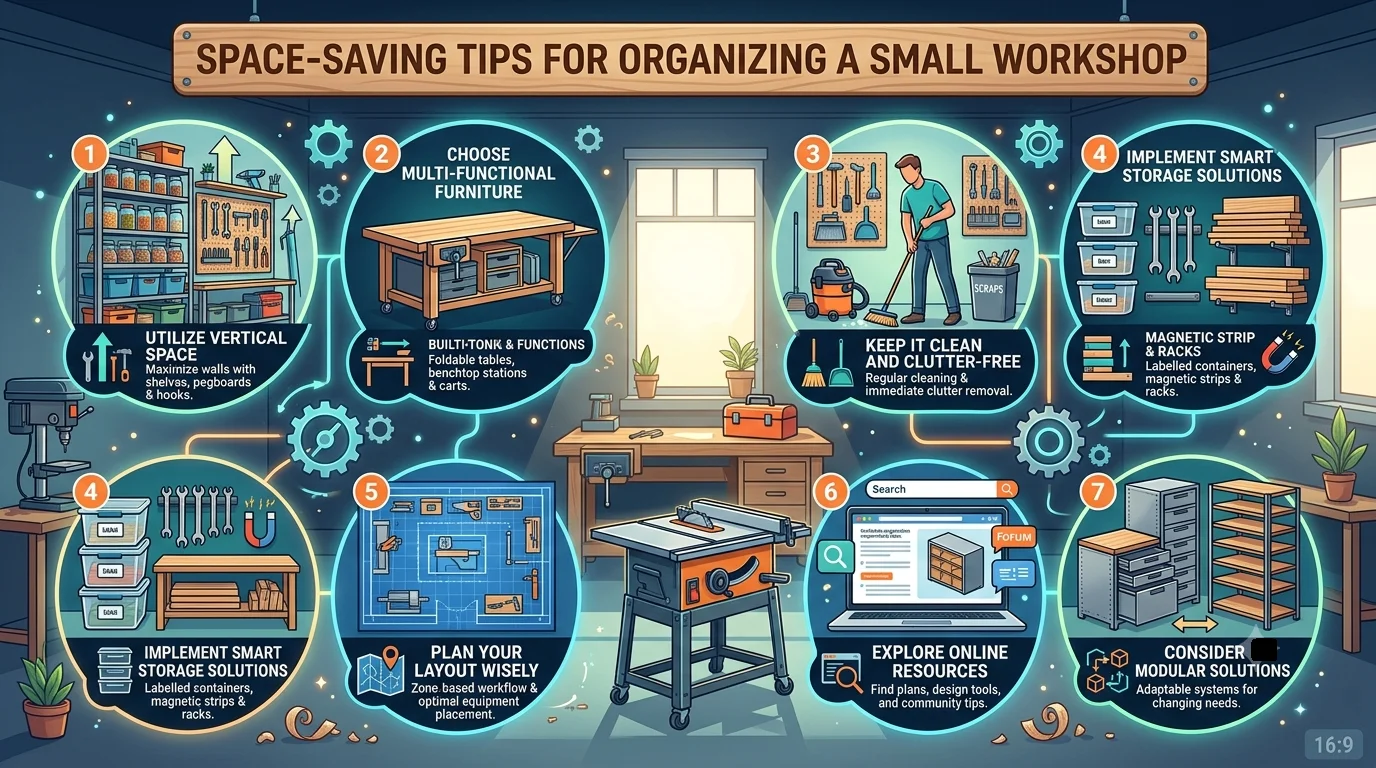
Creating an organized workshop, especially in a small space, can be a rewarding yet challenging task. The good news is that with some creative planning and efficient use of available space, you can maximize both functionality and accessibility. Here are some effective space-saving tips to help you keep your workshop tidy and efficient.
Utilize Vertical Space
One of the most effective ways to save space in your workshop is to make use of vertical surfaces. Shelves, pegboards, and wall-mounted storage solutions are great options. Here are some ideas:
- Wall Shelves: Install sturdy wall shelves to store tools, materials, and even decorative items.
- Pegboards: Hang tools on pegboards to free up counters. This allows easy access while keeping everything organized.
- Overhead Storage: Consider installing overhead racks to store materials like lumber or bulky tools.
Choose Multi-Functional Furniture
Using furniture that serves multiple purposes is a smart way to save space. Look for solutions that can do more than one thing:
- Workbenches with Storage: A workbench that includes drawers or shelves can help keep your tools close while saving floor space.
- Folding Tables: If you need extra work surfaces occasionally, consider sturdy folding tables that you can put away when not in use.
- Chairs with Storage: Some chairs come with hidden storage, which can be great for keeping extra supplies.
Keep It Clean and Clutter-Free
A clean workspace is not only safer but also allows you to work more efficiently. Make it a habit to clear away tools and materials after use. Here are a few practices to maintain cleanliness:
- Daily Clean-Up: Spend a few minutes at the end of each day to tidy up your workshop.
- Designate a Place for Everything: Assign specific spots for all your tools and materials, making them easy to find and return.
- Use Clear Storage Bins: Keep similar items together in labeled bins. This makes it easier to see what you have and reduces clutter.
Implement Smart Storage Solutions
To make the most of limited space, think outside the box when it comes to storage solutions. Consider the following:
- Rolling Tool Carts: A rolling cart can hold frequently-used tools and can be moved wherever you need it.
- Magnetic Strips: Use magnetic strips to store metal tools and hardware on walls without taking up any floor space.
- Storage Crates: Stackable storage crates can help you make use of both vertical and horizontal space simultaneously.
Plan Your Layout Wisely
Efficient workshop layout can enhance your workflow significantly. Keep these tips in mind:
- Workflow Flow: Arrange your tools and supplies in a way that reflects the order of your tasks. This minimizes unnecessary movement.
- Zone Your Workspace: Designate specific areas for different activities like cutting, assembly, and finishing.
Explore Online Resources
Building and organizing your workshop in a small space can sometimes feel overwhelming. Thankfully, there are numerous online platforms that provide plans and inspiration. Websites such as Wood Magazine and Popular Woodworking offer great resources for DIY projects and storage solutions that can maximize your workspace.
Consider Modular Solutions
Modular shelving and workstations allow you to adapt your setup as needed. Well-designed modular units can fit your changing needs without sacrificing space. You can easily expand or rearrange them based on your current projects.
By using these space-saving tips, you can create an organized and efficient workshop that makes the best use of available space. Embrace creativity with your storage solutions and don’t be afraid to experiment with different layouts. Your small workshop can be a functional and enjoyable place to work!
Benefits of Vertical Storage Solutions for Lumber
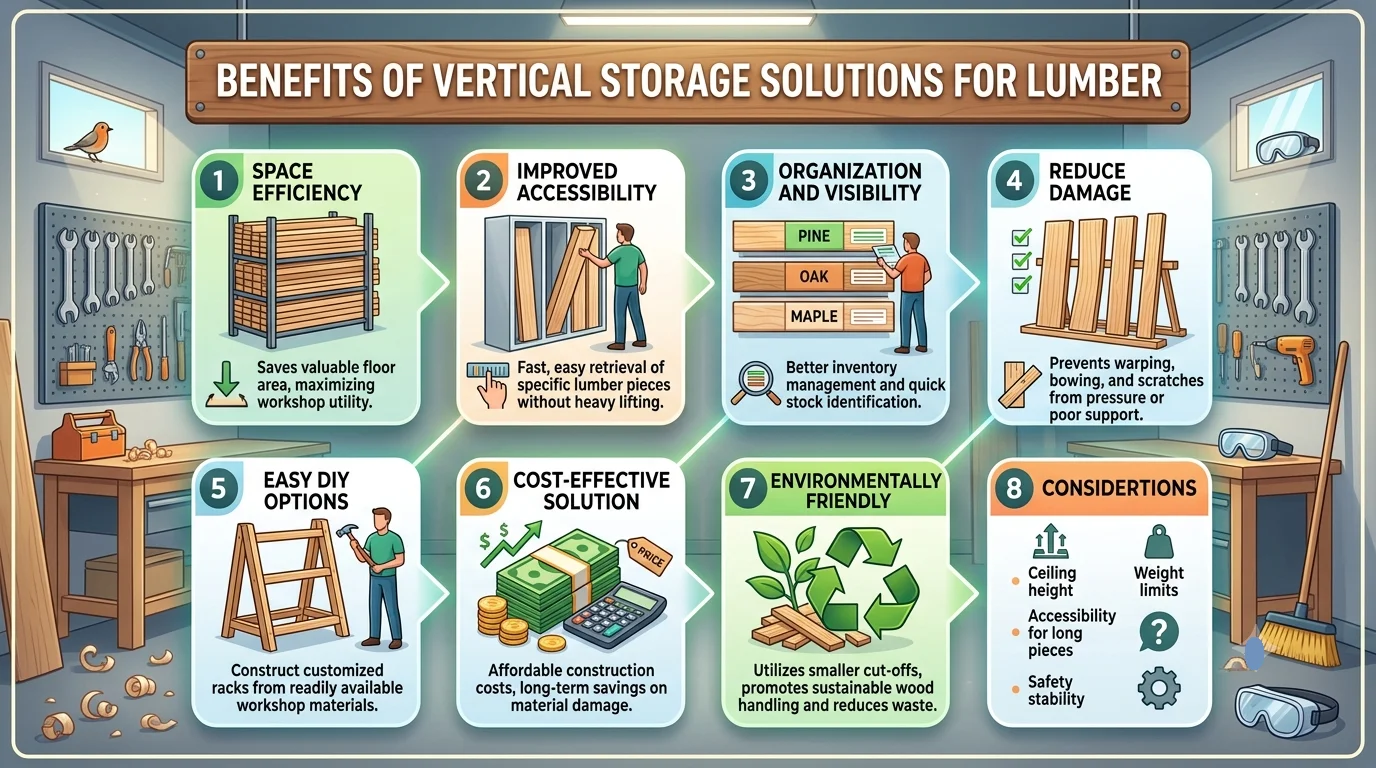
Maximizing space is crucial, especially when working with lumber. Vertical storage solutions offer an efficient way to store your materials without taking up valuable floor space. You can significantly increase your storage capacity by utilizing the vertical dimension of your workspace. Here’s how vertical storage can benefit you.
Space Efficiency
One of the main advantages of vertical storage is its ability to use space efficiently. Instead of spreading lumber across the floor, stacking it upwards saves ground space for other essential items. You can fit more materials into a compact area by standing boards vertically. This approach is especially useful in small workshops or garages where space often comes at a premium.
Improved Accessibility
Another benefit is improved accessibility. Vertical racks allow easier access to your lumber. When stored horizontally, it can be challenging to pull out a piece of lumber from the bottom of a pile. A vertical system enables you to slide out the board you need without disturbing the others, saving you time and effort during your projects.
Organization and Visibility
Vertical storage systems promote better organization. You can categorize your lumber by size, type, or usage. This organization helps you find what you need quickly. Furthermore, having all your materials upright allows you to see what you have at a glance. It reduces the chances of buying unnecessary materials and helps keep your workspace tidy.
Reduce Damage
Storing lumber vertically can help reduce damage. When lumber is stacked horizontally, it may bow or warp due to pressure from other boards. Vertical racks minimize this risk, allowing each piece to rest naturally without unnecessary stress. By preserving the quality of your materials, you save costs and maintain efficiency in your work.
Easy DIY Options
Creating your vertical storage solution can be simple and cost-effective. DIY Lumber Rack Plans for Small Spaces are readily available online. You can customize your rack to suit your specific needs. Here are a few features you might include:
- Adjustable shelves to accommodate different board sizes
- Wall-mounted options to save even more floor space
- Materials made of wood or metal for increased durability
Cost-Effective Solution
Investing in vertical storage racking systems can be a cost-effective solution. Instead of renting a larger space or investing in extensive storage systems, vertical racks provide ample storage at a lower cost. Plus, you can build your system from reclaimed materials or inexpensive supplies, further reducing costs.
Environmentally Friendly
Using vertical space for lumber storage can also be environmentally friendly. By maximizing your workspace and reducing the need for larger storage areas, you minimize your overall footprint. Furthermore, utilizing existing space efficiently can lower the demand for new materials, aligning with sustainable practices.
Considerations
When planning your workshop or storage area, think about how you can employ vertical storage solutions. You can combine practicality with functionality, creating a workspace designed for creativity and efficiency.
Examples of Vertical Storage Designs
Here are a few designs you can explore:
| Design Type | Description | Where to Find Plans |
|---|---|---|
| Wall-Mounted Rack | Utilizes wall space to store lumber vertically. | Wood Magazine |
| Freestanding Rack | Can be placed anywhere in the workshop for optimal storage. | Family Handyman |
| Rolling Rack | Easy to move and access different lumber types. | The Spruce |
Taking advantage of vertical storage solutions not only promotes better organization but also ensures your workspace is optimized for creativity and productivity. By carefully planning and implementing these systems, you can transform your workshop experience.
Safety Considerations When Creating Your DIY Lumber Rack
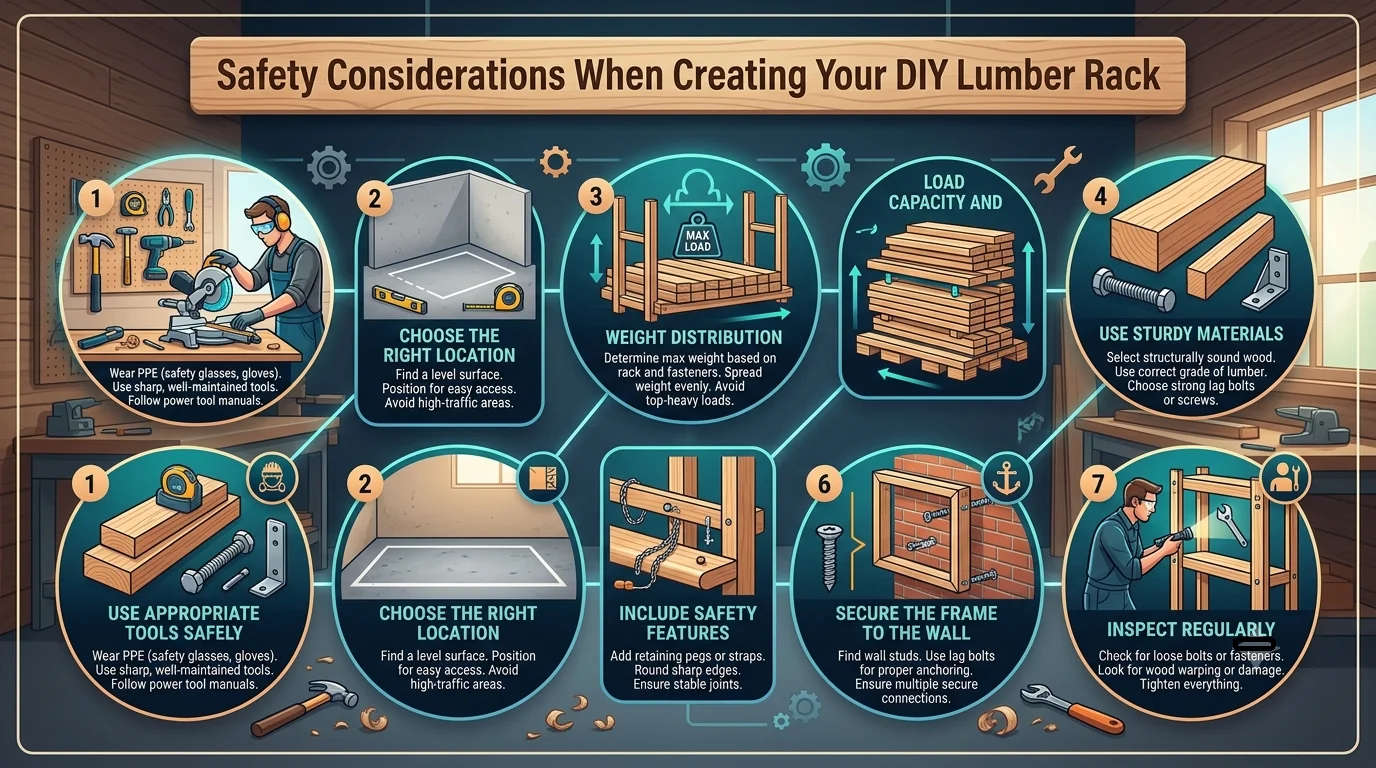
Building a DIY lumber rack is a fantastic way to organize your woodworking space, especially when dealing with limited room. However, safety should always be your top priority during this project. There are essential considerations you should keep in mind to ensure not only your safety but also the durability of the rack you create.
Use Appropriate Tools Safely
Before you begin, make sure you have the right tools for the job. Here are the essentials:
- Measuring Tape
- Power Drill
- Saw (Circular or Miter)
- Level
- Screwdriver
- Sandpaper
Handling power tools can be dangerous if you’re not cautious. Always follow these safety tips:
- Wear safety goggles to protect your eyes from debris.
- Use ear protection if using loud tools like saws.
- Always keep your work area clean to avoid slips and trips.
Choose the Right Location
Finding the correct location for your lumber rack is crucial. Look for a spot that is:
- Stable and away from walking paths to avoid accidents.
- Close to your workspace for easy access while also being out of the way of daily activities.
- Well-ventilated if you’re storing treated lumber, as it can emit fumes.
Load Capacity and Weight Distribution
Designing your lumber rack with weight capacity in mind is vital for safety. Consider the following:
| Rack Type | Typical Load Capacity |
|---|---|
| Horizontal Rack | 100-500 lbs |
| Vertical Rack | Approximately 300 lbs per side |
Make sure to calculate the total weight of the lumber you plan to store. Distributing weight evenly will prevent tipping and ensure stability.
Use Sturdy Materials
When building your rack, it’s crucial to select high-quality materials. Opt for:
- Heavy-duty lumber or metal framing that can support significant weight.
- Galvanized screws and bolts for durability and rust resistance.
- Ensure any brackets or fasteners used are rated for the load you intend to store.
Include Safety Features
Adding specific safety features to your lumber rack can prevent accidents. Consider these options:
- Railings or guardrails, especially when building vertical racks, to prevent lumber from falling.
- Gun racks or brackets that secure the lumber in place.
- Ensure that sharp edges are sanded down to avoid injury.
Secure the Frame to the Wall
Securing your lumber rack to the wall is recommended for added stability. Use sturdy wall anchors and brackets to keep the structure in place. Remember to check that the wall where you’ll attach the rack can support the load, as drywall alone may not be sufficient. For further guidance, check resources like Wood Magazine for tips on weight-bearing wall considerations.
Inspect Regularly
After your DIY lumber rack is complete, it doesn’t end there. Regular inspections are necessary to ensure everything remains secure. Look for:
- Signs of wear and tear, especially on the brackets and screws.
- Any shifting in your lumber or instability in the structure.
- Check the wood for moisture or decay, especially if stored in less than ideal conditions.
By keeping these safety considerations in mind, you can build a DIY lumber rack that not only saves space but also promotes a secure and organized workspace. Remember, safety is paramount when working on any DIY project, and your diligence will lead to a successful build.
For more exciting woodworking ideas and detailed plans for your perfect lumber rack, visit Woodworker’s Source.
Conclusion
Creating a DIY lumber rack for small spaces is not only an exciting project but also a practical solution to maximizing your workshop’s organization. By utilizing creative plans tailored to your specific area, you can design a sturdy and efficient rack that suits your needs. Having the right materials is crucial, so gather essential tools and supplies that ensure your rack will stand the test of time.
In a compact workspace, space-saving tips are key. Implementing vertical storage solutions can greatly enhance your ability to keep your lumber and materials organized, allowing you to utilize floor space effectively. The benefits of having an efficient system in place include easier access to your supplies and the ability to work more comfortably and efficiently.
Safety must remain a top priority throughout your building process. Always wear protective gear and ensure your structure is securely built to avoid potential accidents. By following these guidelines and focusing on a well-thought-out design, your DIY lumber rack will not only enhance your workspace but also make your woodworking projects more enjoyable.
As you embark on this journey, remember that a well-organized workshop contributes to creativity and productivity. Embrace the satisfaction of building your own space-saving solutions, and take pride in the fact that you’ve created an essential tool tailored exclusively for your needs. Happy building!