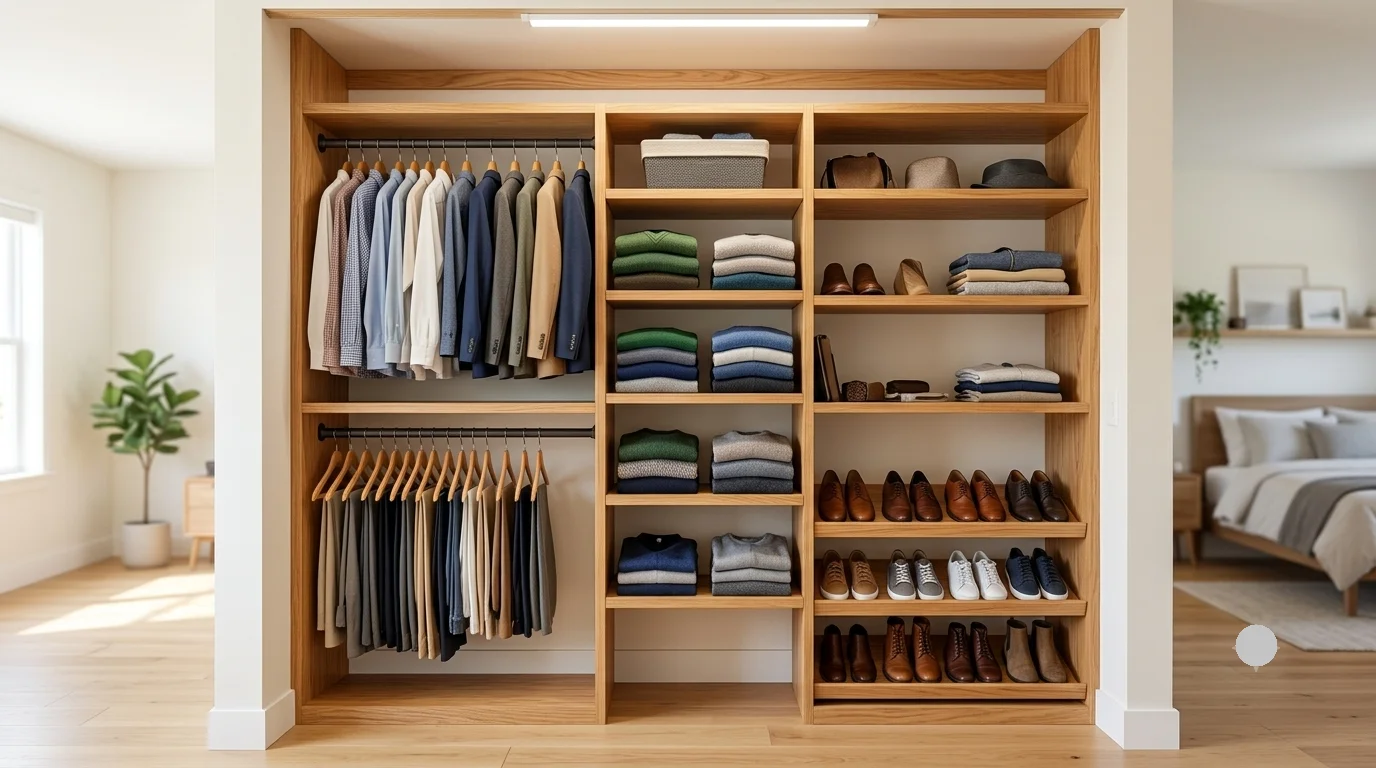
A complete, budget-conscious guide to building a sturdy, custom-fit wood closet system without paying custom-closet prices.
Walk into any closet company’s showroom and you’ll get a beautiful system, a friendly designer, and a quote that can easily run into the thousands of dollars for a single reach-in closet. For most of us, that price tag simply doesn’t match the size of the problem — a closet that’s disorganized, underused, and full of wasted vertical space. The good news is that a genuinely functional, good-looking storage system doesn’t require a custom-closet budget at all. A well-planned DIY closet organizer wood under $100 can solve the exact same problem, using materials you can find at any home center in an afternoon.
The secret isn’t cutting corners on quality — it’s cutting out the overhead. Custom closet companies charge for design consultations, installation labor, and proprietary hardware systems. When you build it yourself, you’re paying only for the raw materials: a few sheets of plywood or MDF, some basic hardware, and a modest amount of hardware-store lumber. The result is a closet system that’s just as sturdy, just as functional, and entirely tailored to how you actually store your clothes — all for less than the cost of a single drawer unit from a big-box closet retailer.
This guide covers everything: how to plan a layout that maximizes your closet’s actual storage potential, exactly which materials keep the project under budget without sacrificing durability, the tools you’ll need, and a full narrative walkthrough of the build itself. By the end, you’ll have a clear, confident plan to transform a chaotic closet into an organized, functional space — without touching four figures.
Why a Wood Closet Organizer Beats Wire Shelving and Prefab Kits
Before diving into the build, it’s worth understanding why wood is such a smart material choice for this project, especially compared to the wire shelving and pre-fab plastic-laminate kits that dominate the budget end of the closet market.
- Far stronger weight capacity — solid wood or plywood shelving supports sweaters, shoes, and folded stacks without the sagging that wire shelving is notorious for over time
- No more wire imprint marks — wire shelving famously leaves ridge marks in sweaters and knitwear; solid wood shelves eliminate this completely
- Fully customizable to your closet’s exact dimensions — unlike prefab kits built around standard modular widths, wood lets you build to the inch, using every corner of an oddly shaped or narrow closet
- A far more finished, built-in look — wood shelving and hanging rods read as an intentional, custom feature of the room rather than an obviously retrofitted storage kit
- Genuinely lower cost at this scale — for a single reach-in closet, raw lumber and plywood is often cheaper than the equivalent-sized prefab laminate kit, especially once you factor in the flexibility to reuse cut-offs across multiple shelves
The result is a system that looks and performs like a built-in, at a price point closer to a weekend hardware store run than a home renovation.
Planning Your Layout: Getting the Most Out of Every Inch
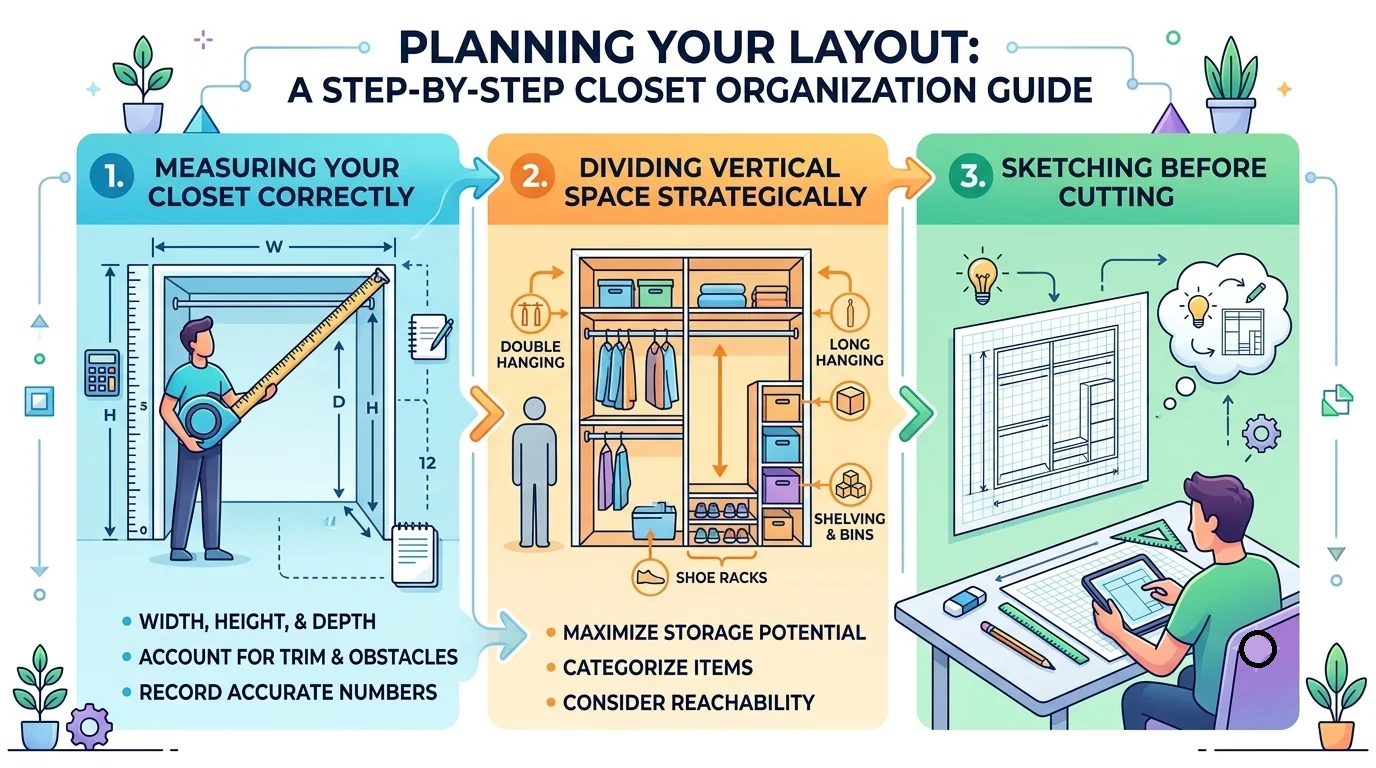
The single biggest factor in whether a DIY closet organizer wood under $100 actually solves your storage problem — or just rearranges the chaos — is the layout planning that happens before any wood gets cut.
Measuring Your Closet Correctly
Start by measuring the full width, depth, and height of your closet interior, along with the exact position of any door swing, light fixture, or trim that might interfere with shelving placement. Note these measurements down to the quarter inch — closets are rarely perfectly square, and a small discrepancy between the back wall and the door-side wall can throw off a shelf that was cut assuming perfect symmetry.
Dividing Vertical Space Strategically
Most closets waste enormous amounts of vertical space, either leaving a single hanging rod with empty air above and below, or stacking too many shelves too close together for anything but folded shirts. A smarter division typically includes:
- A double-hang section — two rods stacked roughly 40 inches apart, ideal for shirts, folded pants, and skirts, doubling your hanging capacity in the same footprint as a single rod
- A long-hang section — a single rod set higher, around 66–72 inches from the floor, for dresses and coats that need full-length clearance
- A shelf tower — vertically stacked shelves spaced 10–14 inches apart, perfect for folded sweaters, shoes, or storage bins
- A top shelf spanning the full width — sitting above the hanging rods, ideal for out-of-season storage bins or luggage
Sketching Before Cutting
Draw your planned layout to scale on graph paper or in a free design tool before finalizing your cut list. This is the cheapest possible way to catch a spacing mistake — far better to erase a pencil line than to discover a shelf is six inches too high once it’s already screwed to the wall.
Keeping the Build Under $100: A Realistic Budget Breakdown
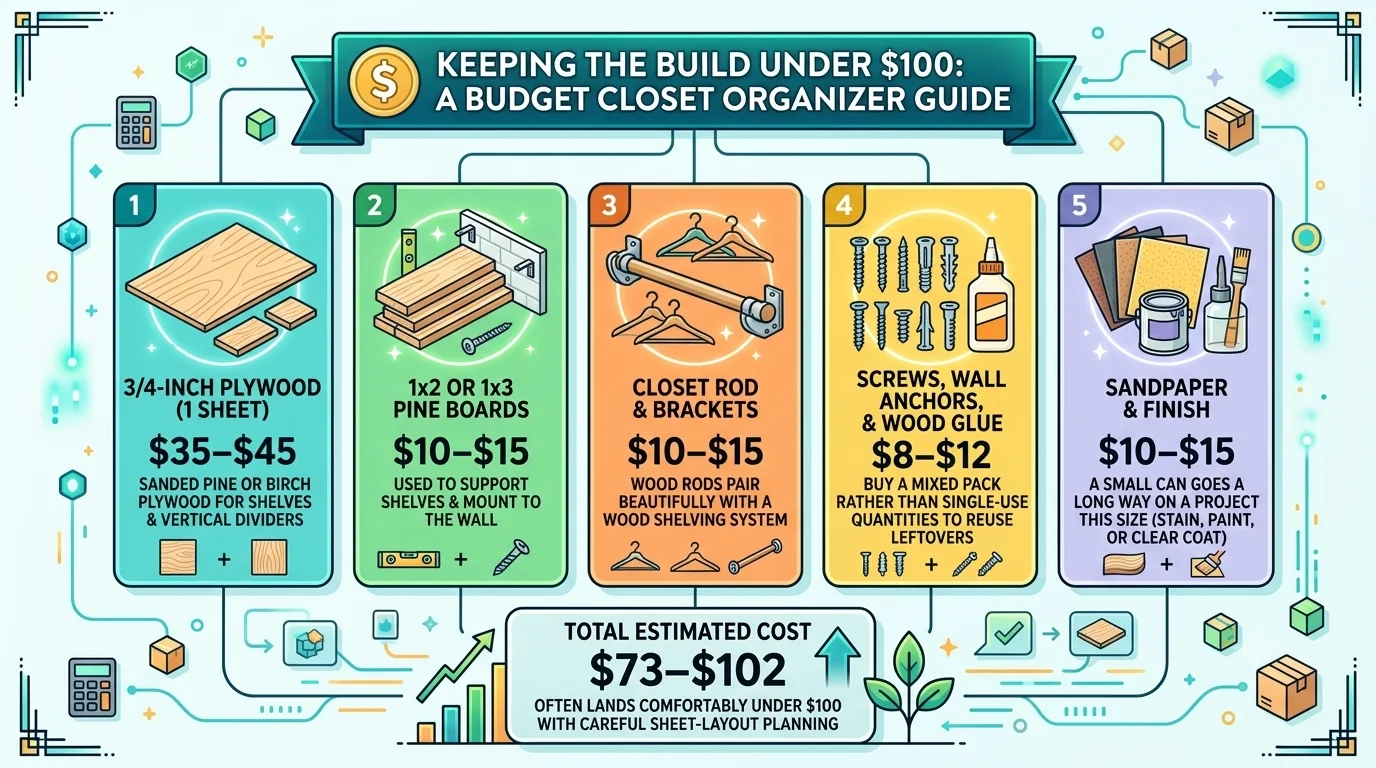
Staying under budget on a DIY closet organizer wood under $100 comes down to smart material choices rather than skimping on quality. Here’s a realistic breakdown for a standard single reach-in closet, roughly 5 to 6 feet wide.
| Item | Estimated Cost | Notes |
|---|---|---|
| 3/4-inch plywood (1 sheet, often enough with cutoffs) | $35–$45 | Sanded pine or birch plywood for shelves and vertical dividers |
| 1×2 or 1×3 pine boards for cleats and rod supports | $10–$15 | Used to support shelves and mount to the wall |
| Closet rod (wood or metal) and end brackets | $10–$15 | Wood rods pair beautifully with a wood shelving system |
| Screws, wall anchors, and wood glue | $8–$12 | Buy a mixed pack rather than single-use quantities to reuse leftovers on future projects |
| Sandpaper and finish (stain, paint, or clear coat) | $10–$15 | A small can goes a long way on a project this size |
| Total estimated cost | $73–$102 | Often lands comfortably under $100 with careful sheet-layout planning |
For a helpful primer on how to plan your plywood sheet layout to minimize waste and stretch a single sheet across an entire project, the Family Handyman plywood-cutting guide offers practical, easy-to-follow diagrams worth reviewing before your cut list is finalized.
Choosing the Right Materials
Material choice is where most of your budget decisions live, and a few smart calls here make the difference between a wobbly, short-lived shelf and one that holds up for years.
Plywood vs. MDF vs. Solid Wood
- 3/4-inch sanded plywood is the sweet spot for most closet organizer builds — strong enough to resist sagging under a loaded shelf, and far more affordable than solid hardwood at this scale
- MDF (medium-density fiberboard) is even more budget-friendly and takes paint beautifully, but is heavier and more prone to sagging over a wide unsupported span, so it works best on shorter shelf runs or with added support cleats
- Solid pine boards are a nice option for visible shelf edges or a rod support, adding a slightly more finished, furniture-grade look to key touchpoints without needing to use solid wood throughout the whole system
Hardware That’s Worth the Small Extra Cost
- Sturdy shelf support cleats rather than relying on shelf pins alone, especially for any shelf holding folded clothing or shoes
- A properly rated closet rod bracket — undersized rod hardware is the most common point of failure in budget closet builds, so this is not the place to cut corners
- Wall anchors rated for your wall type — drywall alone often isn’t enough to support a fully loaded shelving system; locating studs or using rated anchors is essential for long-term stability
Tools You’ll Need
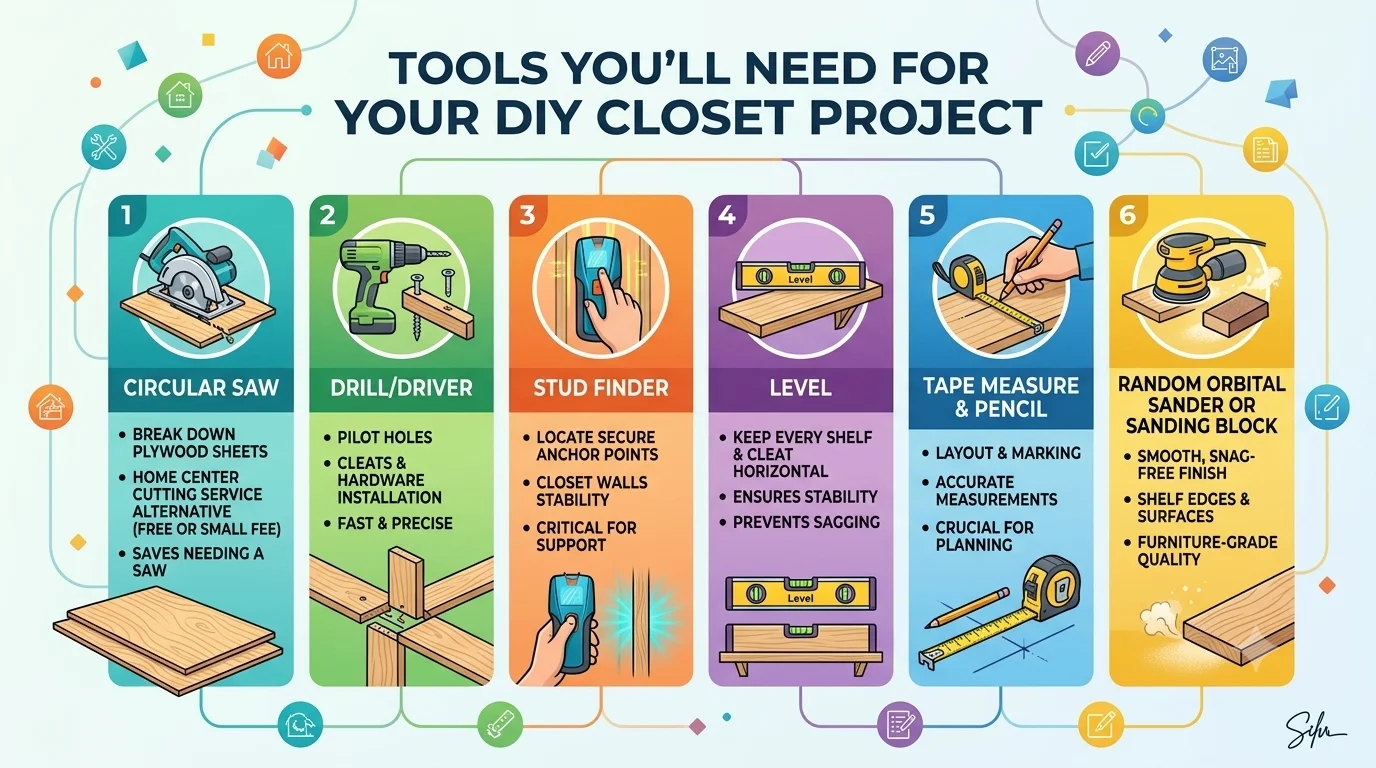
One of the best things about this project is how minimal the tool requirements are. Most builders already own everything on this list, or can borrow what’s missing without much trouble.
- Circular saw or a home center cutting service for breaking down your plywood sheet — many stores will make straight cuts for free or a small fee, which can save you from needing a saw at all
- Drill/driver for pilot holes, cleats, and hardware installation
- Stud finder to locate secure anchor points in the closet walls
- Level to keep every shelf and cleat perfectly horizontal
- Tape measure and pencil for layout and marking
- Random orbital sander or sanding block for a smooth, snag-free finish on shelf edges
Building the Organizer: A Natural Walkthrough
With your layout planned and materials gathered, here’s how the actual build comes together — as a flow from empty closet to fully organized space, not a rigid checklist.
Cutting Your Panels
Using your scaled layout sketch, mark and cut your plywood into the shelves, vertical dividers, and any side panels your design calls for. If a home center is cutting your sheet down, bring your exact cut list with you — most stores will follow it precisely, saving you the need for a saw altogether on a tight budget build. Sand all cut edges smooth before installation, since raw plywood edges can be surprisingly sharp straight off the saw.
Marking and Installing Wall Cleats
Locate your wall studs with a stud finder and mark their positions clearly, since this is where your primary support cleats will anchor. Using a level, mark a horizontal line at each shelf height from your layout plan, then attach 1×2 or 1×3 cleats along these lines, driving screws into studs wherever possible and using rated wall anchors to fill in any gaps between studs.
These cleats are the unsung heroes of a budget closet build — they transfer the weight of loaded shelves directly into the wall structure, meaning your shelves don’t rely on flimsy shelf pins or brackets alone to stay level under a full seasonal wardrobe.
Installing the Shelves and Vertical Dividers
Set each shelf onto its corresponding cleat line, checking level before securing it in place with screws driven up through the cleat into the underside of the shelf. If your design includes vertical dividers to separate a shelf tower from a hanging section, these typically get secured both to the wall cleats and to the shelves themselves, adding significant rigidity to the whole system and preventing any side-to-side wobble.
Work from the bottom of the closet upward, since a lower shelf often provides a convenient temporary support surface for positioning the next shelf above it during installation.
Mounting the Closet Rod
Attach rod end brackets to the side walls or vertical dividers at your planned heights, double-checking that both sides are level with each other before drilling final mounting holes. If you’re using a wood rod, this is also a nice opportunity to give it a quick sanding and finish pass to match the rest of the system, since it’s one of the most visually prominent elements of the finished closet.
Sanding and Finishing
Give every surface a final sanding pass, paying particular attention to shelf front edges, which see the most contact as you reach in and out of the closet daily. From here, your finish options are flexible depending on your budget and desired look:
- Clear coat or wipe-on polyurethane preserves the natural plywood or pine look while adding durability and a slight sheen, and is typically the fastest, most budget-friendly finish option
- Paint in a crisp white or soft neutral tone gives the system a clean, built-in look that brightens the closet interior, especially valuable in closets with limited natural light
- Stain brings out the natural grain for a warmer, more furniture-like appearance, particularly effective if you’ve used solid pine for visible edges
Smart Additions That Don’t Break the Budget
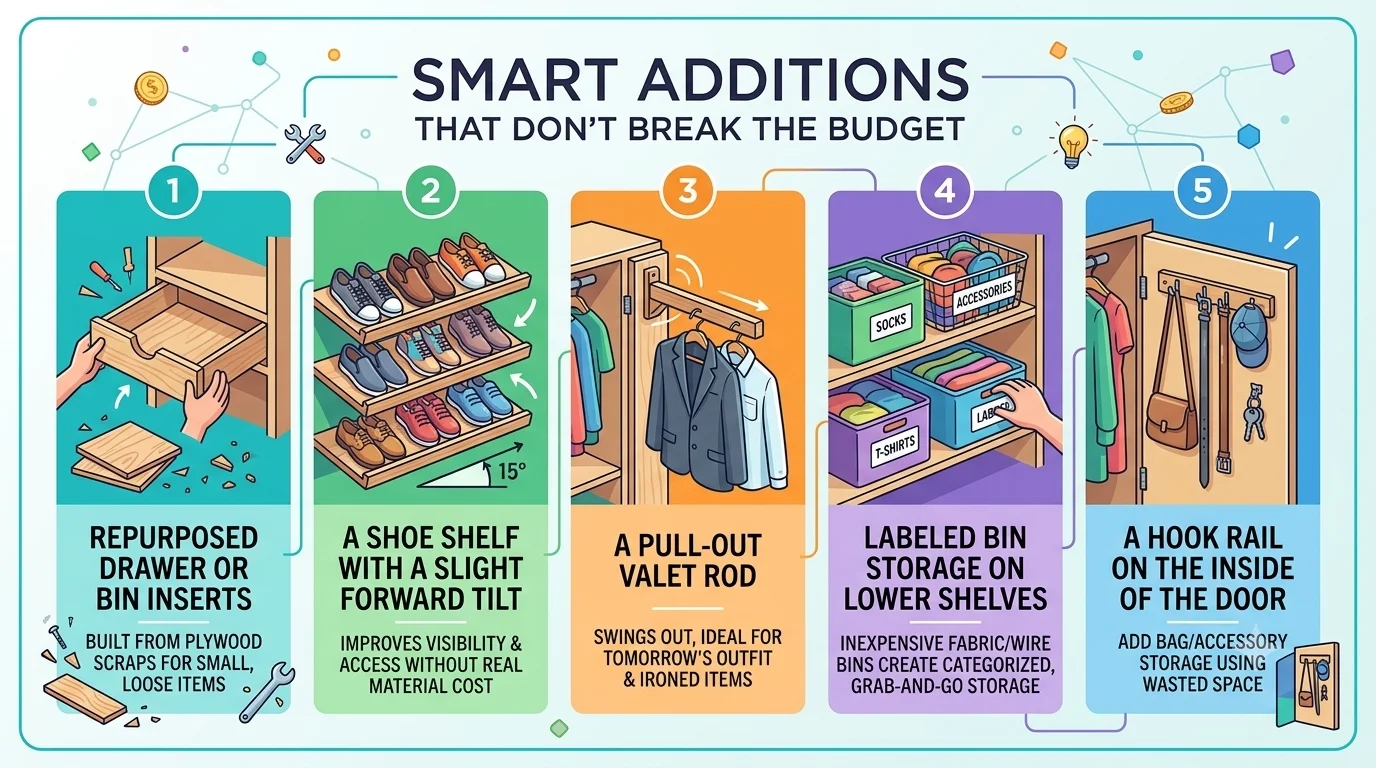
Once the core structure is built, a few small additions can meaningfully boost function without pushing your total much past the $100 mark:
- Repurposed drawer or bin inserts — a shallow wood drawer built from plywood scraps fits neatly into a shelf tower opening for small, loose items
- A shoe shelf with a slight forward tilt — improves visibility and access without adding any real material cost
- A pull-out valet rod — a small hinged wood arm that swings out from the side of the unit, ideal for hanging tomorrow’s outfit or freshly ironed items
- Labeled bin storage on lower shelves — inexpensive fabric or wire bins turn open shelving into categorized, grab-and-go storage
- A hook rail on the inside of the door — a scrap length of 1×3 with a few hooks adds bag or accessory storage using space that’s otherwise completely wasted
Styling and Maintaining Your Finished Closet
A well-built organizer deserves a little styling attention to make it feel as good as it functions:
- Group by category — dresses together, shirts together, folded items together — makes the system genuinely easier to use day to day
- Use matching hangers — a small, inexpensive swap that instantly makes any closet look more organized and intentional
- Keep the top shelf for rotation, not permanence — reserve it for seasonal storage bins you can swap in and out, rather than letting it become a catch-all
- Dust shelves periodically with a soft cloth, especially the top shelf, which tends to collect dust unnoticed
- Check hardware tightness every few months, since a fully loaded system does put ongoing stress on screws and anchors over time
Frequently Asked Questions
Can I really build a full closet system for under $100?
Yes, for a standard single reach-in closet in the 5–6 foot width range, a single sheet of plywood combined with basic hardware and a small can of finish typically lands in the $75–$100 range, especially if you plan your sheet layout carefully to minimize waste.
Do I need to find wall studs, or can I rely on wall anchors alone?
Whenever possible, anchor your primary support cleats into studs, since this provides significantly more weight capacity than anchors in drywall alone. Rated wall anchors are a reasonable supplement for shorter spans, but shouldn’t be the sole support for a heavily loaded shelf.
Is plywood or MDF better for a budget closet organizer?
Plywood generally offers better sag resistance over wider spans and slightly more forgiving screw-holding strength, making it the safer choice for shelves that will carry real weight. MDF is a reasonable budget alternative for shorter shelf runs, particularly if you plan to paint the finished system.
How long does a build like this typically take?
Most builders can complete the full cutting, installation, and finishing process in a single weekend, especially if a home center pre-cuts the plywood sheet to your cut list, which removes the most time-consuming step from the process.
Will this work in a small reach-in closet, or only a larger walk-in?
This approach scales well to both. Smaller reach-in closets often benefit the most, since a custom-built system can maximize every inch in a way that generic wire shelving simply can’t match in a tight footprint.
Final Thoughts: Big Organization, Small Budget
A cluttered, underused closet is one of those household frustrations that’s easy to live with simply because fixing it seems expensive and complicated. A well-planned DIY closet organizer wood under $100 proves that neither has to be true. With a single sheet of plywood, some basic hardware, and a weekend of focused work, you can build a system that’s sturdier than wire shelving, more customized than any prefab kit, and finished to look like a genuine built-in feature of your home.
Take the time to measure carefully, sketch your layout before cutting, and anchor your cleats into real structural support — those three habits do more to determine the long-term success of this project than any single material choice. Once it’s built and loaded up, you’ll wonder why you ever considered spending ten times the price for something a weekend and a hundred dollars could deliver on their own.