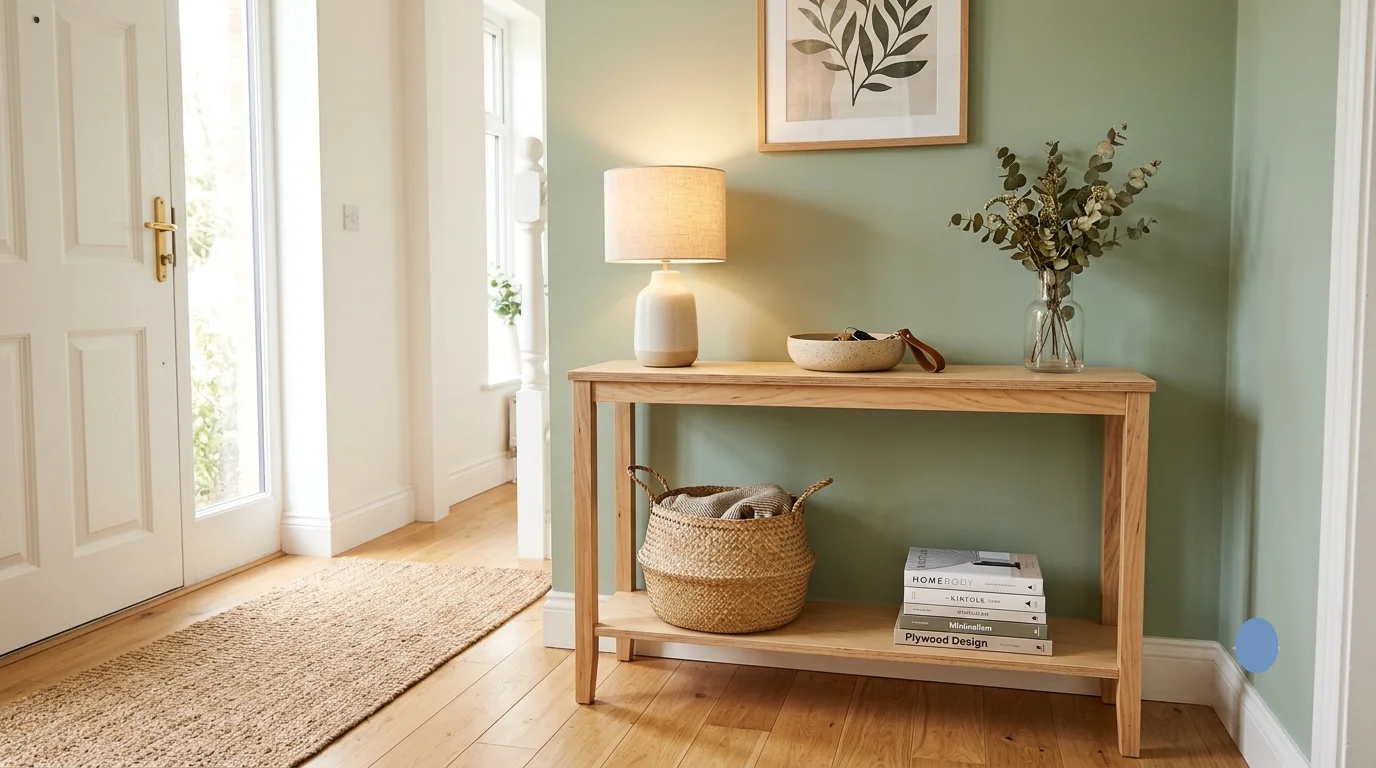
A complete, beginner-friendly guide to designing and building your own entryway table — proof that affordable materials can still deliver a furniture-grade finish.
There’s a reason the entryway is called the “first impression” of a home. It’s the space that greets guests, catches your keys, holds your mail, and sets the tone for everything beyond it. And yet, so many entryways are left bare — a stretch of empty wall crying out for a little personality. If you’ve been scrolling through furniture stores wincing at price tags for a simple console table, it’s time to consider a different route: entryway table plans using plywood.
Plywood has a reputation problem. Many people picture it as a rough, splintery material meant for subfloors and shed walls — not something that belongs in a well-styled foyer. But that reputation is outdated. Modern hardwood plywoods, especially birch and maple varieties, have a smooth, tight grain that finishes beautifully, holds paint or stain evenly, and rivals solid wood in both looks and durability. When you follow the right entryway table plans using plywood, you get a piece of furniture that looks custom-built by a professional carpenter, at a fraction of the material cost.
This guide walks you through everything: why plywood is such a smart choice, how to choose the right sheet and thickness, the tools you’ll actually need (no fancy shop required), the design decisions that make or break the final look, and a full narrative walkthrough of the build itself — from first cut to final coat of finish. By the end, you’ll have a clear, confident path to a table that looks like it belongs in a design magazine.
Why Plywood Is the Smartest Material for a DIY Entryway Table
Before diving into entryway table plans using plywood, it helps to understand exactly why this material has become the go-to choice for so many home DIYers and even professional furniture makers. Solid wood is beautiful, but it’s expensive, prone to warping with humidity changes, and unforgiving if you’re new to woodworking. Plywood solves several of these problems at once.
- Dimensional stability — Because plywood is made of cross-laminated layers, it resists the warping, cupping, and splitting that solid wood boards are prone to, especially in entryways near exterior doors where temperature and humidity swing throughout the year.
- Large, uniform panels — A single 4×8 sheet gives you a huge, consistent surface with no seams to match, unlike gluing together narrow solid boards.
- Budget-friendly — A quality sheet of hardwood plywood typically costs a fraction of the equivalent volume in solid hardwood lumber.
- Beginner-forgiving — Plywood cuts cleanly with basic tools, doesn’t require the joinery expertise solid wood furniture often demands, and forgives minor imperfections once finished.
- Design versatility — Plywood takes paint, stain, veneer edging, and even exposed-edge “shou sugi ban” style finishes beautifully, so you can match virtually any interior style.
The trick is knowing which grade and thickness of plywood to buy, and how to detail the raw edges so the piece doesn’t look like a construction leftover. We’ll cover both below.
Choosing the Right Plywood: Grades, Thicknesses, and Species
Not all plywood is created equal, and this is where most entryway table plans using plywood succeed or fail before a single cut is made. Walk into any home center and you’ll find a bewildering range of options. Here’s how to cut through the noise.
Understanding Plywood Grades
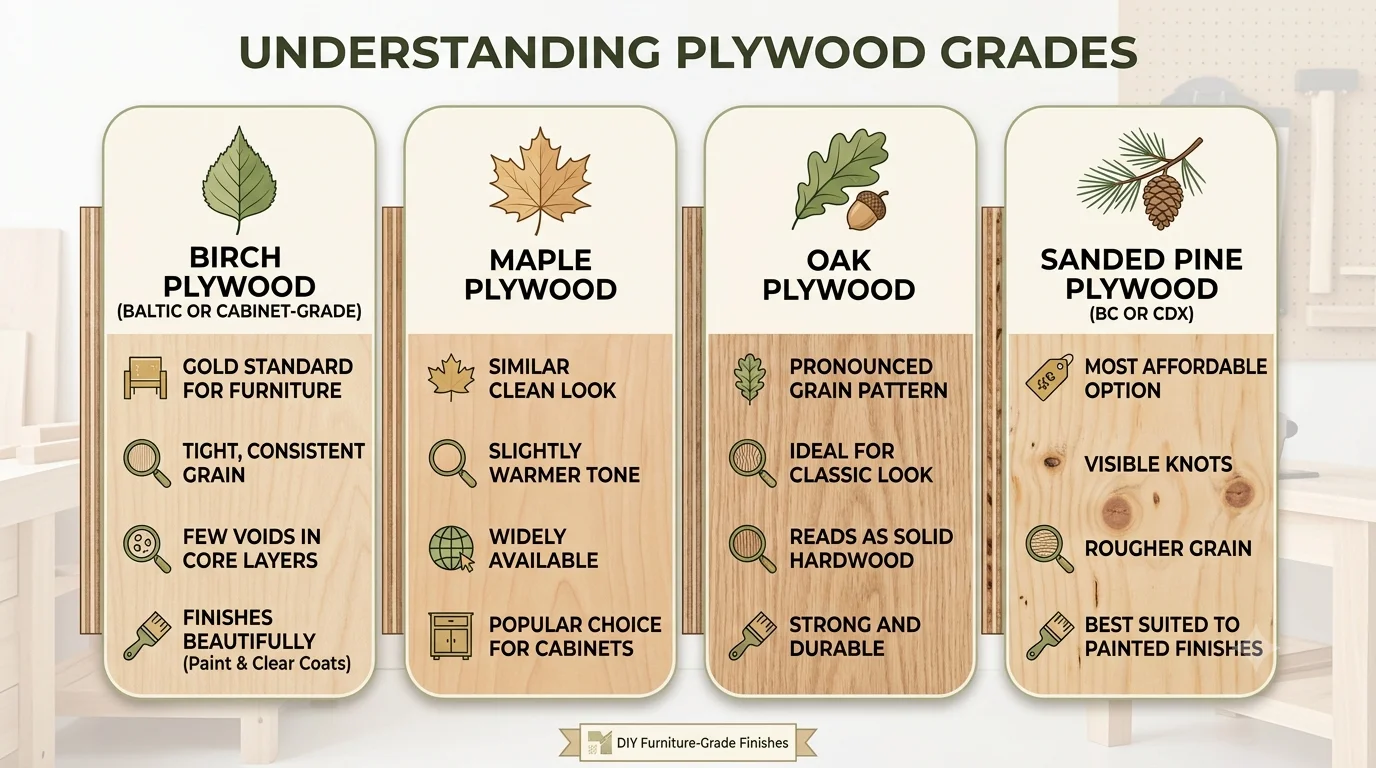
Plywood is graded by the quality of its front and back veneers, typically labeled with a letter combination like “A-C” or “B-BB.” For furniture-grade work:
- Birch plywood (Baltic or cabinet-grade) is the gold standard for furniture projects. It has a tight, consistent grain, few voids in the core layers, and finishes beautifully with both paint and clear coats.
- Maple plywood offers a similar clean look with a slightly warmer tone, and is widely available at most lumber yards.
- Oak plywood brings a more pronounced grain pattern, ideal if you want your table to read as a classic hardwood piece.
- Sanded pine (BC or CDX) plywood is the most affordable option but comes with visible knots and rougher grain — better suited to painted finishes than natural wood tones.
For a full breakdown of how plywood grading actually works, the APA – The Engineered Wood Association publishes detailed, manufacturer-neutral standards worth bookmarking before your lumber yard trip.
Choosing the Right Thickness
Thickness affects both strength and visual weight. For an entryway table, here’s what generally works best:
- 3/4-inch plywood is ideal for the tabletop and any structural shelving — it’s rigid enough to resist sagging under decorative objects, mail trays, or lamps.
- 1/2-inch plywood works well for lower shelves, drawer boxes, or decorative side panels where load-bearing needs are lighter.
- 1/4-inch plywood is best reserved for drawer bottoms or decorative back panels — too thin for legs or the main top.
Essential Tools and Materials You’ll Need
One of the best things about entryway table plans using plywood is how accessible the tool list is. You don’t need a fully outfitted workshop — a modest home garage setup is enough.
Tools
- Circular saw or table saw with a fine-tooth plywood blade for clean, splinter-free cuts
- Straightedge guide or track saw system to keep long cuts perfectly straight
- Drill/driver for pilot holes and assembly screws
- Pocket hole jig (such as a Kreg jig) for strong, hidden joinery — a favorite among DIYers because it eliminates complex joint-cutting
- Random orbital sander with 120, 180, and 220-grit sandpaper
- Iron-on edge banding or hardwood edge strips to hide raw plywood edges
- Tape measure, combination square, and pencil for accurate layout
- Clamps — at least four, for holding joints tight while glue and screws set
Materials
- One 3/4-inch sheet of furniture-grade plywood (birch or maple recommended)
- Wood glue rated for interior furniture use
- 1 1/4-inch pocket hole screws or wood screws
- Edge banding to match your plywood species
- Wood filler for any screw holes or minor gaps
- Primer and paint, or wood stain and polyurethane, depending on your desired finish
- Optional: hairpin legs, tapered wood legs, or a custom trestle base, depending on your design direction
If you’re unfamiliar with pocket hole joinery, it’s worth watching a short demonstration before you begin — Kreg’s official guide shows the technique clearly and is a great reference to keep open on your phone while you work.
Design Considerations Before You Cut a Single Board
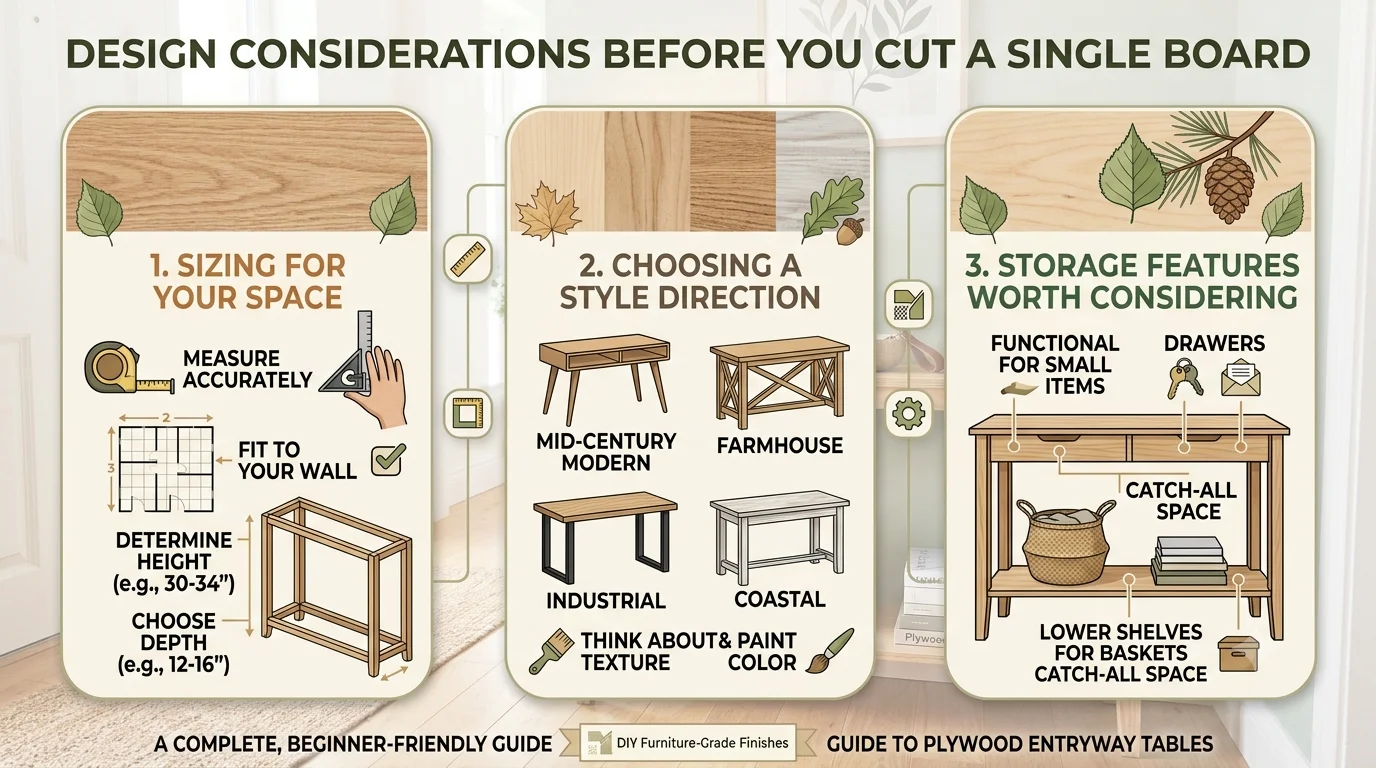
The difference between a table that looks “homemade” and one that looks “designer-made” almost always comes down to decisions made before the saw ever touches the plywood. Here’s what to think through first.
Sizing for Your Space
Most entryway tables run between 30 and 48 inches wide, 12 to 16 inches deep, and 28 to 32 inches tall — proportioned to sit comfortably against a wall without blocking foot traffic. Measure your actual entry space, including the swing radius of your front door, before finalizing dimensions.
- Narrow hallways benefit from a slim 10–12 inch depth so the table doesn’t create a bottleneck.
- Open foyers can support a deeper, more substantial table (16–18 inches) as a focal point.
- Tall ceilings pair well with a taller table (30–34 inches) so the piece doesn’t feel visually lost.
Choosing a Style Direction
Because plywood is such a flexible base material, your entryway table plans using plywood can be adapted to almost any interior aesthetic:
- Mid-century modern: tapered wood legs, exposed plywood edge banding as a design feature, warm walnut or maple stain
- Minimalist Scandinavian: clean white-painted panels, hairpin metal legs, minimal hardware
- Industrial: raw plywood edges left exposed and sealed, black pipe or angle-iron legs
- Coastal/farmhouse: whitewashed or lightly distressed finish, turned wood legs, X-brace detailing
Deciding on style early will guide your leg choice, edge treatment, and finish — all of which are far easier to plan up front than to retrofit after assembly.
Storage Features Worth Considering
An entryway table earns its keep when it does double duty. Consider building in:
- A lower shelf for baskets, shoes, or bags
- A single shallow drawer for keys, mail, or sunglasses
- Open cubbies divided by thin plywood dividers for a modular, gallery-style look
Building the Table: A Natural Walkthrough of the Process
With your design decided and materials gathered, it’s time to actually bring your entryway table plans using plywood to life. Rather than treating this like a rigid instruction manual, think of it as a flow — each phase sets up the next.
Planning and Cutting the Panels
Everything starts with a cut list, sketched out based on your final dimensions. A typical layout includes a tabletop panel, a lower shelf panel, two side panels (if you’re using a panel-based leg structure rather than turned legs), and a back stretcher for rigidity.
Before cutting, lay out your plywood sheet and map every piece with a pencil and straightedge, accounting for the width of your saw blade between cuts (called the “kerf”). Cutting the largest panels first and working down to smaller pieces minimizes waste and keeps your layout efficient. A sharp, fine-tooth blade paired with painter’s tape along the cut line dramatically reduces splintering on the visible face of the plywood — a small trick that makes a big difference in the final look.
For long, straight cuts, clamp a straightedge guide to the sheet rather than trying to freehand it. Even a slight wobble in a cut becomes glaringly obvious once the table is assembled and standing under natural light.
Assembling the Frame and Base
Once your panels are cut, dry-fit everything together before any glue or screws come out. This is your chance to catch sizing issues while they’re still easy to fix. Check that the top sits flush, that side panels are square to the floor, and that your leg attachment points — whether pocket-hole joints, leg mounting plates for hairpin legs, or a bolted trestle base — all line up correctly.
If you’re using panel-style sides rather than separate legs, pocket hole joinery is the fastest, strongest option for a beginner. Drill pocket holes along the inside edges of your side panels, apply wood glue to the mating surfaces, clamp everything square, and drive in your screws. The combination of glue and mechanical fasteners creates a joint that’s stronger than the plywood itself.
If you’re going the hairpin-leg or tapered-leg route instead, this is the stage where you’ll attach a mounting plate to the underside of the tabletop, positioned symmetrically and set back slightly from each edge for a balanced stance.
Adding the Tabletop and Lower Shelf
With the base structure solid, secure the tabletop from underneath using screws driven up through the side rails or through pocket holes, so no fasteners are visible on the top surface. If you’ve included a lower shelf, this typically gets glued and screwed into notches or cleats along the inside of the leg structure, adding both storage and a meaningful boost in overall rigidity — a lower shelf essentially turns your table into a mini ladder-frame, resisting wobble far better than a top-only design.
This is also the stage to double-check everything sits level. Set the assembled base on a flat floor and check with a level across the top in both directions, shimming or sanding down high points on the leg contact points as needed.
Sanding, Filling, and Finishing
This step is where a plywood project stops looking like plywood and starts looking like furniture. Begin with 120-grit sandpaper to knock down any glue squeeze-out and level joints, then move to 180 and finish with 220-grit for a silky-smooth surface ready for finish. Fill any visible screw holes or small gaps with wood filler matched to your finish plan, and sand it flush once dry.
Raw plywood edges are the single biggest giveaway of a DIY build if left untreated. Applying iron-on edge banding that matches your plywood’s face veneer, then trimming and sanding it flush, instantly transforms the look of every visible edge. For a more rustic or industrial aesthetic, you can instead leave the edges exposed and simply seal them well — the layered look of plywood edges has become a legitimate design statement in its own right.
Finally, apply your chosen finish:
- For a painted look: apply a quality primer, let it cure fully, then apply two thin coats of your chosen paint color, lightly sanding with 320-grit between coats for a smooth, professional sheen.
- For a natural or stained look: apply a wood conditioner first (especially important on plywood to prevent blotchy stain absorption), followed by your stain of choice, then seal with two to three coats of polyurethane or a hardwax oil finish for durability against everyday entryway traffic.
The This Old House staining guide is a solid reference if you’re staining plywood for the first time, since technique matters more on engineered wood than on solid lumber.
Creative Variations to Make Your Table Uniquely Yours
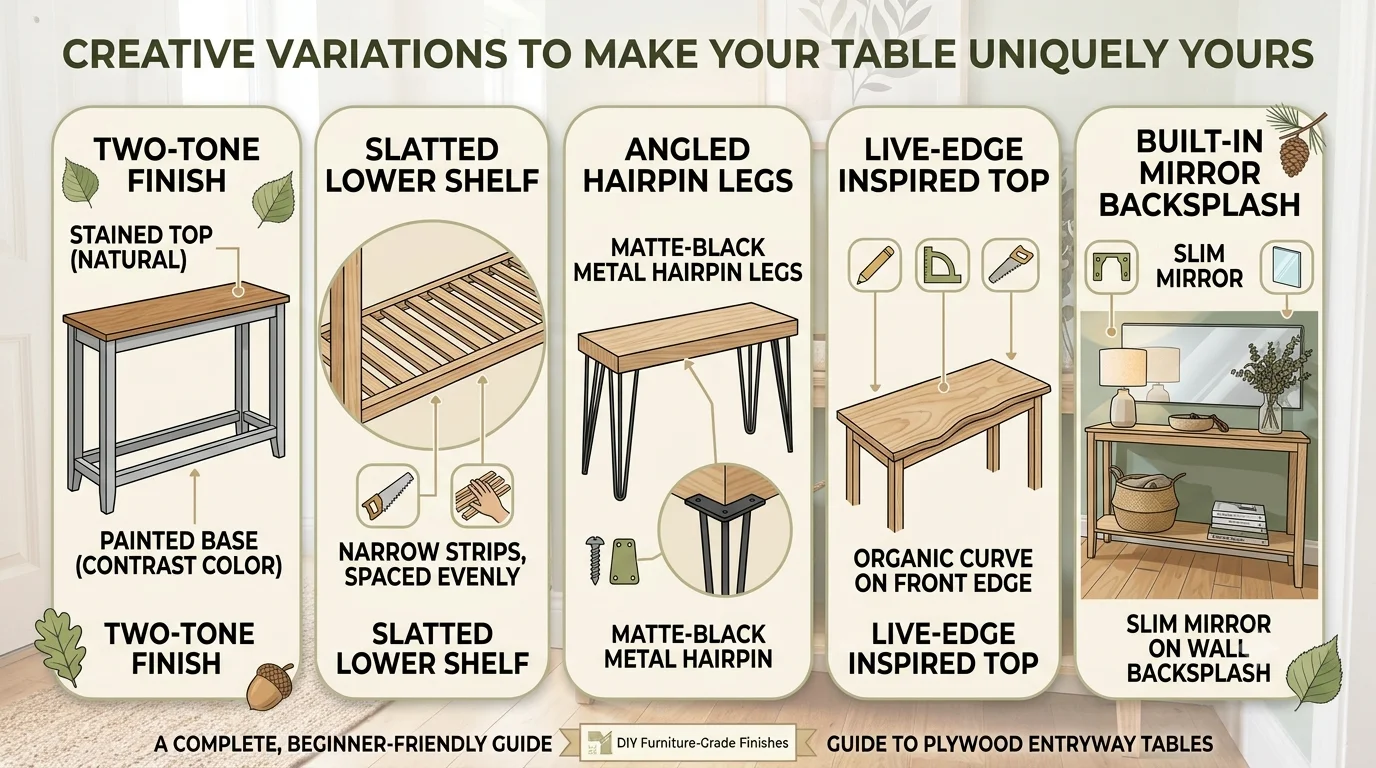
Once you’ve mastered the basics of entryway table plans using plywood, there’s enormous room to experiment. A few ideas that consistently turn out beautifully:
- Two-tone finish — paint the base one color and stain the top natural for visual contrast
- Slatted lower shelf — instead of a solid plywood shelf, rip narrow strips and space them evenly for a lighter, more textural look
- Angled hairpin legs — a subtle way to add mid-century flair without any extra woodworking
- Live-edge inspired top — trace an organic curve on one long edge of the tabletop before cutting for a softer, sculptural silhouette
- Built-in mirror backsplash — mount a slim mirror to the wall directly above the table for a boutique-hotel entryway moment
Styling Your Finished Entryway Table
The build is only half the story — how you style the table determines whether it becomes the room’s focal point. A few styling principles that consistently work:
- Anchor with a lamp or mirror — vertical height above the table balances its horizontal mass and draws the eye upward
- Layer in a catch-all tray — corrals keys and mail without visual clutter
- Add one organic element — a small plant or a vase of dried stems softens the geometry of the plywood
- Keep the surface mostly clear — two to three styled objects read as intentional; six or more reads as clutter
- Use the lower shelf for texture — a woven basket or stack of books adds warmth beneath the clean tabletop line
Caring for Your Plywood Entryway Table
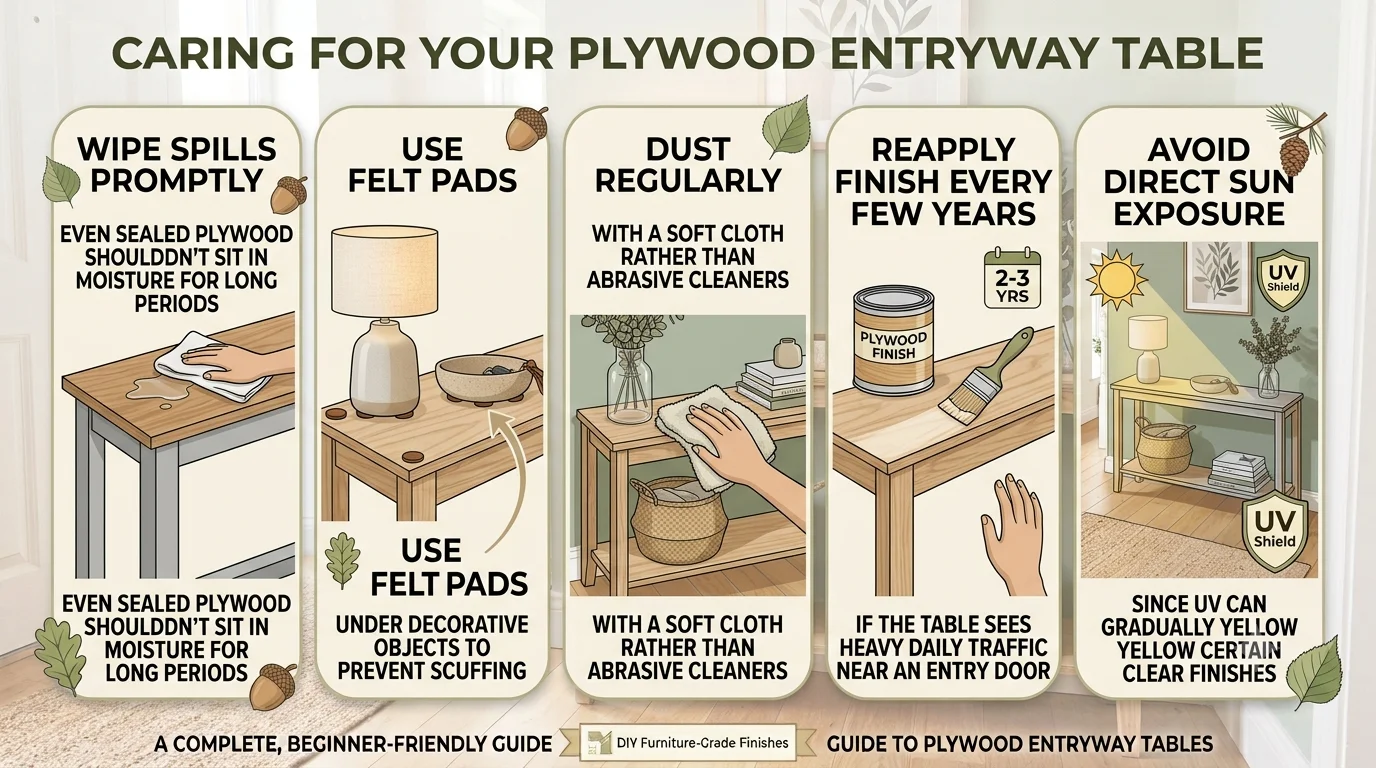
A well-finished plywood table is genuinely durable, but a little routine care keeps it looking sharp for years:
- Wipe spills promptly — even sealed plywood shouldn’t sit in standing moisture for long periods
- Use felt pads under decorative objects to prevent scuffing the finish
- Dust regularly with a soft cloth rather than abrasive cleaners
- Reapply finish every few years if the table sees heavy daily traffic near an entry door
- Avoid direct sun exposure where possible, since UV can gradually yellow certain clear finishes
Frequently Asked Questions
Is plywood actually strong enough for a piece of furniture like this?
Yes. Furniture-grade plywood, particularly birch or maple varieties at 3/4-inch thickness, is structurally excellent for tables. Its cross-laminated construction actually resists warping better than many solid woods, which is why it’s widely used in professional cabinetry and furniture making.
Do I need a table saw, or can I use a circular saw?
A circular saw paired with a straightedge guide can produce cuts just as clean as a table saw for this type of project, as long as you take your time and use a sharp, fine-tooth blade. Many experienced furniture makers still reach for a circular saw and track system for breaking down full plywood sheets.
How do I stop the plywood edges from looking unfinished?
Iron-on edge banding is the simplest solution and matches most common plywood veneers. Alternatively, gluing thin strips of solid hardwood along visible edges creates an even more refined, furniture-store look, though it requires slightly more precision to install flush.
What’s the most beginner-friendly leg option?
Hairpin legs are extremely popular for first-time builders because they require no additional woodworking — you simply attach a mounting plate to the underside of the tabletop and screw the legs directly in. They also instantly lend a clean, mid-century look.
How long does a build like this typically take?
For a first-time builder working at a relaxed pace, expect to spend one weekend on cutting and assembly, and a second weekend on sanding and finishing (largely due to drying time between coats). Experienced DIYers can often complete the entire build in a single weekend.
Final Thoughts: Why This Project Is Worth Your Weekend
There’s something deeply satisfying about walking through your own front door and seeing a table you built with your own hands — one that holds your keys, catches the afternoon light, and quietly tells guests that this home has been made, not just furnished. That’s the real appeal behind entryway table plans using plywood: an accessible, budget-conscious path to a piece of furniture that looks and feels custom, without requiring years of woodworking experience or a professional-grade workshop.
Whether you lean toward a minimalist Scandinavian silhouette, a warm mid-century profile, or a moody industrial edge, plywood adapts to your vision rather than limiting it. Choose a quality furniture-grade sheet, take your time with the cuts and joinery, don’t skip the edge treatment, and invest a little extra care into the finish — and you’ll end up with an entryway table that looks like it came from a boutique furniture studio, built by you, for exactly the space it was designed to fill.
Ready to get started? Gather your tools, pick up a sheet of quality birch plywood, and give yourself a weekend to turn an empty corner of your entryway into the first great impression your home deserves.