What Are Acoustic Diffuser Panels?
Acoustic diffuser panels are designed to scatter sound waves rather than absorb them. Unlike sound absorbers, which reduce volume and deaden sound, diffusers maintain a lively atmosphere in a room by ensuring a balanced sound distribution. This results in clearer audio, whether you are listening to music, watching movies, or conducting meetings.
Types of Acoustic Diffusers
Different types of acoustic diffuser panels can cater to various needs and spaces:
- Wooden Diffusers: These panels offer aesthetic appeal along with functionality, making them ideal for living rooms and performance spaces.
- Polyester Diffusers: Made from recycled materials, these panels are eco-friendly and versatile for commercial applications.
- QRD Diffusers: Quasi-Random Diffusers work based on mathematical principles to scatter sound evenly, often used in professional recording studios.
Benefits of Using Acoustic Diffuser Panels
The installation of acoustic diffuser panels in your space can yield noticeable improvements in sound quality. Here are some key benefits:
- Enhanced Clarity: Diffusers prevent sound waves from creating thick spots or dead zones, leading to clearer audio.
- Balanced Sound Energy: The scattering effect of diffusers helps in achieving more uniform sound energy across the room.
- Visual Appeal: Many acoustic diffusers come in various designs, allowing you to improve acoustics while maintaining or enhancing your aesthetic preferences.
- Versatility: Whether you place them in a home theater, a recording studio, or an office, diffuser panels adapt well to different environments.
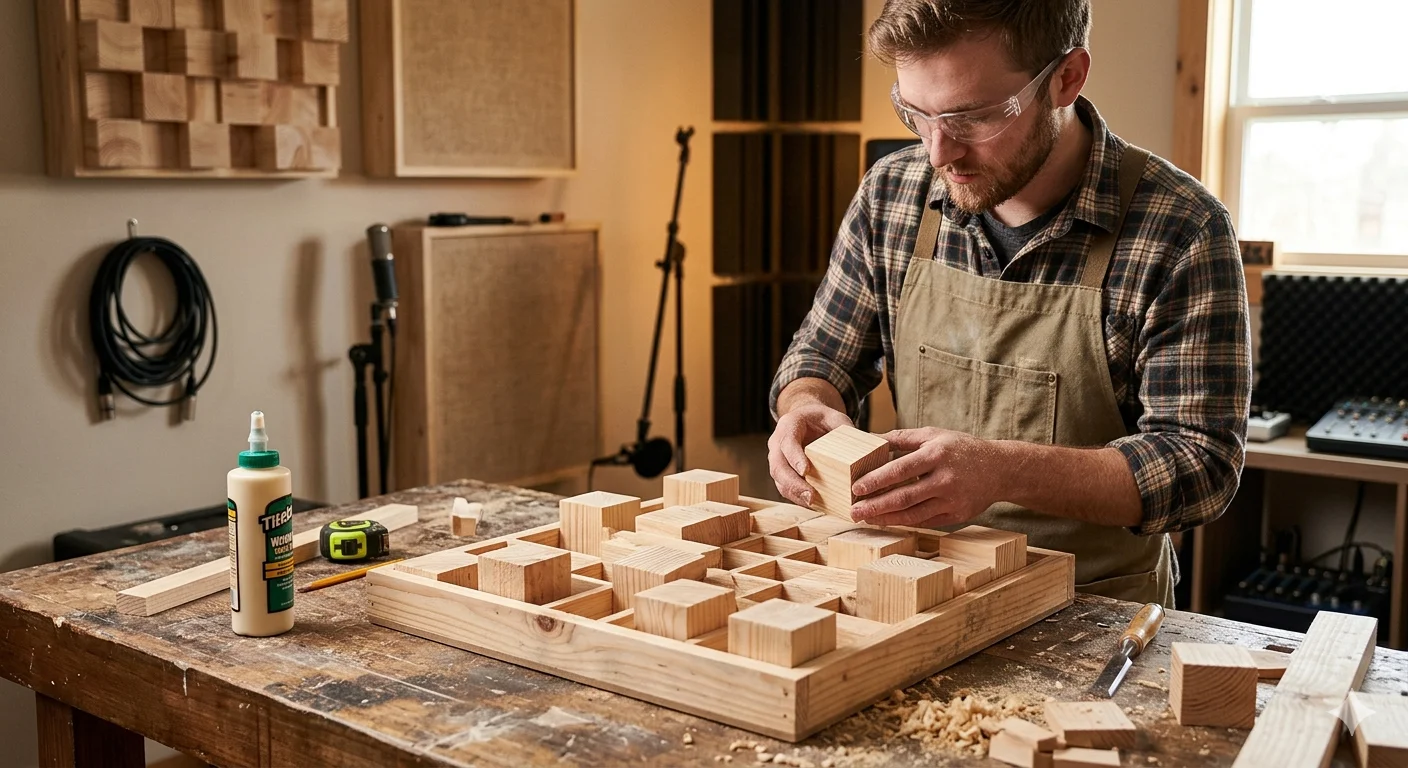
Creating the perfect sound environment in your home studio can be a challenge. One great solution is to use DIY Wooden Acoustic Diffuser Panels. These panels not only enhance the auditory quality of your space but also add aesthetic appeal. Let’s explore the benefits that these DIY projects can offer to your recording or mixing area.
Controlling sound waves
Acoustic diffusion is essential for controlling sound waves in a room. Unlike absorption panels, which quiet down sound by soaking it up, diffusers scatter sound waves. This helps to eliminate undesirable echoes and standing waves. When you opt for DIY Wooden Acoustic Diffuser Panels, you can easily tailor the design and efficiency according to your specific needs.
Affordability
One of the most significant advantages of using wooden acoustic diffuser panels is their affordability. Purchased panels can be quite costly, especially if you need multiple units. By creating your own, you can significantly lower the expense while enjoying a completely personalized design. With some basic woodworking skills, you can build panels that look great and function even better.
Versatility of wood
Another benefit is the versatility of wood. Different types of wood can offer varied acoustic properties. For instance, hardwoods tend to be denser and provide excellent sound diffusion. Softwoods are lighter and, while they might not diffuse sound as effectively, they can still be part of your design. By experimenting with different wood types, you can find the perfect combination that works for your space.
| Type of Wood | Acoustic Properties | Usage |
|---|---|---|
| Oak | Dense and strong | High-end studios and big spaces |
| Pine | Lightweight and cost-effective | Budget setups and small spaces |
| Bamboo | Eco-friendly and durable | Stylish interiors and sustainable design |

Utilize your creativity
DIY Wooden Acoustic Diffuser Panels also allow you to utilize your creativity. You can choose the design that best reflects your personality or complements your studio’s style. Whether you opt for geometric shapes, natural finishes, or painted patterns, the options are endless. This customization not only enhances sound quality but also personalizes your working environment, making it more enjoyable to spend time in.
It is rewarding
Additionally, building your own panels can be incredibly rewarding. The process gives you hands-on experience with woodworking and a deeper understanding of acoustic principles. This knowledge can benefit you in future projects or when making improvements to your studio setup. Plus, the sense of accomplishment you feel after completing a project adds to the overall enjoyment of your space.
It is straightforward
Installing these panels is straightforward. Depending on your studio’s layout, you can mount them on walls or place them strategically in corners. This flexibility allows you to experiment with placement until you achieve the desired sound quality. Remember that the placement of the diffusers can greatly affect the acoustic environment in your studio.
Act as a conversation starter
Aside from their practical applications, DIY Wooden Acoustic Diffuser Panels can also act as a conversation starter. When guests visit your studio, they will surely notice the beautiful craftsmanship. Sharing the story behind your creation not only shows your dedication but also encourages others to appreciate the aesthetics of sound and design.
The advantages of DIY Wooden Acoustic Diffuser Panels for home studios range from affordability and customization to enhanced sound quality and personal satisfaction. By diving into this creative endeavor, you can transform your studio into a sound haven, perfect for all your audio needs.
Essential Tools and Materials for Creating Your Own Acoustic Diffuser Panels
Creating your own acoustic diffuser panels can significantly enhance the sound quality in your home or workspace. Whether you’re an aspiring musician, setting up a home studio, or just enjoying quality listening experiences, having the right tools and materials is essential. Here is a comprehensive guide to help you gather everything you need to make your DIY Wooden Acoustic Diffuser Panels.
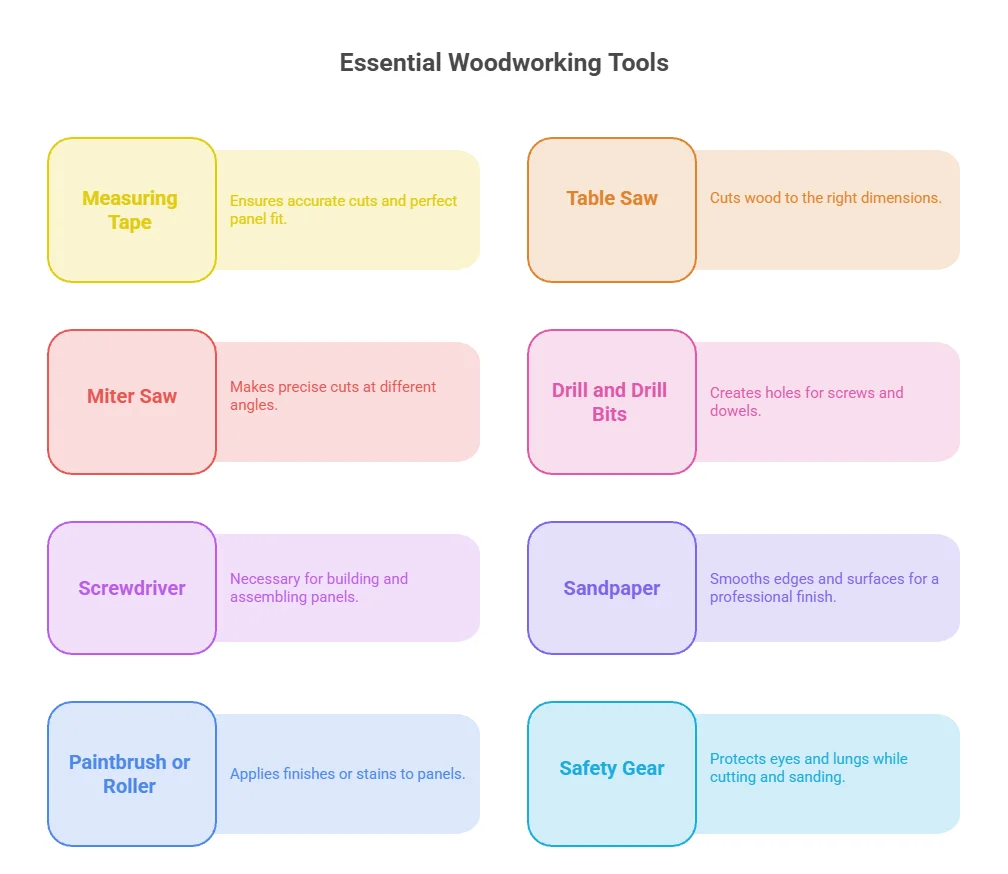
The tools you choose will directly impact the quality and ease of your project. Here’s a list of the essential tools you’ll need:
- Measuring Tape – To ensure your cuts are accurate and your panels fit perfectly.
- Table Saw or Circular Saw – These are primarily for cutting wood to the right dimensions.
- Miter Saw – Useful for making precise cuts at different angles.
- Drill and Drill Bits – You’ll need these for creating holes for screws and dowels.
- Screwdriver – Necessary for building and assembling your panels.
- Sandpaper – To smooth edges and surfaces of the wood, ensuring a professional finish.
- Paintbrush or Roller – For applying any finishes or stains to your panels.
- Safety Gear – Don’t forget goggles and a mask for safety while cutting and sanding.
Materials Required
Once you have your tools ready, the next step is gathering quality materials for constructing the panels. Here’s what you’ll need:
- Wood – Use high-quality plywood or hardwood for durability and aesthetics.
- Wood Glue – This will help secure joints and ensure the integrity of the structure.
- Acoustic Foam or Fiberglass Insulation – For sound absorption inside the diffuser.
- Wood Finish or Paint – To give your diffuser a polished look, choose a finish that complements your decor.
- Screws or Dowels – For assembling the different parts of your panels.
Wood Selection Tips
When choosing wooden materials for your panels, consider the following types:
- Pine – Affordable and easy to work with, suitable for beginners.
- Birch – Offers a beautiful grain and adds sophistication to your diffusers.
- Maple – Dense and durable, excellent for sound diffusion.
Building Your Diffuser Panels
After gathering your tools and materials, it’s time to start building your acoustic diffuser panels. Follow these basic steps:
- Measure and cut your wood according to the desired panel size.
- Sand down all edges and surfaces to eliminate splinters.
- Assemble the frame using wood glue and screws for stability.
- Insert your acoustic foam or insulation inside the frame.
- Finish the exterior by painting or staining to your liking.
Step-by-Step Guide to Building Wooden Acoustic Diffuser Panels
Creating an inviting and acoustically pleasant space can be achieved through various techniques, one of which involves using DIY Wooden Acoustic Diffuser Panels. These panels help scatter sound waves, reducing echoes and improving sound clarity. This step-by-step guide will walk you through the process of building your own acoustic diffuser panels, perfect for studios, home theaters, or any room where sound quality matters.
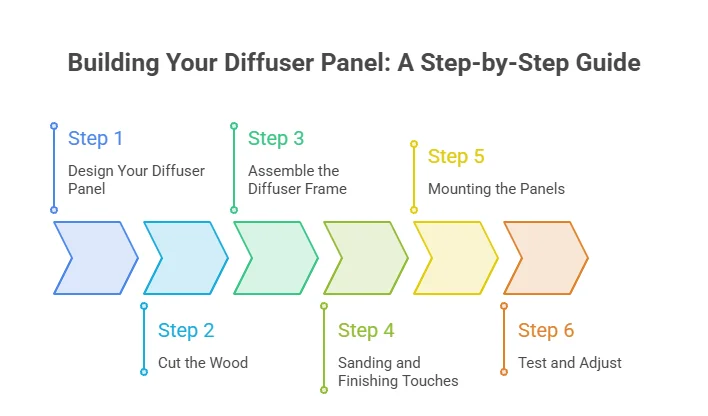
Step 1: Design Your Diffuser Panel
Start by deciding the size and shape of your diffuser. A common size is 2′ x 4′, but you can customize this based on your room’s dimensions. The design of a diffuser can vary, but a simple triangular or quadratic pattern works well for basic panels. Sketch out your design on paper, ensuring you include dimensions for each piece.
Step 2: Cut the Wood
Using your design as a guide, cut the wood boards into the shapes you determined. Make sure to wear safety gear when using saws. The more precise your cuts, the better your diffuser will function. For a standard triangular pattern, you might want to cut several triangular pieces that will fit into a rectangular frame.
Step 3: Assemble the Diffuser Frame
Using your plywood, create a solid backing for your diffuser. Attach the wood pieces you cut earlier to the plywood using wood glue and nails or screws. It’s essential to secure each piece tightly to prevent potential sound leaks. Allow the glue to dry completely according to the manufacturer’s instructions.
Step 4: Sanding and Finishing Touches
Once the adhesive is dry, use a sander or sandpaper to smooth out rough edges. This step not only enhances the visual appeal but also prevents splinters. After sanding, you can apply a wood stain or paint if you want to match the décor of your space. Ensure the finish is acoustic-friendly, avoiding heavy coatings that may deaden sound absorption.
Step 5: Mounting the Panels
Decide where you want to place your diffuser panels for maximum effect. A good rule of thumb is to mount them on walls opposite sound sources or where sound reflections are most prominent. Use brackets or wall adhesives to mount your panels securely.
Step 6: Test and Adjust
After mounting, test the sound quality in your space. Listen for any lingering echoes or imbalances in sound. You may want to experiment with moving the panels to different positions to find the optimal layout. Adjusting their location can provide a noticeable improvement in sound quality.
Building your own wooden acoustic diffuser panels doesn’t just improve sound quality in your home or studio; it also allows you to tap into your creativity and personalize your space. Following these straightforward steps will help you create effective and visually pleasing panels that elevate your listening experience.
Design Ideas and Aesthetic Considerations for Customized Diffuser Panels
Customizing diffuser panels not only enhances the acoustic quality of your space but also elevates its aesthetic appeal. When considering design ideas and aesthetic factors, it is essential to merge functionality with creativity. Here are several aspects to explore while crafting your DIY Wooden Acoustic Diffuser Panels.
Material Selection
Choosing the right type of wood is crucial for both the acoustic performance and the overall look of your diffuser panels. Common choices include:
- Pine: Lightweight and easy to work with, pine offers a natural finish and good sound diffusion properties.
- Bamboo: Known for its eco-friendliness and unique patterns, bamboo brings a modern touch while still being effective acoustically.
- Birch: This hardwood is durable and boasts a beautiful grain, making it an excellent choice for elegant designs.
Consider your interior style when selecting materials; each wood type brings its own character and charm. A subtle finish may complement a contemporary setting, while a rustic appearance can enhance a more traditional space.
Design Shapes and Patterns
The shape and pattern of your diffuser panels can significantly impact both sound dispersion and visual appeal. Some innovative designs to consider include:
- Geometric Designs: Using squares, triangles, or hexagons can create a visually striking pattern that also effectively diffuses sound.
- Wave Motif: Curved shapes mimic natural sound waves, adding an organic feel while offering great acoustic benefits.
- Custom Artwork: Personalizing your diffuser panel with laser-cut designs or hand-painted art can make an impactful statement in your room.
Don’t hesitate to experiment with different shapes. Combining various designs on a single panel can produce stunning results and optimize acoustic performance, tailored to your specific needs.
Color and Finish
The finish you choose for your panels will greatly influence their appearance. Here are some options to consider:
- Natural Wood Stain: Enhance the wood’s natural beauty while protecting it. Clear or lightly tinted stains maintain the organic look.
- Paint: Choosing bright colors or contrasting hues can add a pop of personality and fit well with modern decor themes.
- Matte vs. Glossy: Matte finishes can appear more sophisticated, while glossy finishes add a sleek, contemporary flair.
Keep in mind how the color scheme of your room interacts with your diffuser panels. Choose shades that complement your decor, creating a cohesive, inviting space.
Placement and Arrangement
The placement of your DIY Wooden Acoustic Diffuser Panels can amplify their effectiveness in sound management. Consider these placement strategies:
| Placement Method | Description |
|---|---|
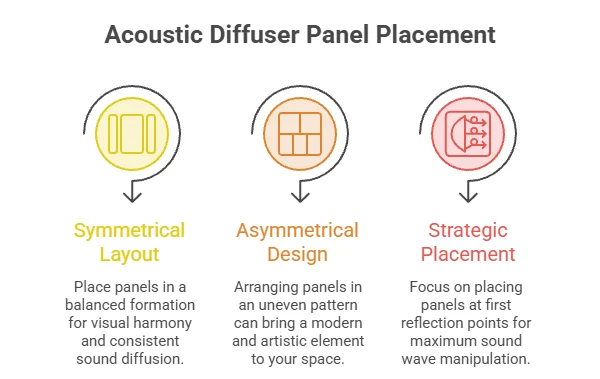
| Symmetrical Layout | Place panels in a balanced formation for visual harmony and consistent sound diffusion. |
| Asymmetrical Design | Arranging panels in an uneven pattern can bring a modern and artistic element to your space. |
| Strategic Placement | Focus on placing panels at first reflection points for maximum sound wave manipulation. |
Don’t forget about the height at which you mount these panels. Installing them at ear level can create an optimal acoustic environment, especially in entertainment settings.
Integration with Existing Decor
Your diffuser panels should blend seamlessly with your existing decor. Think about how to incorporate elements of your overall design:
- Matching Furniture: Coordinate the wood finish or color of the panels with your furniture for a unified look.
- Complementary Accessories: Use accents that echo the materials or colors found in your diffuser panels, such as cushions or art pieces.
- Lighting: Position your panels in a way that they catch or reflect light beautifully, enhancing both the acoustics and aesthetics of the room.
Crafting your own acoustic diffuser panels can transform your space beautifully while enhancing sound quality. By carefully considering these design ideas and aesthetic factors, you’ll create a unique experience that resonates with your style and needs.
How Acoustic Diffuser Panels Improve Sound Quality in Various Spaces
When it comes to sound quality in various spaces, many people underestimate the impact of acoustic treatments. One effective way to enhance sound in any environment is through the use of diffuser panels. These specialized panels can dramatically improve acoustics in settings such as music studios, home theaters, offices, and even educational institutions. Let’s explore how these panels work and the benefits they offer.
Considerations for Effectiveness
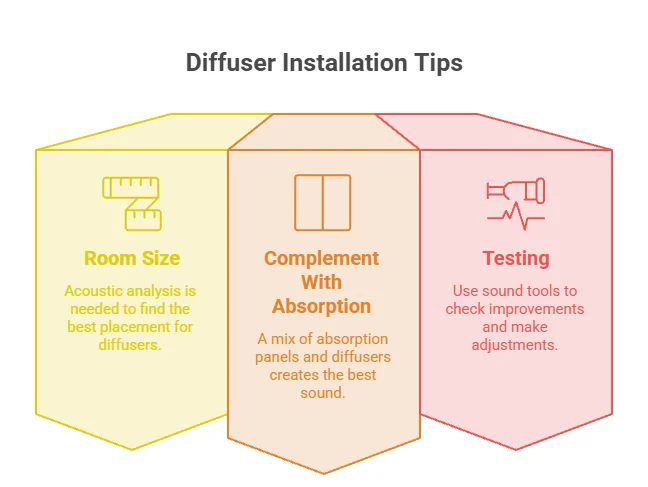
While installing acoustic diffuser panels can greatly enhance sound quality, a few key considerations must be kept in mind:
- Room Size: The effectiveness of a diffuser can vary depending on the room size and shape. Perform acoustic analysis to determine optimal placement.
- Complement With Absorption: A good balance of absorption panels and diffusers typically yields the best sound quality.
- Testing: After installation, use sound measuring tools to assess improvements and make necessary adjustments.
Where to Learn More
For more information on acoustic treatments, including advanced techniques and DIY guides, check out Acoustics First and Soundproof Cow. These sites provide comprehensive resources to deepen your understanding of acoustic solutions.
DIY Wooden Acoustic Diffuser Panels can transform your space by enhancing sound quality. Not only do they offer acoustic benefits, but they can also add a unique visual element, blending functionality with style. Whether you’re a musician, a movie enthusiast, or looking to improve your workspace, these wooden panels could be the solution you’ve been searching for.
Conclusion
Creating your own DIY Wooden Acoustic Diffuser Panels is an enriching project that not only enhances the sound quality of your home studio, but also adds a personalized touch to your space. By understanding the benefits of these panels, you can transform any room into a more acoustically balanced environment.
With a clear understanding of the essential tools and materials, you can successfully embark on this rewarding journey with confidence. The step-by-step guide provided enables you to build your own panels while ensuring the process remains engaging and manageable. Don’t forget the importance of aesthetics—designing your panels in a way that complements your decor makes the project even more appealing.
As you implement these acoustic diffuser panels, you will notice a significant improvement in sound clarity and balance, elevating your audio experience whether you’re recording music, mixing sound, or simply enjoying your favorite tunes. From home studios to living rooms, the versatility of wooden diffusers allows for effective sound management in various spaces.
Embracing the DIY route not only empowers you to customize these panels to meet your unique needs, but it also fosters a deeper appreciation for the intricacies of sound. So, plunge into this creative endeavor, and enjoy the benefits that come from crafting your very own acoustic solutions. The quality of your audio experience truly begins here.