Creating a DIY Wooden Room Divider Screen can be an exciting project that enhances your living space. Whether you want to separate areas in a studio apartment, add some privacy to your workspace, or simply inject creativity into your home decor, a wooden room divider can provide both functionality and style. Here are some creative ideas to inspire your next DIY project.
Choosing Your Style
Before you start building your room divider, decide on the style that fits your space. Here are some popular styles:
- Modern Minimalist: Use clean lines and a simple structure to create a sleek look that blends with contemporary decor.
- Rustic Charm: Incorporate reclaimed wood for a warm, inviting feel. This style works well in country or farmhouse settings.
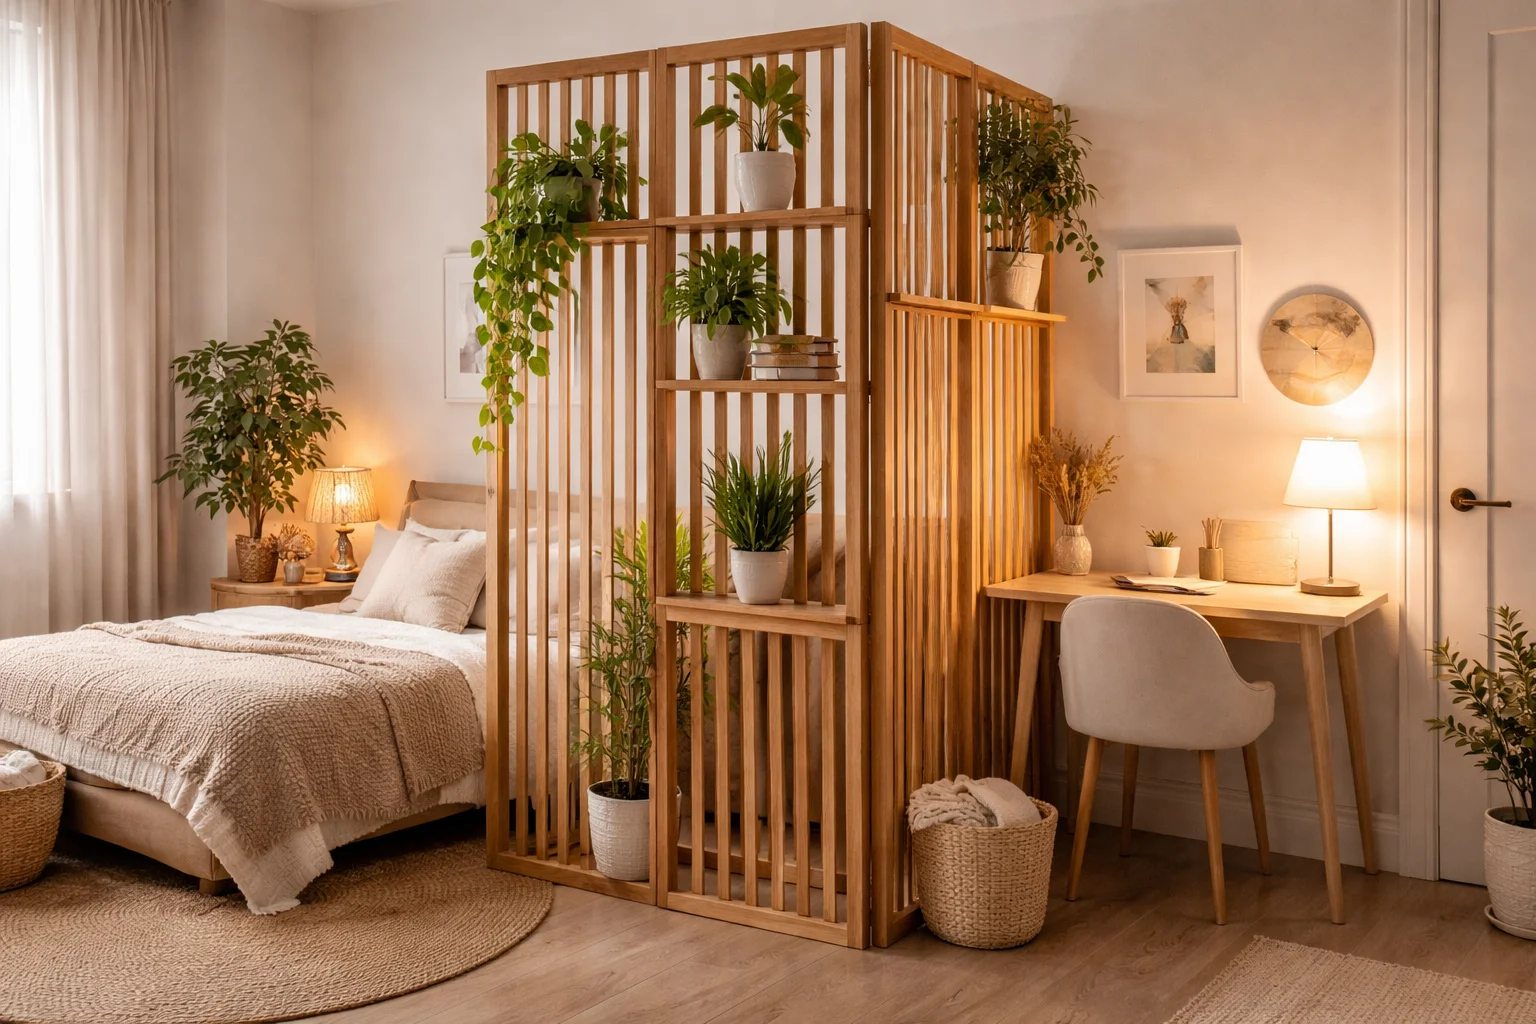
- Screened Elegance: Build a divider with slats or panels that allow light to flow through while still providing separation.
- Artistic Statement: Incorporate carvings, artwork, or colorful finishes for a unique piece that draws attention.
Materials Needed
To build your DIY Wooden Room Divider Screen, gather the following materials:
- Wood planks (Pine, Cedar, or plywood)
- Wood screws
- Wood glue
- Hinges (if creating a folding screen)
- Sandpaper
- Paint or wood stain (optional)
- Tools: Saw, drill, screwdriver, measuring tape, level
Step-by-Step Instructions
The construction process for your DIY Wooden Room Divider Screen can be broken down into several key steps:
- Measure Your Space: Determine how tall and wide you want your divider to be. Adjust based on your room layout.
- Cut Your Wood: Cut the wood planks to the desired dimensions using a saw. For a multi-panel screen, consider how many sections you want.
- Assemble Panels: Use wood screws and glue to join the planks together in each panel. Make sure to sand the edges for a smooth finish.
- Attach Hinges: If creating a folding screen, attach hinges at the edges of each panel. This allows for easy folding and adjusting of the divider.
- Finish the Divider: Apply paint or a wood stain to finish your divider. Let it dry completely before placing it in your desired location.
Unique Features to Consider
Add functional elements to your divider to make it even more useful:
- Built-in Shelves: Consider incorporating shelves to display plants, books, or decorative items.
- Storage Options: Design compartments for storage that blend with the aesthetics of the divider.
- Integrated Lighting: Install LED strip lights along the edges to create ambiance and highlight the wood grain.
- Artwork Panels: Use canvas or fabric panels between wooden slats to showcase your personal art collection.
Where to Find Inspiration
Sometimes, a little inspiration goes a long way. Here are a few websites that can help you explore creative designs and DIY plans:
Tips for Success
Here are a few tips to ensure your DIY project goes smoothly:
- Plan Ahead: Sketch your design and gather all materials before starting.
- Take Your Time: Don’t rush through the cutting and assembly processes to ensure quality workmanship.
- Get Help: Ask a friend to join you. It can make the process more enjoyable and is helpful when handling large pieces of wood.
- Test Fit: Once assembled, place the divider in its intended spot to ensure it fits well with your existing decor.
A DIY Wooden Room Divider Screen offers a perfect way to personalize your space. By weaving together functionality and artistry, you can create a stunning addition to your home that reflects your unique taste. So gather your materials and start building! With a little creativity and effort, you’ll produce a practical masterpiece that enhances your living environment.
Choosing the Right Wood for Your Room Divider Project
When embarking on a DIY project, especially something as visually striking as a wooden room divider screen, selecting the right type of wood is crucial. The wood you choose will impact not only the aesthetics of your divider but also its durability and functionality. Here are some vital factors to consider to ensure your project is a success.
Understanding Different Wood Types
Different types of wood offer varying strengths, finishes, and characteristics. Here’s a rundown of some popular wood choices:
| Wood Type | Characteristics | Best Use |
|---|---|---|
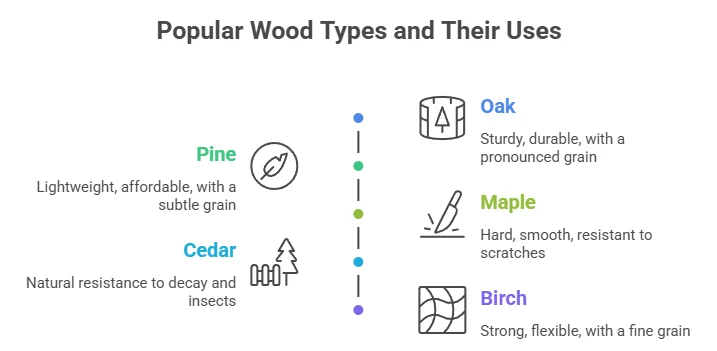
| Oak | Sturdy, durable, with a pronounced grain | Elegant room dividers, furniture |
| Pine | Lightweight, affordable, with a subtle grain | Budget-friendly projects, rustic designs |
| Maple | Hard, smooth, resistant to scratches | Modern, sleek designs |
| Cedar | Natural resistance to decay and insects | Outdoor dividers, aromatic finishes |
| Birch | Strong, flexible, with a fine grain | Creative designs, complex shapes |
Consider the Aesthetics
The wood you choose should align with your existing interior decor. Here are some factors to think about:
- Color: Lighter woods like birch or pine can brighten a room, while darker woods like walnut or mahogany add warmth.
- Grain Pattern: Some woods have distinctive grain patterns that can add visual interest to your space.
- Finish: Consider whether you want to stain the wood, paint it, or leave it natural to highlight its features.
Assessing Durability and Maintenance
Wood durability varies significantly. Hardwoods like oak and maple are known for their strength and longevity. Softwoods, such as pine, are easier to work with but may require more maintenance over time. Here are some pointers:
- Location: If your divider will be in a high-traffic area, choose a denser wood to withstand wear.
- Climate: If you live in a humid area, consider wood treatment options to prevent warping or mold.
- Maintenance: Some woods require regular polishing and care to maintain their appearance.
Cost Considerations
Your budget will greatly influence the type of wood you can use. Here’s a simple breakdown:
- High-End Options: Exotic woods like mahogany or walnut can be costly but offer stunning aesthetics.
- Mid-Range Choices: Popular domestic woods such as oak or maple provide a balance of quality and affordability.
- Bargain Prices: Pine is the most budget-friendly option, ideal for projects where cost is a concern.
Where to Source Your Wood
When selecting your wood, consider the following sources:
- Lumber Yards: Local lumber yards often have a wide range of options and knowledgeable staff to assist you.
- Home Improvement Stores: Big-box retailers offer many common options and sometimes specialty selections.
- Online Retailers: Websites like Woodworkers Supply and Rockler can be great for finding specific types of wood.
Selecting the right wood for your DIY Wooden Room Divider Screen is an important decision that affects the look and feel of your space. Take your time to evaluate each type of wood based on its characteristics, durability, and cost. With the right choice, you can create a stunning divider that enhances your home or office setting.
Tools and Materials Needed for Making a Wooden Divider
Creating a DIY Wooden Room Divider Screen is an exciting project that not only adds functionality to your space but also allows for a personal touch. Whether you’re looking to create a cozy nook or separate areas in your home, understanding the tools and materials needed is essential for a successful build. Below are the key items required for crafting your own wooden divider.
Essential Tools
Gathering the right tools will make your project smoother and more efficient. Here is a list of the essential tools you will need:
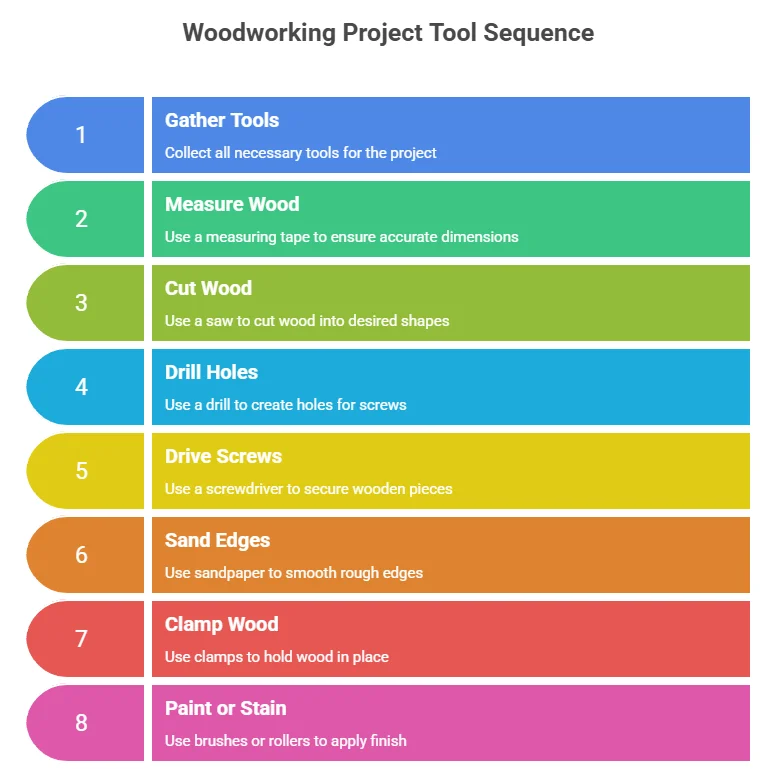
- Measuring Tape: Accurate measurements are crucial. A measuring tape helps ensure all your pieces fit together perfectly.
- Saw: A circular saw or a miter saw is perfect for cutting your wood into the desired dimensions. Ensure your blades are sharp for clean cuts.
- Drill: A cordless drill will be handy for making holes and driving screws. Consider using a drill with different sized bits for added versatility.
- Screwdriver: A quality screwdriver, or better yet, a drill with a screwdriver attachment, aids in securing your wooden pieces together.
- Sandpaper: After cutting your wood, sandpaper smooths the edges, ensuring a polished finish that’s safe to touch.
- Clamps: These help hold your wood in place while you work, making assembly easier and more precise.
- Paintbrushes or Rollers: If you plan to paint or stain your divider, these will help you achieve an even, professional-looking finish.
Basic Materials
Now that you have the tools, it’s time to gather the necessary materials for your wooden room divider:
- Plywood or Solid Wood Panels: Choose the type of wood based on your design and budget. Plywood is often more affordable, while solid wood can provide a more sturdy and premium look.
- Wood Screws: Secure your divider together using appropriate wood screws. Make sure they are long enough to hold the pieces firmly without splitting the wood.
- Wood Stain or Paint: This is optional but strongly recommended. Staining or painting your divider adds character and protects the wood.
- Plywood Corners (Optional): Adding plywood corners can increase stability in large dividers. They are particularly useful if your design involves angles or curves.
Optional Features
Consider incorporating additional features into your wooden divider for functionality and aesthetics. Here are some options:
- Hinges: If you want a folding divider, hinges are essential. They allow your divider to be easily opened and closed.
- Decorative Handles: Adding handles not only makes it easier to move but can also enhance the overall look of your screen.
- Feet or Base Stabilizers: These provide extra support and prevent your divider from tipping over.
Helpful Resources
If you’re unsure where to purchase your materials or find additional inspiration, consider these resources:
- Wood Magazine offers numerous articles and plans for woodworking projects.
- Ana White is a popular site with a range of woodworking plans that include room dividers.
- Rockler Woodworking and Hardware is a great source for tools and materials.
This DIY project is not only cost-effective but also allows you to create something uniquely yours. With the right tools and materials, you can achieve a stunning wooden room divider that enhances the beauty and functionality of your space. Remember to plan your design carefully, and enjoy the crafting process!
Step-by-Step Guide to Building Your Own Room Divider
Are you looking to add some privacy or define spaces in your home without breaking the bank? A DIY Wooden Room Divider Screen might just be the perfect solution. Building your own room divider can not only enhance the aesthetic of your space but also give you the freedom to customize it according to your needs. Let’s walk through the steps to create your own wooden room divider.
Materials Needed
Before you start constructing your room divider, gather all the necessary materials. Here’s a basic list:
- Wood panels or plywood sheets
- Wood glue
- Screws
- Hinges
- Sandpaper
- Paint or wood stain
- Measuring tape
- Power drill
- Table saw or circular saw
Step-by-Step Construction
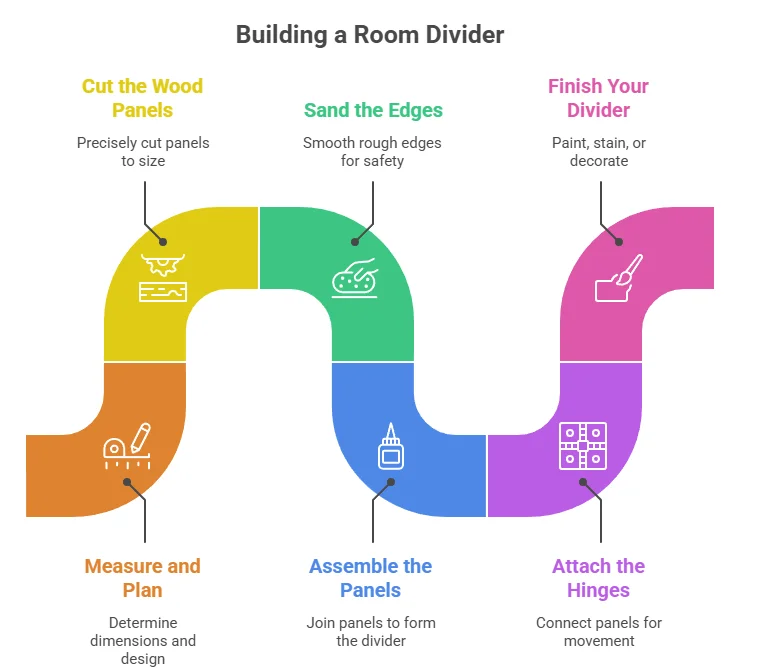
1. Measure and Plan
Start by measuring the space where you want to place your room divider. Decide how tall and wide you want your divider to be. Sketch a simple design that outlines the number of panels and their dimensions. This blueprint will serve as a guide throughout the construction process.
2. Cut the Wood Panels
Using your measurements, cut the wood panels or plywood sheets to size. A circular saw or table saw can make this process easier. Remember to wear safety glasses and follow safety procedures when working with power tools. For a more professional look, try to create panels of equal sizes.
3. Sand the Edges
Once your panels are cut, smooth the edges with sandpaper to avoid splinters. Sanding not only makes the panels safe to handle but also prepares them for painting or staining.
4. Assemble the Panels
Now, it’s time to create the actual divider. Lay out your panels side by side. Use wood glue to join the edges of each panel together. For added stability, use screws to secure the panels. Let the glue dry as per the manufacturer’s instructions.
5. Attach the Hinges
Position your hinges at the edges where each panel meets. This allows your room divider to fold and creates a flexible structure. Use the power drill to secure the hinges in place, ensuring they are tightly fastened.
6. Finish Your Divider
Once the assembly is complete, it’s time to add a personal touch. Apply paint or wood stain to match your décor. If you desire a natural look, a simple clear coat can enhance the wood grain.
7. Place Your Room Divider
After the paint or stain dries, move your wooden room divider into the chosen area. Make sure it stands securely and adjust its position as needed. You can also add decorative items like plants or art to complement your new divider.
Tips for Customization
Your DIY wooden room divider doesn’t have to be just plain wood. Here are some ideas to make it unique:
- Paint Patterns: Use stencils to paint designs on your panels.
- Add Shelves: Incorporate small shelves for displaying items.
- Choose Different Wood: Use different types of wood for a mixed look.
- Include Fabric: Hang curtains for softness and privacy.
Maintenance Tips
To keep your room divider looking fresh:
- Clean it regularly with a damp cloth.
- Reapply wood polish every few months.
- Check for loose hinges and screws periodically.
Building your own wooden room divider screen is not only a fun project but also a rewarding one. It allows you to create a personal touch in your space while being cost-effective. If you’re looking for more inspiration and techniques, visit Better Homes & Gardens for innovative design ideas. You can also check out Wood Magazine for detailed woodworking techniques. Enjoy your crafting journey!
Styling Tips to Enhance the Look of Your Wooden Screen
When it comes to styling your DIY Wooden Room Divider Screen, the possibilities are endless. A wooden screen not only serves a functional purpose but also acts as a beautiful design element in your space. Whether you want to create a private nook or simply add sophistication to the room, here are several styling tips that will enhance the look of your wooden screen.
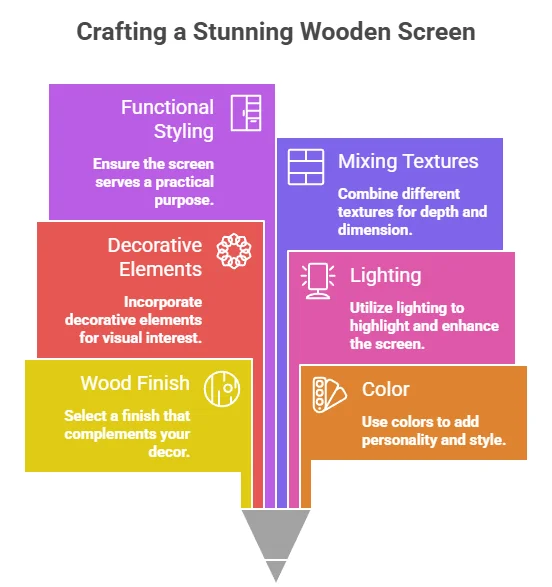
Choose the Right Wood Finish
The wood finish you select can drastically change how your room divider looks. For a modern vibe, consider a sleek, matte finish. If you prefer a rustic feel, a distressed or weathered finish will add charm. Looking for something more classic? Opt for a glossy finish that highlights the natural grain of the wood.
Incorporate Color
Don’t be afraid to play with color when styling your wooden screen. You can paint the screen in a color that complements your room’s palette. Consider using spray paint or wood stain for a clean finish. If you want a unique twist, try a two-tone effect where different panels of the divider are painted in contrasting colors. This adds visual interest while still maintaining the natural look of wood.
Adding Decorative Elements
You can further enhance the appearance of your wooden screen by incorporating various decorative elements. Here’s how:
- Artwork: Attach framed artwork or prints to the surface of your screen to create a gallery look. This can also serve as an opportunity to display seasonal decorations.
- Plants: Hang small planters with succulents or trailing plants from the top of the screen. This brings life into your space and pairs beautifully with wooden elements.
- Textile Options: Drape lightweight fabrics or string lights along the divider. This softens the wood’s hard lines and adds warmth to your room.
Utilizing Lighting
Lighting can dramatically change the perception of any space. Consider positioning your wooden screen next to a window or placing it in such a way that it catches natural light. Additionally, incorporate adjustable lighting solutions, such as floor lamps or wall scone, aimed at the screen. This not only highlights the texture of the wood but also creates a cozy atmosphere in the room.
Functional Styling
Structural elements can also serve as functional decor. Here are some ideas:
- Bookshelves: Convert sections of your wooden screen into shelves where you can display books, decorative boxes, or personal items that you love.
- Storage: Add hooks or small baskets to hold everyday items, making the divider a practical and stylish element.
Mixing Textures
Wooden screens work well with a variety of textures. Pairing hard surfaces with soft furnishings creates balance in the space. For instance, surround your screen with plush chairs or a fluffy rug. This combination helps to soften the wooden edges and makes the room look welcoming.
Strategic Placement
Where you place the wooden room divider screen matters significantly. If you want to create separate cozy corners in an open floor plan, position it strategically between furniture areas. For example, place the screen behind a sofa or in front of a reading nook. This not only defines space but also creates a natural flow.
Personal Touches
Ultimately, your wooden screen should reflect your style. Incorporate personal touches that make the space genuinely yours. Consider adding photos, souvenirs from travels, or elements that bring back memories. These personalized items add warmth and character to the divider.
Creating a stylish and functional wooden room divider screen is all about creativity and personal expression. Remember to think about how the screen integrates with your overall room design. For additional inspiration and tips, visit Wood Magazine or The Spruce for expert advice on wooden features in home design.
Conclusion
A DIY Wooden Room Divider Screen is not just a functional piece; it becomes a stunning focal point in your space. By exploring creative ideas, you can customize your room divider to reflect your style and meet your needs. Selecting the right wood is crucial, as it impacts both the durability and aesthetics of your project. Whether you prefer the warmth of pine or the elegance of walnut, each wood type brings something unique to your design.
Equipping yourself with the right tools and materials is essential to ensure a smooth building process. Make sure you have everything from a saw to sandpaper ready before you start constructing. The step-by-step guide you followed will empower you to create a beautifully crafted room divider, even if you’re a beginner.
Once your wooden screen is built, styling it can elevate its look even further. Add some plants, decorative lights, or art pieces to make it a stunning feature in your room. Whether you use it to define spaces, add privacy, or simply enhance your interior decor, your DIY Wooden Room Divider Screen will surely be a rewarding project. Embrace your creativity, enjoy the building process, and relish how this personalized piece transforms your living space. With careful planning and execution, your wooden divider can blend functionality with beauty, creating an inviting environment you can be proud of.