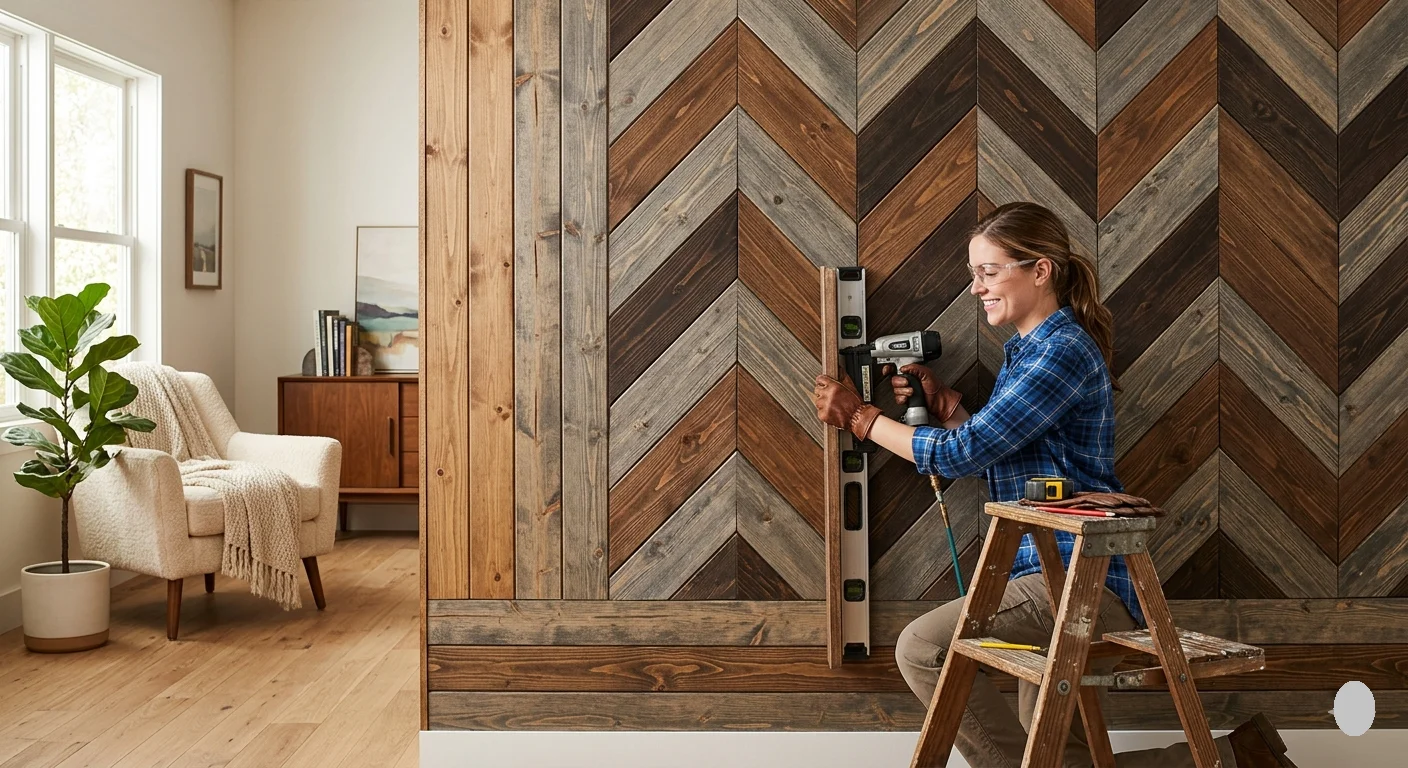
Creating a wood accent wall can transform any room into a cozy, inviting space. Not only does it add character, but it also showcases your personal style. Follow this easy step-by-step guide to How to Make a Wood Accent Wall.
Step 1: Gather Your Materials
Before you start, gather all necessary materials. Here’s a list to get you started:
- Wood planks or boards
- Plywood or drywall (if applicable)
- Nails or screws
- Hammer or power drill
- Level
- Measuring tape
- Stud finder
- Wood stain or paint (optional)
- Sandpaper
- Safety goggles
Having all these items ready will streamline the process and reduce interruptions.
Step 2: Choose Your Wood Type
Decide on the type of wood you want for your accent wall. Common choices include:
- Pine: Affordable and easy to work with.
- Oak: Durable and has a classic look.
- Walnut: Rich color and elegant appearance.
- Rustic reclaimed wood: Offers texture and character.
Your wood choice will influence the overall aesthetic of the accent wall. Consider the existing décor when making your decision.
Step 3: Measure and Plan the Layout
Measure the wall where you want to install the wood. Use a stud finder to locate the studs; this ensures your planks stay secure. Mark these spots with a pencil. Planning How to Make a Wood Accent Wall layout—horizontally, vertically, or in a pattern—will help guide the installation.
Step 4: Prepare the Wall
Before attaching your wood, make sure the wall is clean and smooth. If your wall has any imperfections, it’s best to sand it down. This will help the wood sit evenly and adhere better. If you’re attaching the wood to drywall, consider installing plywood panels first to give the wood a sturdy base.
Step 5: Cut Your Wood Planks
Using your measurements, cut the wood planks to size. A power saw works best for straight cuts. Always wear safety goggles while cutting to protect your eyes.
Step 6: Stain or Paint the Wood (Optional)
If you want to add color or enhance the natural grain of the wood, apply a stain or paint before installation. Make sure the wood is completely dry before moving to the next step. Different finishes can create a unique look; find inspiration here.
Step 7: Install the Wood Planks
Now it’s time for the fun part! Start from the bottom and work your way up. Use a level to make sure your planks are straight. Nail or screw the wood into the studs you marked earlier. Ensure each plank is secure, checking alignment as you go.
Step 8: Finishing Touches
Once all your wood is installed, fill in any gaps or nail holes with wood putty. If desired, you can further sand down the areas to create a smooth finish. apply a sealant to protect your wood accent wall from wear and tear. You can find helpful sealing tips here.
Step 9: Add Decor
Your wood accent wall serves as a backdrop for your creative display. Consider adding shelves, artwork, or light fixtures to enhance the look. Decorate in a way that reflects your personal style, making the space truly yours.
Benefits of a Wood Accent Wall
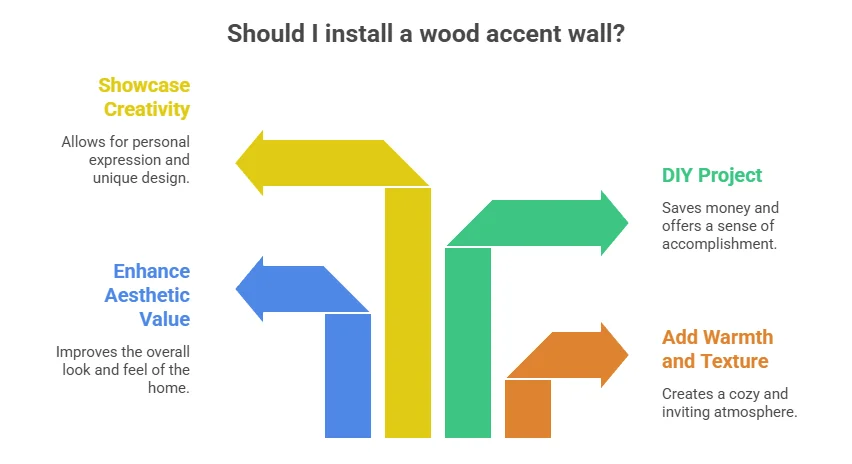
A wood accent wall can:
- Add warmth and texture to the room.
- Enhance your home’s aesthetic value.
- Be a DIY project that saves money over hiring a professional.
- Showcase your creativity and style.
By following these steps, you can create a stunning and personalized wood accent wall that will impress your guests and renew your living space. For more tips and inspiration, check out this resource.
Choosing the Right Wood for Your Accent Wall
Creating a wood accent wall can transform any room into a cozy, inviting space. One of the most important decisions you will make is choosing the right wood. Each type has its own unique benefits and characteristics that can enhance the look of your home. Here’s a guide to help you select the best wood for your accent wall.
Types of Wood to Consider
When it comes to wood choices, there are several popular options. Here’s a quick overview:
- Pine: This is one of the most affordable choices. It’s lightweight and accepts paint and stains well, making it versatile. However, it may dent or scratch more easily than harder woods.
- Cedar: Known for its rich color and natural resistance to decay, cedar is great for indoor and outdoor use. Its aromatic properties also add a pleasant scent to your space.
- Oak: Oak is a classic choice. It’s very durable and has a beautiful grain. Red oak has a warmer tone, while white oak is cooler and more refined.
- Maple: This type of wood is hard and less porous. It comes in different shades and is excellent for a modern look. Its fine grain lends itself to a polished finish.
- Walnut: If you want a luxurious finish, walnut is an excellent choice. The dark, rich tones can make a statement and pair beautifully with lighter colors in a room.
Cost Considerations
The cost of wood can vary greatly based on species, quality, and finish. Here’s a comparative table to give you a better understanding:
| Wood Type | Price Range (per square foot) | Durability |
|---|---|---|
| Pine | $2 – $5 | Medium |
| Cedar | $3 – $7 | High |
| Oak | $4 – $10 | Very High |
| Maple | $4 – $8 | High |
| Walnut | $8 – $15 | Very High |
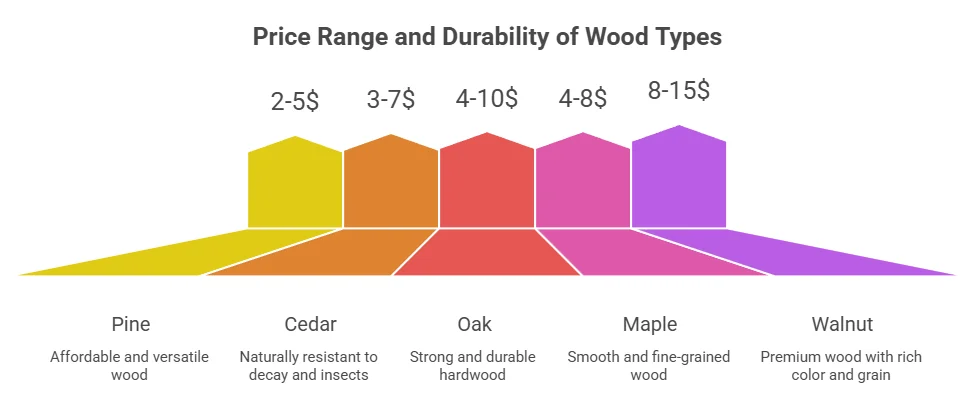
Make sure to budget accordingly and consider the long-term value of your investment. Higher-quality woods like oak and walnut may have a higher upfront cost, but their durability often means less maintenance and replacement down the road.
Personal Style and Aesthetics
Your personal style is a key factor when choosing wood for your accent wall. Consider the overall theme of your space:
- If your home has a rustic design, pine or reclaimed wood can add charm.
- For a contemporary look, maple or sleek oak might fit best.
- Cedar works well for natural-inspired spaces with its earthy tones.
- Rich walnut is perfect for a luxurious atmosphere, especially in a modern or mid-century setting.
Sustainability
Consider choosing sustainably sourced wood. Look for products that come with a certification like FSC or SFI to ensure you are supporting responsible forestry practices. This not only helps the environment but also ensures that your wood is of high quality.
Maintenance
Keep in mind that different woods require varying maintenance levels. Softer woods like pine will need more frequent touch-ups than harder varieties. Consider how much time and effort you’re willing to invest in upkeep before making a decision.
Finding Your Wood
Once you have narrowed down your options, you can start sourcing your wood. Local hardware stores or lumber yards often carry a selection. You can also check out websites like Home Depot or Lee Valley for a broader selection. Choosing the right wood for your accent wall is more than just style; it’s about functionality and sustainability. By considering your options carefully, you will create a beautiful space that you can enjoy for years to come.
Tools and Materials Needed for Wood Accent Wall Installation
Creating a wood accent wall can transform a dull space into a stylish focal point. The beauty of wood adds warmth and character to any room. However, to achieve the desired look, having the right tools and materials is essential. Below is a comprehensive list to help you get started on How to Make a Wood Accent Wall project.
Essential Tools
- Measuring Tape: Accurate measurements are critical. A measuring tape ensures you cut your wood pieces correctly to fit your wall.
- Level: To ensure that your wood panels are straight, a level is necessary. This tool will help you avoid the frustration of crooked lines.
- Pry Bar: If you’re working with existing wall structures, a pry bar can help you remove any trim or molding without causing damage.
- Power Drill: A power drill will be your best friend for securing wood panels to the wall. It’s efficient and makes the job easier.
- Stud Finder: Locating the studs in your wall is crucial, as this is where you should secure your panels for a sturdy installation. A stud finder can help you pinpoint these locations accurately.
- Chop Saw or Miter Saw: These saws allow for precise cuts at various angles. If you’re working with different wood sizes and shapes, a miter saw is especially helpful.
- Nail Gun or Hammer: A nail gun makes fastening the wood to the wall quick and efficient. If you prefer a traditional method, a hammer will also do the job.
- Safety Gear: Don’t forget your protective goggles and gloves! Safety should always be a top priority during your DIY project.
Materials Needed
In addition to tools, you will need specific materials to construct your wood accent wall. Here’s what you should gather:
- Wood Panels: Choose from various types of wood, like reclaimed barn wood, shiplap, or even plywood. Each option offers a unique appearance.
- Adhesive: Depending on your installation method, a strong adhesive can be an excellent choice for adhering the wood to the wall. Look for construction adhesive designed for heavy materials.
- Wood Stain or Paint: To enhance the natural beauty of your wood, consider a stain. Alternatively, paint can provide a completely different look. Choose a color that complements your space.
- Wood Sealer: If you choose not to stain your wood, a sealant will protect it from moisture and wear over time.
- Caulk: Caulking can be used to fill gaps between wood panels for a smooth finish, ensuring a polished look.
- Trim or Molding: Baseboards or crown molding can complete your wood accent wall with a decorative touch.
Preparation Steps
Before you begin your project, follow these preparation steps:
- Measure the wall where you will install the wood panels.
- Decide on your layout and design. Sketch it out for reference.
- Gather all the tools and materials listed above to ensure you’re fully prepared before starting the installation.
For more detailed instructions, you can refer to sites like Wood Magazine that provide valuable insights into woodworking projects. Building a wood accent wall is an engaging project that can elevate the look of your home. With the right tools and materials in hand, you’re well on your way to creating a stunning feature that you’ll be proud to show off. Need more DIY inspiration? Explore the resources at Home Depot for tips and ideas to enhance your space.
Creative Design Ideas for Your Wood Accent Wall

Creating a wood accent wall can dramatically change the feel and aesthetics of a space. It offers warmth, texture, and depth that can enhance any room’s design. Whether you want a rustic appearance or a modern twist, incorporating innovative design ideas can help you learn How to Make a Wood Accent Wall achieve your desired look.
Choose the Right Wood Type
Wood comes in various types, each offering unique characteristics. Here are some popular choices:
- Pine: Affordable and easy to work with.
- Cedar: Naturally resistant to decay, ideal for humid environments.
- Walnut: Offers a rich, dark look and is highly durable.
- Oak: Known for its strength and traditional appearance.
Selecting the right type of wood is crucial, as it can affect the overall aesthetic of your wall. Research the characteristics of each wood type to find the one that suits your style best.
Explore Different Finishes and Stains
Finishing touches can transform your wood accent wall. Here are a few ideas:
- Natural Stain: Showcases the wood’s natural beauty.
- Dark Stain: Adds a bold, dramatic touch.
- Whitewash: Creates a light, airy feel.
- Paint: Allows for a pop of color and unique design.
Experiment with various stains or paints to find a finish that truly reflects your personality and complements your existing decor.
Incorporate Patterns and Textures
Don’t just stick with a single, flat design. Consider these creative patterns:
- Horizontal Planks: Offers a contemporary vibe.
- Vertical Stripes: Creates the illusion of height in smaller rooms.
- Geometric Patterns: Adds a modern, artistic flair.
- Mixing Textures: Combine smooth and rough finishes for an interesting contrast.
Choosing different patterns can make your wood accent wall a focal point and conversation starter. Don’t hesitate to get creative!
Layer Your Wood Accents
Layering different shades or types of wood can create depth and interest. For example, alternate light and dark stains in a staggered pattern, or combine reclaimed wood with new wood for an eclectic look. This technique helps to draw the eye and provides a more personalized touch to your space.
Highlight with Lighting
The right lighting can make your wood accent wall truly shine. Here are some tips:
- Spotlights: Draw attention to your wall and showcase its texture.
- Wall Sconces: Create a cozy atmosphere and add character.
- LED Strips: Offer a modern touch and can be used to highlight patterns.
Strategically placed lighting can dramatically improve the ambiance of the room and elevate the look of your wood accent wall.
Integrate Functional Elements
Consider integrating functional elements into your design. Here are some ideas:
| Element | Function |
|---|---|
| Shelves | Display decor or books while enhancing the design. |
| Hooks | Stylishly store and display coats or bags in an entryway. |
| Built-in Benches | Create a cozy nook and utilize space efficiently. |
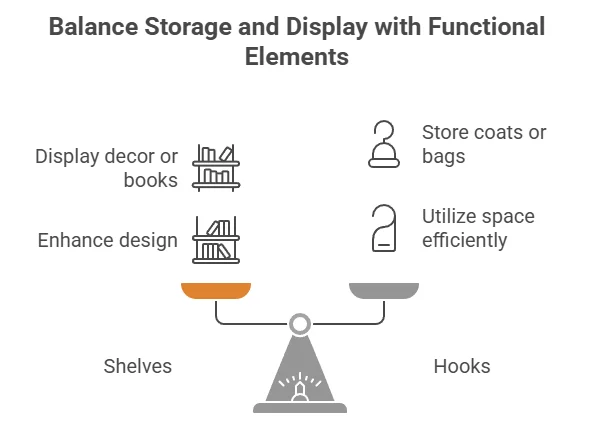
By integrating functionality, you make your accent wall not only beautiful but practical as well. For more inspiration and guidance on How to Make a Wood Accent Wall, visit The Spruce or Wood Magazine.
Maintenance Tips for Keeping Your Wood Accent Wall Looking Great
Wood accent walls can bring warmth and style to any room in your home. However, they require some ongoing maintenance to keep them looking fresh and beautiful over time. Follow these essential tips to ensure your wood accent wall remains a stunning focal point.
Regular Cleaning
Dust and dirt can accumulate on your wood accent wall, dulling its appearance. Regular cleaning helps maintain its beauty:
- Dust Weekly: Use a soft, dry cloth or a feather duster to wipe away dust weekly. Make sure to reach all corners and any detailed areas.
- Vacuum Occasionally: If your wall has any nooks, consider using a vacuum attachment to remove cobwebs or debris. This method can be particularly effective for textured wood.
- Gentle Wipes: Every few months, clean the surface with a damp cloth. Just make sure it’s not soaking wet, as excess moisture can damage the wood.
Avoid Harsh Chemicals
When maintaining your wood accent wall, be cautious about the cleaning products you choose. Strong chemicals can strip the finish or damage the wood surface. Instead, use natural cleaners as a safer alternative:
- Vinegar and Water: Mix one part white vinegar with three parts water for an effective natural cleaner.
- Olive Oil and Vinegar: This mixture not only cleans but also conditions the wood, helping to maintain its luster.
- Commercial Wood Cleaners: If you prefer a store-bought option, choose cleaners specifically designed for wood surfaces.
Monitor Humidity Levels
Wood can expand and contract with changes in humidity. Keeping your home at a stable humidity level is crucial for your wood accent wall’s longevity:
- Aim for 30-50% Humidity: Use a hygrometer to monitor humidity levels. Consider using a humidifier or dehumidifier as needed.
- Avoid Damp Areas: If your wall is in a bathroom or basement, make sure these areas are well-ventilated to prevent moisture buildup.
Protect From Sunlight
Direct sunlight can cause wood to fade and warp over time. Here’s how to protect your wall:
- Use Window Treatments: Install blinds or curtains to filter sunlight during peak hours.
- UV-Blocking Films: Consider applying UV-blocking films to your windows for added protection.
- Position Decor Wisely: Arrange furniture or decor to shield the wall from excessive sunlight exposure.
Regularly Inspect for Damage
Perform regular checks to identify any issues before they become major problems. Here’s what to look for:
- Scratches: Touch up small scratches with a matching wood stain or marker.
- Water Damage: Look for water stains or swelling, particularly after spills or flooding.
- Loose Panels: Ensure that all panels are securely attached. If any appear loose, reattach them promptly.
Periodic Re-Finishing
Over time, the finish on your wood accent wall may wear out. A fresh coat can breathe new life into your wood accents:
- Light Sanding: Before reapplying a finish, lightly sand the surface to ensure the new layer adheres well.
- Choose the Right Finish: Use a finish that complements your space, whether it’s matte, satin, or gloss.
- Follow Manufacturer Guidelines: Always adhere to the product instructions for the best results.
With these maintenance tips, your wood accent wall can remain a stunning feature for years to come. For more information on wooden wall care, visit Woodworker’s Source and Houzz to explore additional advice.
Conclusion
Creating a wood accent wall can transform your living space, adding warmth and personality to any room. By following the step-by-step guide, you can confidently tackle How to Make a Wood Accent Wall and achieve stunning results. Choosing the right wood is essential; whether you prefer rustic charm or modern sophistication, the right selection will enhance the overall aesthetic of your space.
Equipping yourself with the necessary tools and materials is vital for a smooth installation process. With the right preparations in place, even beginners can achieve a professional-looking finish. Once your accent wall is up, let your creativity shine with various design ideas. From geometric patterns to stained finishes, the possibilities are endless, making it easy to create a unique focal point that reflects your style.
Maintaining your wood accent wall is equally important for ensuring its beauty lasts for years. Simple care tips, such as regular dusting and occasional reconditioning, will keep the wood looking fresh and vibrant. Remember, a little upkeep goes a long way in preserving your hard work.
Elevating your home’s atmosphere with a wood accent wall adds character and value. With this guide in hand, you’re well-equipped to embark on your DIY journey. Enjoy the process, relish in your creativity, and know that you’re creating a space that is distinctly yours. Happy decorating!