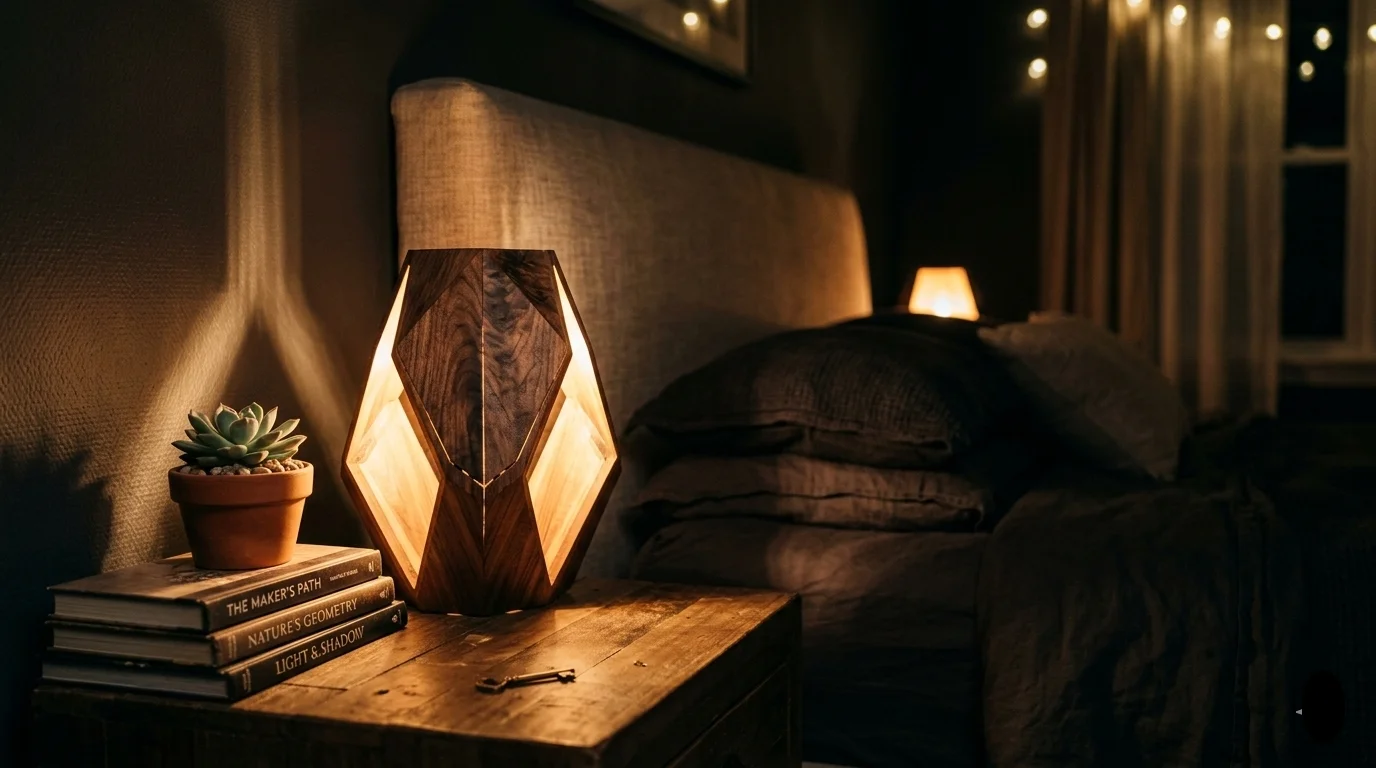
If you’re looking to enhance your home’s décor with a personal touch, DIY Wooden Lamp Making Ideas can provide a unique and creative outlet. Crafting your own lamp not only adds warmth to your space but also allows you to explore your creativity. Here are several innovative ideas to consider for your next DIY project.
Rustic Wooden Block Lamp
A rustic wooden block lamp makes a striking centerpiece for any room. Begin with a sturdy piece of wood, such as cedar or pine. Cut your wood to the desired height; a 12-16 inch block works well. Sand it to create a smooth surface and stain or paint it to match your home. Here’s a simple guide:
- Materials Needed: Wooden block, lamp kit, light bulb, sandpaper, wood stain or paint, brush.
- Steps:
- Cut the wood block to your desired size.
- Smooth the edges with sandpaper.
- Apply wood stain or paint as desired.
- Pierce a hole through the center for the lamp kit wiring.
- Assemble the lamp kit according to the manufacturer’s instructions.
Driftwood Lamp
If you love a beachy vibe, a driftwood lamp is a perfect choice. Collect some driftwood sticks to create a base. You can glue or tie them together to form a natural formation. Here’s a quick rundown:
- Materials Needed: Driftwood sticks, lamp kit, light bulb, strong glue, or twine.
- Steps:
- Arrange the driftwood in a pleasing design.
- Secure the pieces together with glue or twine.
- Pierce a hole at the top for lamp wiring.
- Install the lamp socket and, if necessary, add a lampshade.
Pallet Wood Lamp
Pallet wood is an excellent material for DIY projects, including lamps. This idea is eco-friendly and budget-friendly. You can easily find used pallets, which makes them a sustainable option.
- Materials Needed: Pallet wood, lamp kit, light bulb, nails, hammer, saw.
- Steps:
- Disassemble the pallet carefully.
- Cut the slats into pieces that suit your lamp design.
- Construct a lamp shape, nail the pieces together.
- Attach the lamp kit at the top.
Geometric Wooden Lamp
For a modern touch, consider creating a geometric lamp. This involves using geometric shapes to form the base. You can use plywood and cut it into triangles or squares.
- Materials Needed: Plywood, lamp kit, light bulb, wood glue, saw.
- Steps:
- Plan your geometric design.
- Cut the plywood into the shapes needed.
- Assemble the shapes using wood glue.
- Install the lamp kit and light bulb.
Tree Branch Lamp
Utilizing a tree branch can add a rustic charm to your home. A sturdy branch can serve as the base while you add a light kit on top.
- Materials Needed: Tree branch, lamp kit, light bulb, sandpaper, stain (optional).
- Steps:
- Choose a branch that is thick and sturdy.
- Sand it down to remove rough spots.
- If desired, apply a wood stain for a polished look.
- Attach the light kit to the top of the branch.
Essential Tools and Materials for Building Wooden Lamps
Creating your own wooden lamp can be a rewarding endeavor, offering the satisfaction of craftsmanship and the chance to light up your space with something truly unique. To embark on this project, it’s essential to gather the right tools and materials. Below, you’ll find a comprehensive guide to essential tools and materials that will help you build beautiful wooden lamps.
Tools You Will Need
Having the right tools is crucial for making your wooden lamp. Here’s a list of the primary tools you should consider:
- Safety Gear: Always start by wearing safety glasses and gloves to protect yourself while working with wood and tools.
- Circular Saw: Perfect for making straight cuts in your wooden pieces. It provides accuracy and ease for cutting larger boards.
- Pocket Hole Jig: This tool allows you to create strong, concealed joints between your wood pieces.
- Drill/Driver: Essential for drilling holes and driving screws. A cordless model adds mobility and convenience.
- Sander: A hand or power sander helps smooth out rough edges and surfaces, ensuring your lamp is not just functional but also aesthetically pleasing.
- Clamps: These are invaluable for holding pieces together while the glue dries or while joining components.
- Wood Chisel Set: Useful for any intricate carving or fine adjustments you want to make to your wooden lamp.
Materials Required
For a wooden lamp project, you will need specific types of wood, electrical components, and finishing supplies. Here’s a breakdown:
- Wood: Choose quality hardwoods like oak, maple, or walnut for longevity and visual appeal. Plywood is also cost-effective and works well for many designs.
- Lamp Kit: This typically includes a socket, switch, and cord. You can find various styles to match your lamp’s design. Check sites like LampParts for a wide selection.
- Light Bulb: Select an energy-efficient light bulb appropriate for your lamp’s design and intensity preference. LED bulbs are excellent for eco-friendliness.
- Wood Glue: Strong adhesive specifically designed for wood work. It’s essential for securing different components together.
- Wood Finish: Whether you prefer varnish, stain, or paint, a good finish will protect your lamp and enhance its beauty. Explore options at Woodcraft.
- Wire Stripper: A handy tool for preparing electrical wires to ensure proper connections.
Choosing the Right Wood
Your wood choice can significantly impact the look and feel of your lamp. Here are popular options:
| Type of Wood | Properties | Best For |
|---|---|---|
| Oak | Durable and strong, with a beautiful grain | Classic lamp designs |
| Maple | Hardwood known for its light color; easy to work with | Modern and minimalist styles |
| Walnut | Rich color and unique grain patterns | Elegant, high-end designs |
You can find various types of wood at your local hardware store or specialty lumberyards. Always choose pieces that are free of major knots and defects for the best results.
Final Tips
As you gather your tools and materials, keep in mind the importance of planning your design thoroughly. Sketching your lamp before starting will help visualize the final product and ensure that you have all the necessary components. You can also find inspiration and detailed guides on websites like Instructables or Wood Magazine. By preparing adequately and choosing the right tools and materials, you’ll be well on your way to creating a stunning wooden lamp that will brighten up your space for years to come!
Step-by-Step Guide to Crafting Unique Wooden Lamp Designs
Creating your own wooden lamp can be a rewarding and creative project. It allows you to customize lighting in your home while giving you the satisfaction of making something by hand. Below, you’ll find a step-by-step guide to help you craft unique wooden lamp designs that will brighten up any space.
Gather Your Materials
Before starting your DIY wooden lamp project, gather the necessary materials. Here’s a list of what you will need:
- Wood blocks or planks (choose your preferred type)
- Lamp kit (socket, cord, and switch)
- Wood glue
- Wood finish or paint
- Sandpaper
- Drill with wood bits
- Clamps (to hold pieces together as they dry)
- Safety goggles
- Ruler or measuring tape
- Pencil for marking
Plan Your Design
Take some time to sketch out your lamp design on paper. Consider the style you want—modern, rustic, or something in between. Think about the height and dimensions to ensure the lamp will fit well in your space. Planning it out will give you a clear direction as you begin cutting and assembling your lamp.
Cut the Wood to Size
Using your ruler and pencil, mark the measurements on your wood. Carefully cut the wood into the desired shapes. Depending on your design, you might need to cut one piece for the base and other pieces for the body or shade. For more intricate designs, consider using a jigsaw or scroll saw for curves.
Sand Your Wood
Once your pieces are cut, use sandpaper to smooth the edges and surfaces. This will help to eliminate any rough spots and give your lamp a polished look. Be thorough but gentle; you want the wood to feel soft to the touch and look inviting.
Assemble the Lamp Base
Start with the base of your lamp. Apply wood glue to the edges of the pieces you’ll be connecting. Hold the pieces in place and use clamps to secure them until the glue dries. Follow the manufacturer’s instructions on the lamp kit for integrating the socket into the base. Usually, this involves drilling a hole through the lamp’s base.
Install the Lamp Kit
Once the glue is dry, it’s time to install the lamp kit. Thread the cord through the hole you drilled in the base. Follow the instructions that come with the lamp kit to connect the socket. This generally involves attaching the wires to the socket’s terminals and securing them with screws. Ensure all electrical connections are tight and secure.
Finishing Touches
To give your lamp a beautiful finish, consider staining or painting the wood. Choose a color that matches your decor. Allow the finish to dry completely. If desired, you can also add a lampshade that complements your style, making the lamp more visually appealing.
Light It Up!
Once everything is assembled and dried, it’s time to add a bulb and plug in your new lamp. Choose a light bulb that fits your socket type and provides the right brightness for your needs. Enjoy the warm glow of your handmade creation!
Explore More Ideas
If you want to expand your skills or find inspiration for additional projects, consider visiting websites with lots of DIY wood projects:
- Wood Magazine
- Instructables
- Pinterest (search for wooden lamp ideas)
Remember, each lamp you create holds unique character, making your home not just brighter but also filled with personalized pieces. Enjoy the crafting process!
Tips for Personalizing Your DIY Wooden Lamps
Creating personalized DIY wooden lamps allows you to infuse your home with unique style and charm. Adding your personal touch not only enhances the aesthetic but also lends a sense of ownership and pride to your living space. Here are some tips for turning your wooden lamps into one-of-a-kind pieces that reflect your personality.
Choose Your Wood Wisely
The type of wood you select can greatly affect the overall look of your lamp. Common options include:
- Pine: Affordable and easy to work with.
- Oak: Durable with a beautiful grain pattern.
- Maple: Smooth finish perfect for modern designs.
Each wood type has its unique characteristics and can help you achieve different aesthetics. For more information on selecting wood for your projects, visit Wood Magazine.
Incorporate Different Shapes
Don’t feel limited to traditional lamp shapes. Experimenting with various designs can lead to exciting results. Consider trying:
- Cylindrical lamps: Sleek and modern.
- Geometric shapes: Faceted designs to create eye-catching structures.
- Organic contours: Sculptural forms that feel natural and flowing.
These shapes can cater to different themes, from rustic to contemporary.
Personalize with Paint and Stains
Paint and stains are great tools for adding personality to your lamp. You can choose colors based on:
- Your room’s color scheme: Match or contrast for visual interest.
- Your favorite colors: Bring joy and warmth to your space.
- Seasonal themes: Change the look with each season for a fresh feel.
Use eco-friendly paint options to keep your project sustainable. Explore different shading techniques, like ombre or color-blocking, to elevate your design. For inspiration, check out Better Homes & Gardens.
Add Decorative Elements
Incorporate decorative additions to further personalize your lamp. Some ideas include:
- Woodburning: Create patterns or designs by burning them into the wood.
- Decoupage: Use paper or fabric to create unique designs on your lamp base.
- Natural embellishments: Add elements like stones, shells, or dried flowers for a bohemian touch.
These elements will make your lamp a focal point in any room.
Tailor the Lighting
Lighting plays a vital role in setting the ambiance of your space. Consider the following options:
| Type of Bulb | Effect |
|---|---|
| LED | Energy-efficient with a long lifespan. |
| Incandescent | Warm and cozy light that creates a friendly atmosphere. |
| Color-changing bulbs | Adds versatility to change moods and ambiance as needed. |
Choose a bulb that complements the style of your lamp while also considering how it will interact with your overall room design.
Use Unique Lamp Shades
The lamp shade is just as crucial as the lamp base. Consider making your lamp stand out with a customized lampshade. Options include:
- Fabric covers: Use patterned fabric to create an inviting aura.
- Wire frames: Make a minimalist shade using wire and sheer fabric.
- Wooden slats: Add a unique touch with wooden pieces arranged artistically.
Whatever shade you choose, ensure it complements the lighting while allowing it to diffuse softly throughout your space. With just a bit of creativity and effort, your DIY Wooden Lamp Making Ideas can reflect your unique style and enhance the atmosphere of your home. Explore more DIY projects and ideas at Instructables to keep your artistic instincts flowing!
Sustainable Practices in DIY Wooden Lamp Projects
When embarking on DIY Wooden Lamp Making Ideas, integrating sustainable practices can have a significant impact on your creative process and the environment. Using eco-friendly materials and adhering to sustainable principles can turn a simple lamp into a unique centerpiece that reflects your values. Here are some innovative ideas and tips for crafting your wooden lamps in an environmentally responsible way.
Selecting Sustainable Materials
The materials you choose play a crucial role in the sustainability of your wooden lamp. Opt for reclaimed or salvaged wood, which reduces the need for new lumber and minimizes waste. Local sources can also cut down on transportation emissions. Consider using:
- Reclaimed Wood: Timber that has been repurposed from old structures, furniture, or pallets.
- Bamboo: A fast-growing grass that is renewable and has a lower environmental impact.
- Certified Wood: Wood that meets standards from organizations like the Forest Stewardship Council (FSC) for responsible forestry practices.
Eco-Friendly Finishes
Choosing finishes that are free from harmful chemicals is essential in DIY Wooden Lamp Making Ideas. Water-based stains and natural oils, such as tung oil and linseed oil, can enhance the wood’s appearance while being safer for you and the environment. Ensure that:
- You avoid varnishes and stains containing VOCs (volatile organic compounds).
- You test any finish on a small, inconspicuous area before applying it to the entire lamp.
Improving Energy Efficiency
Using energy-efficient lighting options not only cuts down on energy consumption but also prolongs the lifespan of your lamp. Consider the following strategies:
- LED Bulbs: Replace traditional incandescent bulbs with LED bulbs, which use up to 80% less energy and last significantly longer.
- Smart Technology: Incorporate smart plugs or dimmer switches to reduce energy use when the lamp is not needed.
Designing for Longevity
A sustainable lamp should be designed to last. Choose designs that emphasize quality and durability over trends. Here are some aspects to consider:
- Timeless Styles: Opt for classic designs that won’t go out of style quickly.
- Quality Craftsmanship: Use strong joinery methods like dovetail or mortise-and-tenon joints for longevity.
- Repurpose and Recycle: If the lamp breaks, consider repurposing the parts instead of discarding them.
Embrace DIY Community Resources
Joining a local DIY community or online forums can provide you with valuable resources. Many communities focus on sustainable building practices and can help you learn new techniques or find materials. You can also share your own projects for feedback. Explore platforms like Instructables and IKEA Hackers for inspiration and ideas.
Ensuring Disposal is Eco-Friendly
When your wooden lamp reaches the end of its life, consider how it can be disposed of responsibly. Here’s what you can do:
- Composting: If your lamp is made of untreated wood, it can often be composted.
- Recycling: Many municipalities have recycling facilities that will accept wood products.
- Repurposing: Try to think of creative ways to turn your old lamp into something new.
Where to Find Sustainable Lamps for Inspiration
If you are seeking ready-made inspiration or want to buy sustainable wooden lamps, here are some websites to explore:
- Etsy – A marketplace for handmade and vintage items, including sustainable home decor.
- UncommonGoods – A source for unique, handmade, and eco-conscious products.
- Pottery Barn – Offers a selection of responsibly sourced home furnishings.
By incorporating these sustainable practices into your DIY Wooden Lamp Making Ideas, you not only create beautiful objects but also contribute to a healthier planet. Remember, each choice you make can lead to a more sustainable creation that you can be proud of.
Conclusion
Creating your own wooden lamps is a rewarding journey that combines creativity, functionality, and sustainability. With the creative DIY Wooden Lamp Making Ideas discussed, you can transform any space in your home into something special. The essential tools and materials highlighted help ensure that your project is not just enjoyable but also safe and efficient. Whether you’re a seasoned crafter or a novice, following the step-by-step guide allows you to craft unique designs that reflect your personal style.
Personalization is key in making your DIY Wooden Lamp Making Ideas stand out. By incorporating unique textures, colors, or even incorporating personal mementos, each lamp becomes a true work of art that tells your story. Additionally, embracing sustainable practices not only benefits the environment but adds an extra layer of meaning to your projects. Using reclaimed wood or eco-friendly finishes can enhance your lamp while minimizing your ecological footprint.
As you embark on these projects, remember that the process itself is just as important as the final product. Enjoy each step, from selecting the wood to the finishing touches. Not only do you create a beautiful lamp, but also an opportunity to express your creativity and resourcefulness. So gather your materials, unleash your imagination, and get ready to illuminate your home with your very own handmade wooden lamps. Each piece you create will not only brighten your space but also bring a sense of accomplishment and pride in your craftsmanship.