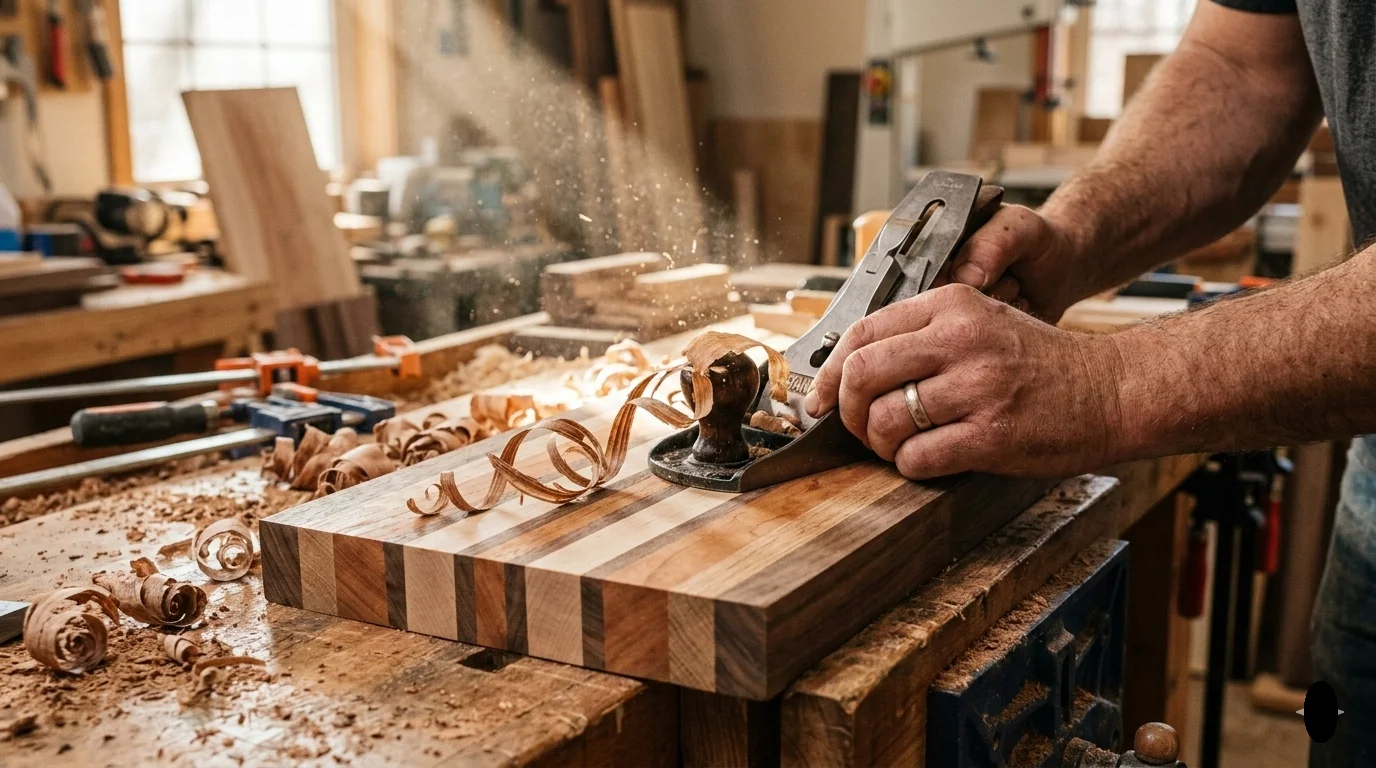
Creating your own wooden cutting board can be a rewarding project that enhances your kitchen while providing a functional tool. If you’re a beginner looking to dive into the art of woodworking, crafting a cutting board is a great way to start. Here are some creative DIY Wooden Cutting Board Projects to inspire you.
Types of Cutting Boards You Can Make
- Classic Rectangular Board: This is the simplest design, using a single piece of wood. You can personalize it with your own finish or engraving.
- Striped and Patterned Board: Combine different types of wood like walnut, maple, and cherry to create stunning patterns.
- Curved Edges Board: Add a touch of elegance with rounded edges. It requires more skill but is worth the effort.
- Serving Tray Board: Create a cutting board with handles. This is perfect for serving cheese or appetizers.
- Reversible Board: Make a two-sided cutting board with different surfaces for different tasks, like one side for cutting vegetables and the other for meats.
Essential Materials
To embark on your DIY Wooden Cutting Board Projects, you’ll need a few essential materials. Here’s a list to get you started:
- Wood: Choose durable hardwoods like maple, walnut, or cherry.
- Wood Glue: This will hold your pieces together securely.
- Sandpaper: Use varying grits for smoothing edges and surfaces.
- Wood Finish: Food-safe mineral oil or beeswax for finishing your board.
- Tools: A saw, clamps, and a router or chisel may come in handy.
Step-by-Step Guide to Making a Basic Wooden Cutting Board
Follow these simple steps to create your very own wooden cutting board:
- Select Your Wood: Choose a type of hardwood that suits your taste. Maple is popular for its durability and light color.
- Cut Your Pieces: Decide on your board size, and cut the wood to the desired dimensions. Aim for at least 1.5 inches thick for durability.
- Glue the Pieces Together: Apply wood glue to the edges of the pieces and clamp them together. Allow them to dry as per the glue instructions.
- Shape the Board: Once dry, sand the surface using 80, 120, and 220 grit sandpaper for a smooth finish. You can also use a router to create beveled edges.
- Finish Your Board: Apply food-safe mineral oil or beeswax to protect the wood and enhance its color. Let it soak in and add multiple coats if necessary.
- Engraving (Optional): Want to personalize your board? Consider engraving a name, date, or special message onto the surface.
Tips for Maintenance
To keep your wooden cutting board in top shape, follow these maintenance tips:
- Wash with warm, soapy water instead of soaking it in the sink.
- Reapply oil regularly, about every month, to prevent drying out.
- Store it upright to allow air circulation.
Essential Tools and Materials for Crafting Your Wooden Cutting Board
Crafting a wooden cutting board can be a rewarding DIY project. Before you start cutting and sanding, it’s important to gather the right tools and materials for the job. This guide will walk you through everything you need to make a beautiful, functional cutting board right at home.
Essential Tools
Having the correct tools is essential for ensuring a smooth and successful cutting board project. Here’s a list of the must-have tools:
| Tool | Purpose |
|---|---|
| Measuring Tape | Accuracy is key for precise dimensions. |
| Square | Ensures corners are perfectly right-angled. |
| Saw | Table saw or circular saw for straight cuts. |
| Router | Adds decorative edges or grooves. |
| Sander | Provides a smooth, polished surface. |
| Clamps | Holds wood pieces together while glue dries. |
Necessary Materials
When it comes to materials, choosing the right type of wood is vital for durability and style. Here’s a comprehensive list:
- Wood Types: Maple, walnut, cherry, and bamboo are popular choices for cutting boards. They are durable and have natural antibacterial properties.
- Food-Safe Glue: Use waterproof, food-safe wood glue to bond your pieces together. This ensures your cutting board remains safe for food preparation.
- Finish: Mineral oil or beeswax are excellent options for finishing your cutting board, providing protection while keeping the wood food-safe.
- Wood Conditioner: This helps to prep your wood for finishing and prevents the oil from soaking in too rapidly.
Safety Gear
Safety should always be a priority when working with tools. Here are some recommended safety items:
- Safety Glasses: Protect your eyes from wood shavings and dust.
- Ear Protection: Dampening noise from power tools is essential to prevent hearing damage.
- Dust Mask: Wearing a mask protects you from inhaling dust created while sanding.
- Gloves: Use gloves when applying finishes to protect your hands.
Step-by-Step Overview
Once you have all your tools and materials ready, it’s time to get crafty! Follow these steps to create your cutting board:
- Measure and Cut: Use your measuring tape and saw to cut wood pieces to the desired size.
- Arrange the Pieces: Lay out your wood pieces in the design you prefer before gluing.
- Glue and Clamp: Apply food-safe glue along the edges and clamp the pieces together to dry.
- Sanding: Once the glue is fully dried, sand down the surface using the sander and various grits of sandpaper for a smooth finish.
- Apply Finish: Use mineral oil or a wood finish to protect the wood and enhance its natural beauty.
With these tools and materials, you’ll be well on your way to creating a stunning wooden cutting board. For further guidance and inspiration, you can check out resources like Woodworker’s Source or the Wood Magazine. They offer numerous tips and tutorials perfect for any woodworking enthusiast. Remember, crafting your cutting board is not just about functionality, it’s also about expressing your creativity. Enjoy the process, and soon you will have a beautiful kitchen accessory made with your own two hands!
Design Ideas: Personalizing Your DIY Cutting Board with Unique Shapes
Creating a DIY wooden cutting board is an exciting project that allows you to unleash your creativity while providing a functional item for your kitchen. One fantastic way to make your cutting board uniquely yours is by personalizing it with distinctive shapes. Whether you’re a seasoned craftsman or a beginner, there are various design ideas to help you carve out a cutting board that’s not only practical but also a beautiful display piece.
Choosing Your Shape
- Classic Rectangle: The traditional choice; it offers ample surface area for chopping.
- Round: Perfect for cheese boards and serves as a unique serving platter.
- Animal Shapes: Great for families with kids, this adds a playful element.
- State or Country Silhouettes: Personalize it further by using the outline of your home state or favorite country.
- Custom Designs: If you have artistic flair, consider freehand shapes that reflect personal interests or hobbies.
Selecting Materials
The type of wood you choose not only affects the durability of your cutting board but also its appearance. Some popular woods include:
- Maple: Known for its tight grain and durability. It’s food-safe and easy on knives.
- Walnut: Offers a rich, dark color and is highly durable.
- Bamboo: An eco-friendly option that’s lightweight and easy to clean.
Tools Needed
Having the right tools can make a significant difference in the outcome of your project. Here’s a list of essential tools you may need:
- Table Saw or Jigsaw
- Router for edges
- Sandpaper or a sander for smooth finishes
- Food-safe mineral oil for sealing
- Wood glue (if creating a laminated board)
Techniques for Personalization
Beyond just the shapes, you can further personalize your wooden cutting board using several techniques:
- Engraving: Use a laser engraver or wood burning tool to add names, quotes, or designs.
- Inlays: Add colored resin or different wood types to create beautiful designs.
- Staining: Change the color of the wood to match your kitchen’s theme.
Finishing Touches
Once you have shaped and personalized your cutting board, it’s crucial to finish it well. Applying a food-safe finish not only enhances the look but also protects the wood. Follow these tips:
- Sand the board to a smooth finish, starting with a coarse grid and finishing with a fine one.
- Apply a thin layer of food-safe mineral oil. Let it soak in for at least an hour.
- Wipe off any excess oil and allow it to cure overnight.
Maintenance Tips
To keep your new cutting board looking its best, follow these maintenance steps:
- Hand wash with soap and water; avoid submerging it in water.
- Regularly oil the surface to prevent drying and cracking.
- Store in a dry place away from heat and direct sunlight.
Creating a personalized DIY wooden cutting board is not just about the final product. It’s a chance to express your creativity while enjoying the process of crafting something uniquely yours. For more inspiration and detailed projects, check out sites like Wood Magazine and Instructables. Happy crafting!
Caring for Your Wooden Cutting Board: Tips for Longevity
Wooden cutting boards are a staple in many kitchens, prized not only for their beauty but also for their durability. To ensure your cutting board remains in excellent condition over the years, proper care is essential. Follow these straightforward tips to keep your wooden cutting board looking great and functioning well.
Cleaning Your Cutting Board
Proper cleaning is crucial for maintaining your wooden cutting board. Here’s how to do it effectively:
- Immediately after use, rinse the board with warm water to remove food particles.
- Use a mild dish soap and a soft sponge or cloth to wipe down the surface.
- Never soak your wooden cutting board in water or place it in a dishwasher, as this can cause warping or cracking.
- After cleaning, rinse it well with warm water and dry it with a clean towel.
For tough stains or odors, sprinkle kosher salt over the surface and rub it with a lemon half. This natural method helps to lift stains and neutralize smells.
Oiling Your Cutting Board
Oiling your wooden cutting board is essential to keep it hydrated and prevent cracking. Follow these steps:
- Choose food-grade mineral oil or a specialized cutting board oil.
- Apply a generous amount of oil to the surface using a clean cloth.
- Let the oil soak in for several hours or overnight, then wipe off any excess oil.
It’s best to oil your cutting board every 3-4 weeks, but frequency may vary depending on usage and climate. A well-oiled board not only looks great but also builds a protective barrier against moisture and bacteria.
Storing Your Cutting Board
How you store your cutting board can impact its lifespan. Keep these storage tips in mind:
- Store your cutting board upright in a dry, well-ventilated area. This helps prevent moisture buildup.
- Avoid stacking other heavy items on top of the board to prevent warping.
- If possible, keep it away from direct sunlight and heat sources, as these can dry out the wood.
Addressing Scratches and Damage
Minor scratches on your cutting board are common, but they can harbor bacteria. Here’s how to deal with them:
- For light scratches, use fine-grit sandpaper to gently buff the area.
- After sanding, clean the area with soapy water, rinse, and dry.
- Follow up with oiling the board to rejuvenate the wood.
If your board suffers deeper cuts, consider sanding the entire surface down to create a fresh, smooth finish. Always re-oil it afterward.
Preventing Odors and Bacteria
Preventing odors and keeping your board bacteria-free is essential for food safety:
- Do not cut raw meat on the same board that you use for vegetables or bread. It’s best to have separate boards.
- After each use, wash and dry the board immediately to prevent bacteria growth.
- Regularly apply a vinegar-water solution for natural disinfection. Mix one part vinegar to four parts water and wipe the board.
By following these tips, you’ll ensure that your wooden cutting board serves you well for years to come. With the right care, it will remain a beautiful addition to your kitchen while keeping your food safe. For more information on maintaining your wooden kitchenware, check out Wood Magazine. They provide great insights on wood care and maintenance. Additionally, you can find useful tips on wood board care at Chowhound, which is dedicated to enhancing your kitchen experience.
Sustainable Wood Choices for Eco-Friendly Cutting Board Projects
In recent years, there has been a significant push towards sustainability, especially in woodworking projects. For those interested in making DIY wooden cutting boards, selecting the right materials is crucial. Ethical sourcing and eco-friendly options not only make your projects environmentally friendly but also ensure that your cutting board is both beautiful and durable. Let’s explore some sustainable wood choices you can utilize for your DIY Wooden Cutting Board Projects.
Sustainable Wood Options
Choosing the right type of wood is essential when embarking on a cutting board project. Here are some sustainable wood choices you can consider:
- Bamboo: Fast-growing and highly renewable, bamboo is technically a grass, not wood. It matures in three to five years, making it an eco-friendly choice. Bamboo cutting boards are lightweight and resistant to knife marks.
- Maple: Hard maple (Acer saccharum) is a popular choice because it’s dense and has a tight grain. It’s often harvested from sustainable forests in North America. Foods do not absorb flavors or bacteria, making it ideal for kitchen use.
- Walnut: Rich in color and grain pattern, walnut stands out visually. It is a hardwood that offers durability and is often sourced from responsibly managed forests. It is less prone to warping, which makes it suitable for heavy-duty use.
- Cherry: Cherry wood develops a rich color over time, giving your cutting board a stunning look. It’s naturally antibacterial and harvested from sustainable American farms, making it another eco-friendly option.
- Acacia: Known for its durability and water resistance, acacia is a fast-growing tree species. Cutting boards made from acacia not only look beautiful, but they also hold up well against wear and tear.
Why Sustainable Wood Matters
Using sustainable wood is not just a trend; it’s a responsibility. Here are some reasons to choose sustainable materials:
- Environmental Protection: Cutting down trees from unsustainable sources leads to deforestation, which harms ecosystems. Sustainable wood comes from managed forests that maintain biodiversity.
- Personal Health: Many sustainable woods, like bamboo and cherry, have natural antimicrobial properties. These woods reduce the risk of bacteria growth when used as cutting boards.
- Quality and Durability: Sustainable woods are often denser and more durable. They withstand heavy usage and look better over time, making your kitchen tools last longer.
- Support Ethical Practices: By choosing wood from sustainable sources, you support responsible logging practices and promote forest conservation.
Tips for Buying Sustainable Wood
When you’re picking wood for your projects, keep these tips in mind:
- Look for Certifications: Certifications like the Forest Stewardship Council (FSC) guarantee that the wood has been sourced sustainably.
- Inquire About the Source: Ask your supplier about where the wood comes from to ensure it’s harvested responsibly.
- Explore Local Options: Check local sawmills or craft shops that focus on sustainable practices. Local wood is often more sustainable and reduces transportation emissions.
- Consider Reclaimed Wood: Using reclaimed wood from old furniture or buildings is an excellent way to reduce waste while getting a unique appearance for your cutting board.
Where to Find Sustainable Wood
Finding sustainable wood options for your cutting board can be made easy with the right resources. Here are some suggested links where you can explore more about sustainable wood choices:
By making conscious decisions about the materials you use in your DIY Wooden Cutting Board Projects, you contribute to a healthier planet. Each sustainable choice supports responsible harvesting and helps protect the environment for future generations. Not only do these choices impact the world, but they also bring a piece of nature’s beauty into your kitchen, elevating your cooking experience. So, let’s get crafting with sustainability in mind!
Conclusion
Implementing your creativity through DIY Wooden Cutting Board Projects opens up a world of possibilities, allowing you to craft functional art for your kitchen. By starting with beginner-friendly designs, you can gradually build your skills and confidence. Armed with the essential tools and materials, you’ll find that creating a personalized cutting board is both rewarding and enjoyable.
Personalization is key—embrace unique shapes and custom engravings to make your cutting board truly yours. Whether it’s for practical use or as a thoughtful gift, these designs reflect your style and can transform a simple kitchen accessory into a cherished piece.
Equally important is the care you provide for your wooden cutting board. By following straightforward maintenance tips, you can ensure longevity and keep your board looking beautiful over time. Regularly oiling and cleaning it properly will protect the wood and preserve its natural beauty.
As you embark on these projects, consider sustainable wood options. Choosing eco-friendly materials not only helps our planet but also adds a unique touch to your creations. The use of responsibly sourced wood enhances your project and aligns with the growing desire for environmentally conscious living.
Embrace these DIY Wooden Cutting Board Projects as a way to blend practicality with creativity. With the right tools, a splash of inspiration, and careful attention to care, you can create stunning cutting boards that enhance your cooking experience while being kind to the environment. Happy crafting!