Epoxy resin woodworking projects have exploded in popularity among DIY enthusiasts. This creative craft combines the beauty of natural wood with the versatility of epoxy resin. The result is stunning artwork that can enhance your home décor or serve as functional pieces of furniture. Whether you are a beginner or an experienced woodworker, there are various projects you can undertake. Here’s a look at some inspiring ideas to unravel your creativity.
Unique Table Designs
One of the most popular DIY Epoxy Resin Woodworking Projects involves creating unique tables. From coffee tables to dining tables, using epoxy resin allows you to incorporate colors, textures, and even objects into the design.
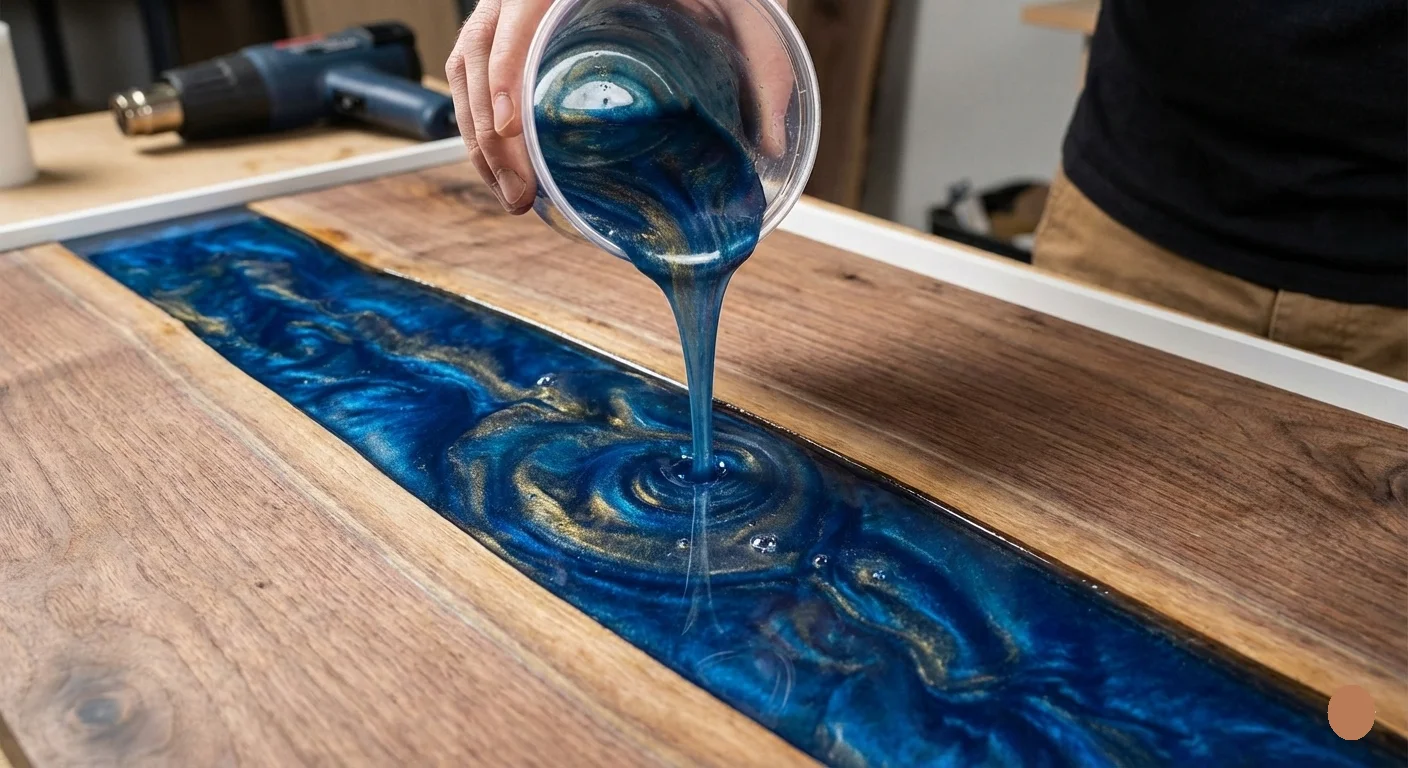
- Live Edge River Table: This eye-catching table features a live edge slab of wood with colored resin poured in the gaps. It’s perfect for adding a rustic yet modern touch to your space.
- Poured Epoxy Table: You can create a solid wood table with a smooth surface coated in clear epoxy. This style showcases the wood grain while offering a durable finish.
Functional Home Decor
Transform your living space while also making practical items with epoxy resin. Consider these ideas:
- Coasters: Custom coasters infused with color can prevent water rings on your tables while serving as stylish accents.
- Wall Art: Epoxy resin can be poured over wood panels to create vibrant wall art that’s unique to your style.
- Cabinet Handles: Inject personality into your cabinets by using resin to mold custom handles.
Gifts Made from Love
Handcrafted gifts are always cherished. With DIY epoxy resin woodworking, you can create memorable items:
- Cutting Boards: Combine wood types with epoxy for a durable and stunning cutting board that friends and family will appreciate.
- Pendants and Jewelry: Small pieces of wood can be combined with resin to create personalized jewelry.
- Photo Frames: Craft stunning frames by embedding small items and colors in resin, making them one-of-a-kind.
Getting Started With Epoxy Resin Projects
If you’re eager to start on your epoxy resin woodworking journey, here are some essential steps to follow:
- Choose Your Materials: Select the type of wood and epoxy resin that fits your project. Look for high-quality epoxy that cures well.
- Prepare Your Workspace: Set up a clean, flat surface to work on, with proper ventilation and safety gear such as gloves and a mask.
- Plan Your Design: Sketch out what you want to create, considering colors and placement before you start.
- Mix and Pour: Follow the manufacturer’s instructions for mixing epoxy. Pour it carefully over your wood.
- Finish and Polish: Once cured, sand the surfaces for a smooth finish. Consider applying a sealer for additional durability.
Safety Tips
Working with epoxy resin can be fun, but safety should always come first. Here are some tips:
- Wear gloves and safety goggles to protect your skin and eyes.
- Ensure your workspace is well-ventilated to avoid inhaling fumes.
- Follow safety precautions outlined in the epoxy resin instructions.
Resources for More Inspiration
If you want to dive deeper into the world of DIY Epoxy Resin Woodworking Projects, check out these resources:
- Epoxy Craft – Offers a variety of epoxy products and project ideas.
- Instructables – Find step-by-step instructions for countless DIY projects.
- Wood Magazine – Great woodworking tips and trends related to epoxy resin.
Embrace the excitement of crafting with epoxy resin. By engaging in these DIY Epoxy Resin Woodworking Projects, you can express your creativity, beautify your living space, and create meaningful gifts for others. The possibilities are endless, so let your imagination run wild!
Essential Tools and Materials for Successful Epoxy Resin Work
When diving into the world of epoxy resin woodworking projects, equipping yourself with the right tools and materials is crucial for success. The satisfaction of creating unique, beautiful pieces can only be achieved when you have the essentials at your disposal. Here’s a detailed look at what you will need to get started.
Essential Tools
Having the right tools on hand can make your epoxy resin project smoother and more enjoyable. Here’s a list of must-have tools:
- Cup and Stirring Sticks: Use clear plastic cups for measuring your resin and hardener. Stirring sticks can be wooden or disposable plastic. This combination ensures you mix the components thoroughly.
- Protective Gear: Safety goggles, gloves, and a respirator mask are essential. They protect you from harmful fumes and prevent skin irritation as some resins can be toxic.
- Heat Gun or Torch: These tools help remove air bubbles from the surface of the resin. They can also help to speed up the curing process.
- Measuring Tools: A digital scale or measuring cups ensures precise measurements. This is key to achieving the right resin-to-hardener ratio, which is vital for the curing process.
- Caulking Gun: If you are working with molds, a caulking gun can be helpful for applying sealants to prevent leaks.
- Sanding Tools: Sandpaper and sanding blocks are necessary for smoothing edges after the resin has cured.
- Mixing Tools: A wide variety of mixing tools, including spatulas and palette knives, can help to mix resin with pigments or additives.
Important Materials
Beyond tools, you’ll also need several materials to ensure your projects turn out well. Here’s what you should consider including:
- Epoxy Resin: Choose a high-quality epoxy resin specific for woodworking. Brands like TotalBoat and Penntek provide great options that cater to a variety of projects.
- Hardener: Ensure you purchase the right hardener that is compatible with your resin. This is crucial for achieving maximum durability.
- Color Pigments: You can choose liquid or powder pigments to add color to your epoxy. Products like those from ArtResin have a wide range of colors and effects.
- Glitters or Inclusions: Adding glitters, seashells, or even flowers to your resin can create stunning designs. Look for items that are specifically meant for resin use.
- Silicone Molds: These are essential for casting shapes. Silicone is flexible and allows for easy removal after curing.
- Sealants: Use sealants to prepare wooden surfaces before applying resin. This prevents the wood from absorbing the resin and ensures a smooth finish.
Workspace Setup
Setting up an organized workspace will also contribute to your success when working with epoxy resin. Here are some tips to create an effective workspace:
- Ventilation: Epoxy resins can release fumes during application. Ensure your workspace is well-ventilated to keep air quality safe.
- Flat Surfaces: Working on a flat, sturdy table minimizes spills and provides stability for your projects.
- Protective Covering: Cover your work surfaces with plastic or newspaper to catch drips and spills for easier cleanup.
Tips for First-Time Users
If you’re new to epoxy resin woodworking, here are a few tips to keep in mind:
- Always read the manufacturer’s instructions and safety data sheets.
- Start with small projects to build confidence.
- Practice mixing small batches before working on larger pieces.
- Take your time and focus on precision to avoid common pitfalls.
Equipping yourself with these essential tools and materials will lay the foundation for successful epoxy resin woodworking projects. Explore more on epoxy techniques and materials at The Art of Manliness and unleash your creativity!
Step-by-Step Guide to Completing Your First Epoxy Resin Project
Embarking on your first epoxy resin project can be an exciting and fulfilling experience. Whether you’re creating a beautiful tabletop, coasters, or a decorative piece, the possibilities with DIY Epoxy Resin Woodworking Projects are endless. This guide will walk you through the process step-by-step to ensure a successful and enjoyable project.
Gather Your Materials
To start your DIY Epoxy Resin Woodworking Projects, you’ll need to gather the following materials:
- Epoxy resin kit (resin and hardener)
- Wood piece (ensure it is clean and dry)
- Protective gear (gloves, goggles, and mask)
- Mixing cups and sticks
- Color pigments (optional)
- Duct tape
- Sandpaper and finishing supplies
Prepare Your Workspace
Before you begin, set up a clean and well-ventilated workspace. Clear any clutter and lay down a drop cloth to protect surfaces. It’s essential to work in an area free from dust and debris, as these can affect your final product.
Measure and Mix Your Epoxy Resin
Follow the instructions on your epoxy resin kit carefully. Typically, you’ll need to mix equal parts of resin and hardener. Use a graduated mixing cup for accuracy. Here’s how to do it:
- Pour the designated amount of resin into the mixing cup.
- Add the same amount of hardener to the resin.
- Stir the mixture for about 3-5 minutes, ensuring there are no bubbles.
Prepare the Wood Piece
Next, prepare your wood piece for the epoxy application. Start by ensuring it is clean and smooth:
- Sand the surface of the wood using sandpaper.
- Wipe it down with a clean cloth to remove dust.
- If your project involves deep filling, apply duct tape to the underside to prevent the epoxy from leaking through.
Add Color to Your Epoxy (Optional)
If you wish to add color to your project, now is the time to mix in color pigments into your epoxy. Start with a small amount of pigment and mix well. You can always add more if you want a bolder color.
Apply the Epoxy to the Wood
Now that everything is prepared, it’s time to pour the epoxy onto the wood. Follow these steps:
- Slowly pour the mixed epoxy onto the wood surface.
- Spread it evenly using a mixing stick.
- If you want a more artistic look, you can swirl colors together at this stage.
Let It Cure
After pouring the epoxy, allow it to cure according to the instructions provided with your kit. Most epoxies require a minimum of 24 hours to cure fully. Avoid touching or moving the project during this time.
Finishing Touches
Once cured, your epoxy resin woodworking project will need some finishing touches:
- Sand the edges and surface of the wood to ensure everything is smooth.
- If desired, apply a wood finish to enhance the wood beneath the resin.
- Clean off any dust with a cloth or a gentle brush.
Explore More Inspiration
There’s an entire world of epoxy resin projects waiting for you to explore. Visit resources like Epoxy Resin Supplies for tutorials and tips or Instructables for more DIY ideas. You can also find valuable techniques on sites such as Wood Magazine.
With this guide, you now have the basics to complete your first DIY Epoxy Resin Woodworking Projects. Remember to follow safety precautions and enjoy the creative process. Happy crafting!
Common Challenges in Epoxy Resin Woodworking and How to Overcome Them
Epoxy resin woodworking has gained immense popularity among DIY enthusiasts and professional woodworkers alike. While it offers stunning aesthetics and durability, working with epoxy resin isn’t without its challenges. Understanding these challenges and how to effectively overcome them can significantly enhance your woodworking projects.
One of the most common challenges when using epoxy resin is achieving a perfect mix. Epoxy resins typically come in two parts: the resin and the hardener. If these components aren’t mixed in the correct ratio, the resin may not cure properly. This could lead to a sticky, tacky surface that never hardens. To avoid this, always follow the manufacturer’s instructions for mixing ratios. It’s also beneficial to use a digital scale to ensure accuracy.
Secondly, temperature and humidity play a crucial role in the curing process of epoxy. If the environment is too cold or damp, the epoxy may take longer to cure or may not cure at all. Optimal temperatures for curing epoxy range from 70°F to 85°F (21°C to 29°C). Using a space heater or working indoors during cooler months can help maintain a suitable working environment. Conversely, low humidity levels (under 50%) are ideal for preventing bubbles and ensuring a clear finish.
Another frequent issue is bubble formation during the mixing process. Tiny air bubbles can get trapped in the epoxy, affecting the finish and clarity. To tackle this issue, after mixing, let the resin sit briefly to allow bubbles to rise to the surface. Additionally, using a heat gun or propane torch can help pop any remaining bubbles. Keep the heat source moving to avoid scorching the resin.
Common Epoxy Resin Challenges
- Poor mixing ratios leading to incomplete curing
- Environmental factors affecting the curing process
- Bubble formation compromising the finish
- Surface defects during application
Surface defects can also arise when working with epoxy resin. If the surface is not perfectly clean, dust and debris can become embedded in the resin. To prevent this, ensure that the wood surface is sanded, cleaned, and free from any contaminants before applying epoxy. Using a vacuum or tack cloth can effectively remove any dust particles.
Moreover, the curing time of epoxy can present challenges, particularly for beginners or those unfamiliar with its workability window. Epoxy can start to set quickly, making it essential to work efficiently. It’s wise to plan your project and have all your tools and materials ready before mixing the epoxy. If you’re working with larger pours, consider using a slow-curing epoxy, which provides more time to work.
Applying epoxy resin also requires attention to detail regarding temperature fluctuations. If epoxy is poured in a cold environment, it can lead to uneven curing. To combat this, aim to maintain a consistent temperature throughout the workspace. Remember also to check the manufacturer’s specifications, as some epoxies are designed to cure under different conditions.
Safety should never be overlooked when working with epoxy resin. The fumes emitted during the mixing and curing process can be harmful. Operating in a well-ventilated area is essential. Wearing gloves and a mask can protect your skin and respiratory system from irritation. Ensuring proper safety gear can make your DIY Epoxy Resin Woodworking Projects much more pleasant and safer.
By understanding these common challenges in epoxy resin woodworking, you can anticipate issues and take steps to mitigate them. Embracing the learning curve and applying these strategies will help you create beautiful, high-quality projects that you can be proud of.
Tips for Maintaining and Caring for Your Epoxy Resin Woodworking Creations
When you’ve invested time and effort into creating stunning epoxy resin woodworking projects, it’s crucial to ensure they last. Proper maintenance and care will help preserve the beauty of your creations while extending their lifespan. Here are some essential tips to keep your epoxy resin pieces looking their best.
Cleaning Your Epoxy Resin Woodworking Projects
Cleaning your epoxy surfaces properly is fundamental to maintaining them. Here are steps to effectively clean your pieces:
- Use a Soft Cloth: Always opt for a microfiber or soft cotton cloth. Avoid abrasive materials that can scratch the surface.
- Gentle Soap Solution: Mix warm water with mild soap for cleaning. Never use strong chemicals, as they can damage the resin.
- Rinse and Dry: After cleaning, rinse thoroughly with fresh water and dry with a soft cloth to prevent water spots.
Protecting Your Projects
Protection is key to maintaining the integrity of your epoxy resin woodworking. Consider these strategies:
- Use Coasters: Place hot or wet items on coasters to avoid warping or staining the surface of your epoxy pieces.
- Avoid Direct Sunlight: Keep your creations out of direct sunlight, as UV exposure can cause the resin to discolor or degrade over time.
- Climate Control: Maintain a controlled environment. Extreme temperatures or humidity can affect the resin’s appearance and durability.
Repairing Minor Damage
Even with careful maintenance, minor damages can occur. Here’s how to handle them:
- Scratches: Light scratches can often be buffed out using a fine polishing compound. Apply with a soft cloth, working in small circles.
- Cracks: For small cracks, consider filling them with a color-matched epoxy filler. Sand the area after it cures to smooth out the surface.
- Discoloration: If discoloration occurs, applying a clear epoxy topcoat can sometimes restore the piece’s original look.
Regular Maintenance Routine
| Task | Frequency |
|---|---|
| Dusting | Weekly |
| Deep Cleaning | Monthly |
| Inspect for Damage | Every 3 Months |
| Reapply Protection (if needed) | Annually |
Following a maintenance routine helps ensure your epoxy resin woodworking creations remain as breathtaking as the day you finished them.
Storing Your Creations Properly
If you need to store your epoxy projects, do so wisely. Here are some storage tips:
- Keep them Indoors: Store pieces in a climate-controlled indoor space, away from extreme temperatures and humidity.
- Use Protective Materials: Wrap items in a soft, non-abrasive material to prevent scratches and other damage during storage.
- Store Vertically: If possible, store pieces vertically to prevent warping or contact with other surfaces that could cause damage.
Taking proactive steps in caring for your woodworking projects not only shows respect for your hard work but also allows you to enjoy the fruits of your labor for generations. So, get started on maintaining those gorgeous epoxy resin pieces today!
Conclusion
Creating your own DIY Epoxy Resin Woodworking Projects is not just a rewarding hobby; it’s a fantastic way to express your creativity and enhance your home with unique pieces. With a clear understanding of the essential tools and materials needed, you can confidently embark on this journey. Following a step-by-step guide helps ensure that your first project is both fun and fulfilling, providing a solid foundation for future creations.
As you venture further into epoxy resin woodworking, being aware of common challenges can make a significant difference. Knowing how to manage issues like air bubbles or improper curing will empower you to troubleshoot effectively. Embracing these small obstacles only adds to the learning experience and enhances your skills.
Once you complete your beautiful epoxy creations, remember that proper care and maintenance are key to preserving their beauty and functionality. Regular cleaning and avoiding harsh chemicals will keep your pieces looking pristine for years to come.
DIY Epoxy Resin Woodworking Projects offer an exciting blend of artistry and craftsmanship. Whether crafting a stunning table or personalized coasters, the possibilities are endless. Dive into this captivating world, and let your imagination run wild as you create stunning works that reflect your style. The journey may come with challenges, but the rewards of building something special with your own hands are immeasurable. So gather your supplies, unleash your creativity, and start crafting today!