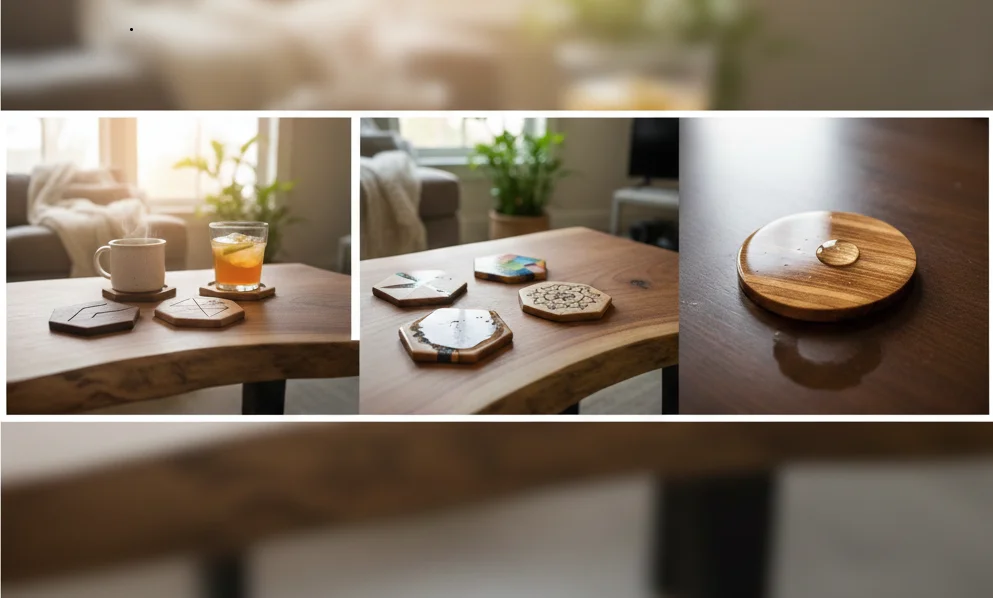
Wooden coasters are both practical and stylish. They not only protect your surfaces from water rings and heat but also add a touch of personality to your home décor. If you’re curious about How To Make Wooden Coasters, you’re in the right place. This guide will walk you through the entire process step-by-step.
Materials You’ll Need
- Wooden rounds (or planks)
- Saw (hand saw or circular saw)
- Sandpaper (varying grits)
- Wood finish (oil or sealant)
- Paint or stain (optional)
- Paintbrush (if using finish or paint)
- Coaster templates (optional)
Step-by-Step Process
Step 1: Choose Your Wood
Select the type of wood you want for your coasters. Popular choices include oak, pine, and cedar because they are durable yet easy to work with. You can purchase pre-cut wooden rounds at craft stores or cut your own from planks, depending on your style and size preference—most coasters are around 4 inches in diameter.
Step 2: Cut the Wood (if necessary)
If you’re cutting your own wood, measure and mark your wooden planks according to your desired coaster size. Use a saw to carefully cut the wood to the marked dimensions.
Step 3: Sand the Edges
After cutting, smooth the edges of the coasters with sandpaper. Start with a coarser grit to remove any rough spots, then finish with a finer grit for a smooth surface. This step is crucial to avoid splinters when using the coasters.
Step 4: Create a Design (Optional)
If you want to personalize your coasters, consider painting or staining them. Use a paintbrush to apply wood stain or paint in your choice of color. Ensure you let it dry completely before moving on to the next step. You can also use templates or stencils to create specific designs or patterns on your coasters. For more design ideas, visit Pinterest.
Step 5: Apply Finish
To protect your coasters and make them last longer, apply a finish. Wood oil or sealant are popular choices. Use a clean paintbrush to apply a thin layer, making sure to cover all surfaces evenly. Allow it to dry as per the instructions on the product you choose. This step ensures that your coasters resist water and heat damage.
Step 6: Final Touches
After the finish dries, inspect the coasters for any rough spots you might have missed. Sand them lightly again if necessary. Your coasters should now be smooth and ready for use!
Tips for Making the Best Wooden Coasters
- Experiment with Saw Cuts: Try different shapes like squares or hexagons for variety.
- Use Natural Wood Grain: Choose wood with interesting patterns to enhance the natural beauty.
- Think About Functionality: Ensure that the coasters are thick enough to hold hot mugs.
Where to Buy Materials
You can find wooden rounds and all necessary materials in local hardware stores or online. Websites such as Etsy and Woodcraft offer a wide variety of crafting supplies specifically for coaster making.
Why Make Your Own Coasters?
Creating your own wooden coasters can be a fun DIY project. It allows you to express creativity and customize items to suit your personal taste. Plus, handmade gifts like these are often more cherished than store-bought ones, making your coasters perfect for housewarming gifts or holiday presents.
How To Make Wooden Coasters is a fulfilling DIY project that enhances your home functionality while expressing your creativity. With just a few materials and some time, you can create beautiful and durable coasters that will impress your family and friends.
Choosing the Right Wood for Your Coasters
When embarking on the project of crafting your own wooden coasters, one of the most significant decisions you’ll face is choosing the right type of wood. The variety of wood available can greatly influence the appearance, durability, and functionality of your coasters. Here, we will delve into the various types of wood suitable for coasters, their unique properties, and why they might be the right choice for your DIY project.
Popular Wood Choices for Coasters
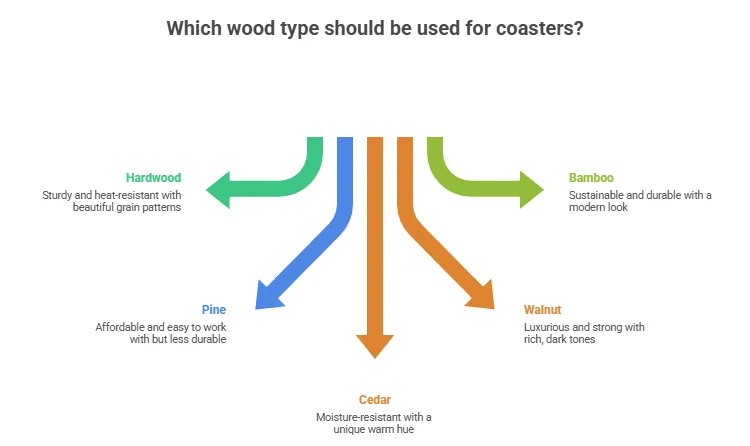
There are several types of wood you can consider for making coasters. Each type brings its own aesthetic and practical qualities. Here’s a rundown of some popular wood types:
- Hardwood: Common hardwoods like oak, maple, and birch are sturdy and have beautiful grain patterns. They can withstand heat and moisture, making them ideal for coasters.
- Pine: An affordable softwood option, pine is easy to work with. However, it may be less durable and can absorb water more easily than hardwoods.
- Cedar: Known for its natural aromatic properties, cedar is resistant to moisture and decay. It offers a unique warm hue, making it a great choice aesthetically.
- Walnut: A luxurious choice, walnut features rich, dark tones. It’s dense and strong but may require additional care to maintain its finish.
- Bamboo: Sustainable and eco-friendly, bamboo is a fantastic alternative. It is incredibly durable and has a modern look, plus it can resist moisture effectively.
Factors to Consider When Selecting Wood
As you choose the wood for your coasters, keep the following factors in mind:
- Durability: You want a material that can withstand daily use. Hardwoods are generally more durable than softwoods and can handle heat and moisture better.
- Water Resistance: Coasters often come into contact with liquids. Wood that has natural oils, like cedar, is better at resisting water damage.
- Aesthetic Appeal: The visual appeal of the wood can enhance your home décor. Choose a type that complements your style, whether it’s rustic, modern, or classic.
- Cost: Your budget may influence your wood selection. Hardwoods tend to be more expensive, while softer woods and bamboo can be more affordable.
Wood Treatments and Finishes
Regardless of the wood you select, applying proper treatments and finishes is crucial. Coasters will be exposed to moisture, and a good finish protects the wood and enhances its appearance. Consider using:
- Sealers: Polyurethane or epoxy-based sealers create a tough, waterproof barrier that preserves the wood.
- Oils: Natural oils, such as mineral oil or tung oil, can penetrate the wood, providing protection while enhancing its natural beauty.
- Varnishes: Varnishes provide a clear, glossy finish that adds elegance and protection from liquids.
Before applying any finish, ensure the wood is sanded smoothly to prevent imperfections that can mar the final result. Remember to apply the finish in a well-ventilated area and follow the manufacturer’s instructions for application.
Maintaining Your Wooden Coasters
| Care Tip | Description |
|---|---|
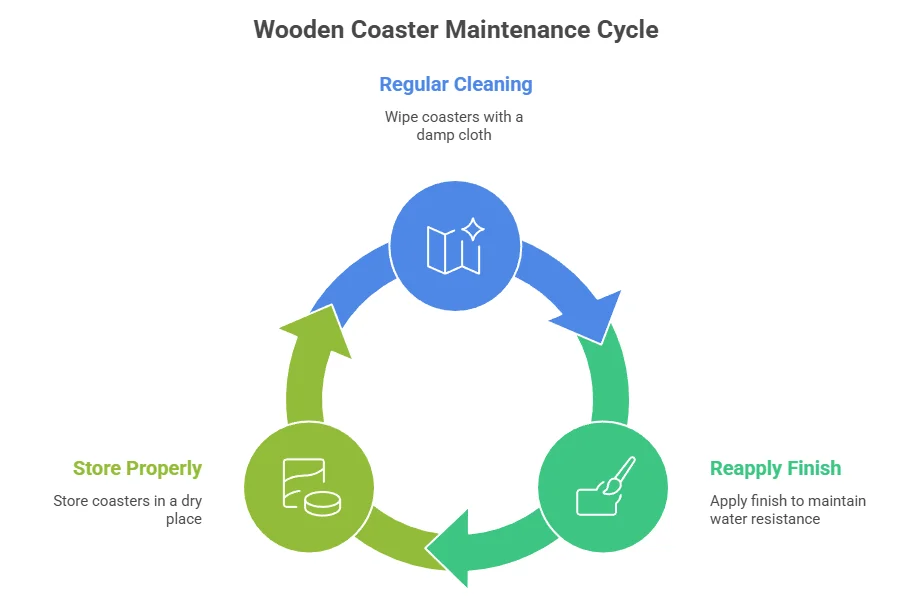
| Regular Cleaning | Wipe down your coasters with a damp cloth to remove spills and dirt. Avoid soakings that can warp the wood. |
| Reapply Finish | Every few months, consider reapplying the finish to maintain water resistance and appearance. |
| Store Properly | When not in use, store your coasters in a dry place to prevent moisture accumulation. |
By selecting the right wood and properly finishing and maintaining your coasters, you can create beautiful, functional pieces that last for years. For detailed woodworking tips and projects, you might find helpful resources on Wood Magazine and Popular Woodworking.
Ultimately, the wood you choose adds character to your coasters while providing the functionality needed in everyday use. Take your time exploring the options and enjoy crafting your unique wooden coasters!
Essential Tools for Crafting Wooden Coasters
Creating wooden coasters can be a rewarding craft project that not only beautifies your living space but also serves a functional purpose. To embark on this fun and practical DIY adventure, it’s important to have the right tools at your disposal. Each tool plays a significant role in ensuring your coasters are not only aesthetically pleasing but also durable. Here’s a breakdown of essential tools you’ll need to craft stunning wooden coasters.
Cutting Tools
The first step in making wooden coasters is cutting your wood to size. You will need appropriate cutting tools to achieve accurate measurements and clean edges.
- Table Saw: This is ideal for making straight cuts on larger pieces of wood, allowing for consistent thickness across all coasters.
- Miter Saw: If you plan to create coasters with beveled edges or angles, a miter saw is essential for precision cuts.
- Hand Saw: For smaller projects or when you need more control, a hand saw can be excellent, although it requires a bit more effort.
Shaping Tools
Once you have the wood cut to size, you might want to shape the edges or add decorative elements. Here’s what you need:
- Sander: A power sander (orbital or belt sander) will help smooth out the surfaces and edges of your coasters, giving them a professional finish.
- Router: For creating decorative edges or grooves, a router can add unique features to your coasters, enhancing their visual appeal.
- Chisels: These are handy for small, detailed work and can help refine corners or aspects of the design.
Finishing Tools
After shaping your coasters, applying a finish is the last step to protect the wood and give it a polished look.
- Brushes: A quality brush or foam applicator is necessary for applying wood stain or sealant evenly across the coaster’s surface.
- Cloth: Microfiber cloths are perfect for applying oils or stains, as they help to ensure a smooth finish without leaving lint behind.
- Spray Finishes: If you prefer a quick application, spray finishes can provide an even coat but require careful handling to avoid overspray.
Safety Gear
Safety should always be a priority when crafting. Make sure you have the necessary gear to protect yourself during the woodworking process.
- Safety Glasses: Protect your eyes from sawdust and wood shavings.
- Ear Protection: Many power tools can be quite loud, so invest in a pair of earplugs or earmuffs.
- Dust Mask: When sanding, a dust mask will help to avoid inhaling fine wood particles.
Additional Accessories
While the main tools are essential, a few additional accessories can enhance your coaster-making process.
- Wood Glue: Use wood adhesive to bond pieces if you’re layering or creating unique designs.
- Kreg Jig: This tool helps you make pocket hole joints for attaching pieces securely.
- Measuring Tape or Ruler: Accurate measurements are crucial for coasters that fit together perfectly.
A Word on Wood Selection
| Wood Type | Durability | Appearance |
|---|---|---|
| Oak | High | Rich grain, durable |
| Maple | Medium | Light color, subtle grain |
| Pine | Low | Light weight, easy to work with |
Each type of wood has its unique charm, so take your time to choose the right one for your coasters. By mastering these essential tools, you’ll be well on your way to crafting beautiful wooden coasters that reflect your style and creativity. For more detailed information on woodworking techniques and other projects, check out Wood Magazine or visit Woodworking Network.
Creative Designs and Patterns for Wooden Coasters
If you’re looking to add a personal touch to your home or create unique gifts, crafting wooden coasters can be a delightful project. Wooden coasters serve not only as functional items but also as artistic expressions. Here are some creative designs and patterns to inspire your next coaster-making adventure.
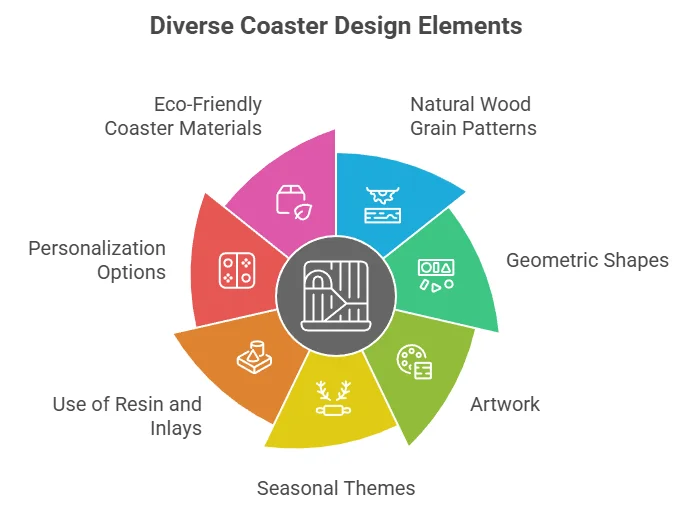
Natural Wood Grain Patterns
One of the simplest and most beautiful designs for wooden coasters is to embrace the natural wood grain. Each piece of wood has unique patterns, colors, and textures. Choose lighter woods like birch for a brighter look or darker woods like walnut for a rich, elegant feel. You can enhance these natural features by applying a clear finish to bring out the wood’s character.
Geometric Shapes
Geometric patterns can add a modern flair to your wooden coasters. Using a jigsaw or laser cutter, you can create coasters with varying shapes—triangles, hexagons, and circles are popular choices. For a cohesive look, consider using a consistent thickness and finish across all your coasters. Here are some ideas:
- Hexagonal coasters with contrasting finishes
- Triangular coasters in a puzzle set
- Square coasters arranged in a checkerboard design
Artwork
Adding artwork to your wooden coasters can truly set them apart. You can use techniques like wood burning, painting, or printing to customize each piece. If you enjoy hand-drawing, sketch your designs directly onto the wood, then accentuate with color. Alternatively, you can use a stencil with vibrant paints to create patterned coasters easily. Some ideas include:
- Nature-inspired illustrations like leaves or flowers
- Abstract designs that reflect your personal style
- Customized family names or initials for personal gifts
Seasonal Themes
Creating coasters for various holidays and seasons is a fun way to celebrate throughout the year. Whether it’s fall-inspired coasters featuring pumpkins or winter designs adorned with snowflakes, there’s an opportunity for seasonal creativity here. Consider creating a small set of coasters for each season, allowing you to change your decor effortlessly.
Use of Resin and Inlays
For those looking to add an extra pop of color and texture, incorporating resin into your wooden coasters can elevate your designs. You can create stunning inlays with colored resin, shells, or glitter, making each coaster a miniature artwork. The resin not only enhances the aesthetics but also provides added durability to your coasters. Follow these simple steps for a resin-infused coaster:
- Sand and prepare your wooden base.
- Design your inlay by filling in with decorative elements.
- Pour a clear resin layer over the top and let it cure as per the instructions.
Personalization Options
Personalizing your wooden coasters can make them perfect gifts or keepsakes. Options for personalization include:
- Engraved names or dates
- Favorite quotes or sayings
- Images printed on wood for custom designs
You can use tools like engraving machines or hire professionals for printing. Websites such as Etsy offer various artisans who specialize in custom wooden products.
Eco-Friendly Coaster Materials
As awareness of sustainability grows, consider using reclaimed or sustainably sourced wood for your coasters. Using wood that would otherwise be discarded not only reduces waste but also adds a unique character to each piece. Resources for sourcing eco-friendly materials include local lumber yards and online marketplaces that focus on sustainable products.
Coaster Care and Maintenance
To keep your coasters looking their best, ensure to follow proper care practices. Here are some tips:
- Wipe coasters with a damp cloth; avoid soaking them in water.
- Periodically reapply a food-safe finish to keep them protected.
- Store in a dry area to prevent warping.
By incorporating these creative designs and patterns into your wooden coaster projects, you can enjoy a blend of art and practicality that reflects your unique style. For additional inspiration and resources, visit Woodworking Network and discover a wealth of information on woodworking projects.
Tips for Finishing and Maintaining Wooden Coasters
Wooden coasters are a charming addition to any home. They not only protect your surfaces but also add a touch of elegance. Proper finishing and maintenance of these coasters can significantly extend their lifespan. Here are some expert tips to help you keep your wooden coasters looking great and functioning well.
Choosing the Right Finish
When you make wooden coasters, selecting the appropriate finish is crucial. Here are some options:
- Polyurethane: This is a highly durable finish that is water-resistant, making it perfect for coasters.
- Varnish: Varnish provides a thick protective layer and enhances the wood’s natural beauty.
- Oil Finishes: Tung oil or linseed oil penetrates the wood and offers a natural look while providing some protection.
Evaluate your preferences, as well as the type of wood used, before selecting a finish. If you want a more glossy appearance, polyurethane is often the best choice.
Applying the Finish
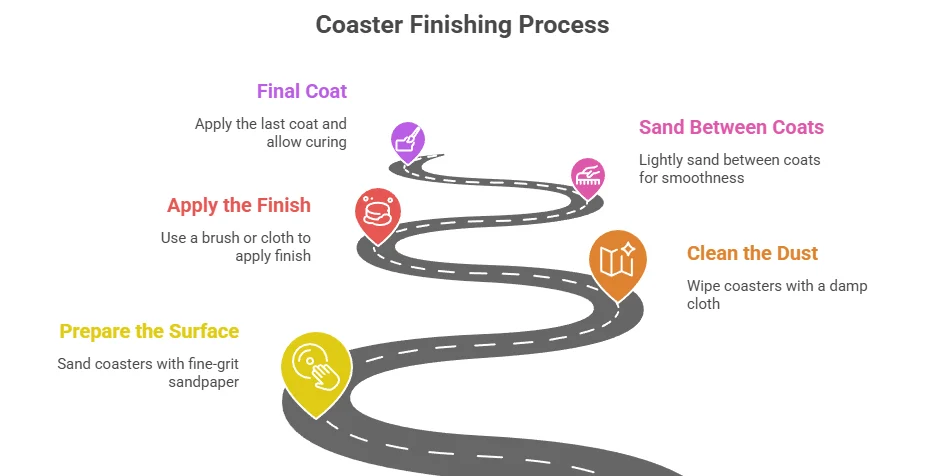
The method of applying the finish can affect the result. Follow these steps for a smooth application:
- Prepare the Surface: Sand the coasters lightly with fine-grit sandpaper. This removes any rough edges, ensuring a smooth finish.
- Clean the Dust: After sanding, wipe the coasters with a damp cloth to remove dust particles.
- Apply the Finish: Use a soft brush or cloth to apply the finish evenly. Follow the manufacturer’s instructions on drying time.
- Sand Between Coats: For a polished look, lightly sand the surface between coats of finish.
- Final Coat: After the last coat, allow ample time for curing as per product instructions.
Repairing Damaged Coasters
Even with careful use, your coasters may become scratched or damaged. Here are a few repair strategies:
- Minor Scratches: Lightly sand the area and apply an appropriate finish to blend with the rest of the coaster.
- Deep Scratches: If a scratch is troublesome, consider using wood filler to fill it in before refinishing.
- Water Damage: If water has warped the coaster, you may be able to sand it down and reapply finish to restore its look.
Taking action quickly when damage occurs can help minimize repairs needed later. For further tips on woodworking and maintenance techniques, consider visiting Wood Magazine or Woodworkers Source.
Finishing and maintaining your wooden coasters requires some effort, but the result is a stylish and functional item in your home. Following these tips will keep your coasters not only practical but also beautiful for years to come.
Conclusion
When you set out to make wooden coasters, you embark on a project that combines creativity and utility. Choosing the right wood is crucial, as it affects not only the aesthetics but also the durability of your coasters. Softwoods like pine are great for beginners, while hardwoods like oak or walnut can add a touch of elegance. Essential tools such as a saw, sandpaper, and finishers are necessary to bring your vision to life.
Being creative with designs and patterns can truly personalize your coasters, making them ideal gifts or lively conversation starters. Whether you opt for simple shapes or intricate carvings, there are countless possibilities to explore. Don’t forget the importance of finishing touches; applying a protective sealant enhances the coasters’ appearance and extends their life. Maintenance is also key, as taking proper care of your wooden coasters will keep them looking their best for years to come. Regular cleaning and occasional re-oiling can make a significant difference.
Crafting wooden coasters is not just a fun activity; it’s a chance to express your personality and style while creating something practical. With the right materials, tools, and a splash of creativity, you can easily make coasters that elevate your home decor and serve as functional art pieces. Roll up your sleeves and start making your own coasters today; you might find it to be a delightful and rewarding endeavor!