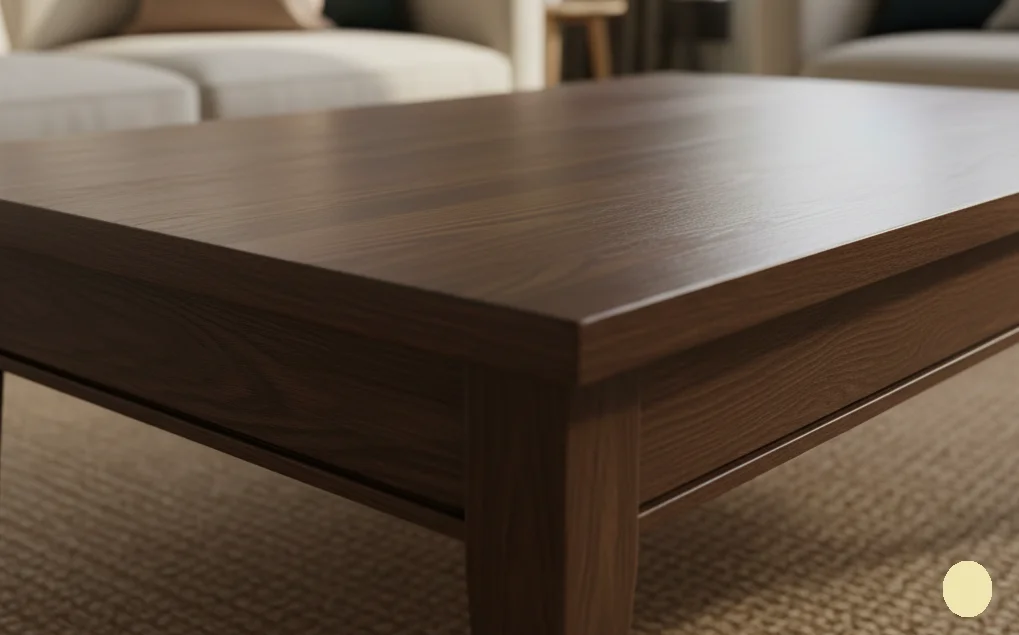
Staining wood evenly can transform any project, elevating its appearance and protecting it from natural elements. However, achieving vibrant and consistent color can be challenging. With the right techniques and attention to detail, you can ensure a flawless finish. Here are several tips and tricks to help you How To Stain Wood Evenly, creating beautiful results every time.
Preparing the Wood Surface
The first step to staining wood evenly is adequate preparation. Properly preparing the wood surface helps the stain adhere better and results in a more uniform color. Here are key steps to follow:
- Choose the Right Sandpaper: Start with coarse sandpaper (around 80 grit) for initial sanding and gradually progress to finer grits (up to 220 grit). This will create a smooth surface for staining.
- Sanding Direction: Always sand in the direction of the wood grain to avoid scratches that can disrupt the stain application.
- Clean the Surface: After sanding, wipe the wood with a damp cloth or tack cloth to remove all dust and debris.
Selecting the Right Stain
The choice of stain can significantly impact the final look. Consider these tips:
- Type of Stain: Oil-based stains generally penetrate deeper than water-based stains, while water-based options dry faster and are easier to clean up.
- Test Samples: Always test the stain on a small, inconspicuous area of the wood or a scrap piece before application to ensure you like the color.
- Match the Right Finish: Gloss, semi-gloss, and matte finishes can affect how the stain looks. Choose a finish that complements your project.
Applying the Stain Evenly
Now that your surface is prepared and you’ve selected the right stain, it’s time to apply. Follow these techniques for an even finish:
- Use a High-Quality Brush or Cloth: A good quality brush helps to distribute the stain evenly. Alternatively, use a staining cloth or foam applicator for a smoother application.
- Work in Sections: Divide the wood into manageable sections (about 2 feet at a time). This prevents the stain from drying too quickly and helps you keep track of where you’ve stained.
- Apply Generously: Use an ample amount of stain, spreading it in the direction of the grain. Make sure to get the stain into all grooves and corners.
- Wipe Off Excess: After allowing the stain to sit as per the instructions, wipe off any excess with a clean cloth, again working in the direction of the grain.
Monitor Drying Times
Drying time is crucial for achieving an even stain finish. Keep in mind these points:
- Follow Product Instructions: Always refer to the manufacturer’s guidelines for specific drying times. Factors such as humidity and temperature can alter drying times.
- Do Not Rush: Apply additional coats only after the previous coat is fully dried to avoid streaking and uneven color.
Multiple Coats
If you desire a deeper color, consider applying multiple coats. Here’s how to do it evenly:
- Light Sanding Between Coats: Lightly sand the surface between coats with very fine sandpaper (320 grit) to ensure better adhesion of the next layer.
- Maintain Consistency: Use the same application method throughout to maintain uniformity in color and texture.
By following these tips and tricks on How To Stain Wood Evenly, you will achieve a professional-looking finish on your projects. With patience and practice, you will master the art of wood staining.
The Importance of Surface Preparation Before Staining
When preparing to stain wood, the way you handle surface preparation plays a vital role in the final outcome. Skipping this crucial step can lead to uneven staining, blotchy patches, and a less than desirable finish. Understanding the importance of properly preparing your wood can help you achieve the beautiful and uniform look you aim for.
Why Surface Preparation Matters
Surface preparation sets the groundwork for how well the stain will adhere to the wood. When your wood surface is clean, smooth, and ready to embrace color, the stain application becomes more effective. Various elements affect staining quality, including the type of wood, its previous finishes, and environmental conditions. Here are a few key reasons to ensure your wood is properly prepared:
- Enhanced Stain Absorption: A well-prepared surface allows the wood to absorb the stain evenly, ensuring consistent color.
- Improved Finish Longevity: Properly prepared wood can hold the stain longer, reducing the need for reapplication.
- Minimized Blotching: Preparing the surface helps prevent blotchy areas, especially on softwoods like pine.
- Better Overall Appearance: A smooth, clean surface results in a more visually appealing final look.
Steps for Proper Surface Preparation
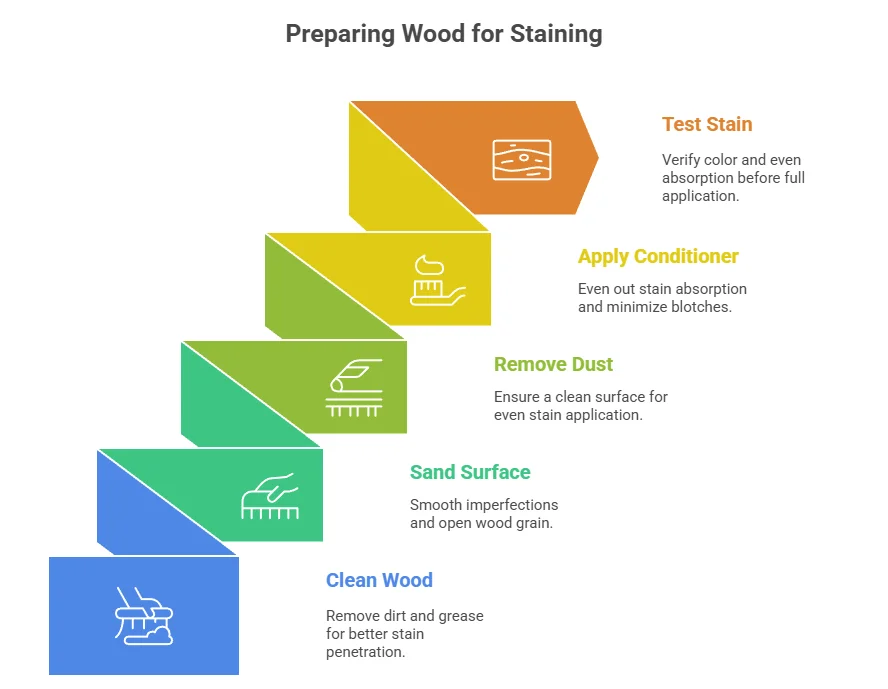
Follow these essential steps to prepare the wood surface adequately before applying stain:
- Clean the Wood: Start by removing any dirt, dust, or grease from the wood surface. A clean surface allows the stain to penetrate better. Use a damp cloth or a mild detergent solution for cleaning. Follow up with plain water to rinse and let it dry.
- Sand the Surface: Sanding is crucial to smooth out imperfections and open up the wood grain. Use a medium-grit sandpaper (around 120-150 grit) initially, and finish with a finer grit (220 grit) for a silky touch. Always sand in the direction of the wood grain to avoid scratches.
- Remove Dust and Residue: After sanding, dust will accumulate on the surface. Wipe it down with a tack cloth or a lint-free cloth to pick up all the dust particles. Failing to remove this debris can lead to uneven stain application.
- Apply Pre-Stain Conditioner: Using a pre-stain conditioner is notably beneficial, especially on softwoods. This product helps even out the stain absorption and minimizes blotches. Brush or wipe it on and allow it to sit as directed by the manufacturer before applying the stain.
- Test the Stain: Before applying stain to the entire project, always do a test patch. Choose a hidden or less visible area to ensure you like the color and that the wood has absorbed the stain evenly.
Choosing the Right Stain for Your Wood Project
Selecting the ideal stain for your wood project is key to achieving the best results. The right stain enhances the natural beauty of the wood while providing protection. Here’s a guide to help you determine which stain to use for your next woodworking endeavor.
Types of Wood Stains
Wood stains generally fall into two main categories: oil-based and water-based. Understanding the differences can guide you in making the right choice.
Oil-Based Stains:
- Take longer to dry.
- Penetrate deeply into the wood, providing rich color.
- Ideal for outdoor furniture due to their durability.
- Cleanup requires solvents.
Water-Based Stains:
- Dry quickly, usually within hours.
- Less odor than oil-based stains.
- Cleanup is easy with soap and water.
- Can raise the wood grain, so sanding may be necessary.
Consider the Type of Wood
Different wood species absorb stains differently. Here’s how various types respond:
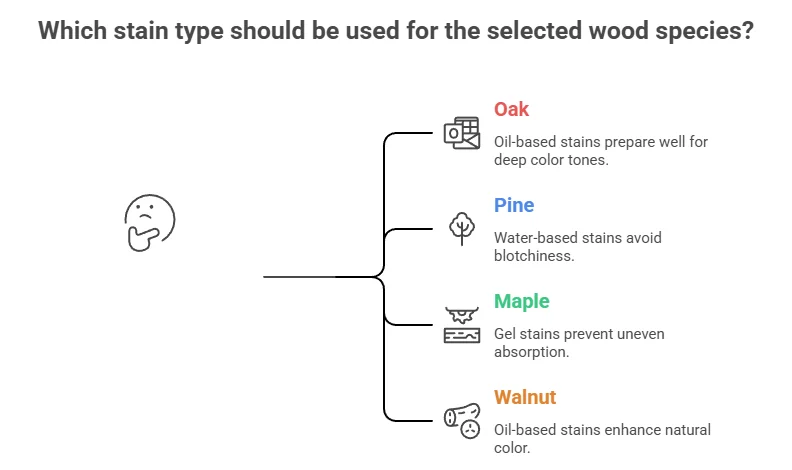
| Wood Type | Best Stain Type | Notes |
|---|---|---|
| Oak | Oil-Based | Prepares well for deep color tones. |
| Pine | Water-Based | Lighter stains work best to avoid blotchiness. |
| Maple | Gel Stain | Helps to prevent uneven absorption. |
| Walnut | Oil-Based | Enhances natural color with minimal alteration. |
Choosing the Right Color
When selecting a color, consider the following factors:
- Original Color of the Wood: Different stains will react differently with different woods.
- Lighting: A stain can look different under various lighting conditions. Test your stain samples in the light where the finished project will be.
- Intended Use: Consider whether the wood will be indoors or outdoors. In high-traffic areas, you may want a darker, more protective stain.
Testing Your Stain
Always test the stain on a small, inconspicuous area or a scrap piece of the same wood. This allows you to see how it will look when dry. Here’s the process for testing:
- Sand the wood to ensure a smooth surface.
- Apply the stain according to the manufacturer’s instructions.
- Allow it to dry completely to see the final color.
Application Techniques
How you apply the stain can affect the finish. Here are some techniques:
- Brush: Good for detailed work but can leave brush strokes.
- Rag: Provides a smooth finish and is less likely to leave marks.
- Sprayer: Covers large areas quickly but requires practice to master.
Where to Buy Stain
When sourcing wood stain, opt for reputable suppliers. Trusted locations include:
Choosing the right stain for your wood project is not just about picking the first color you see; it requires thought, testing, and technique. With a blend of knowledge and practice, you can achieve a beautiful and even finish that enhances the natural beauty of your woodworking projects.
Common Mistakes to Avoid When Staining Wood
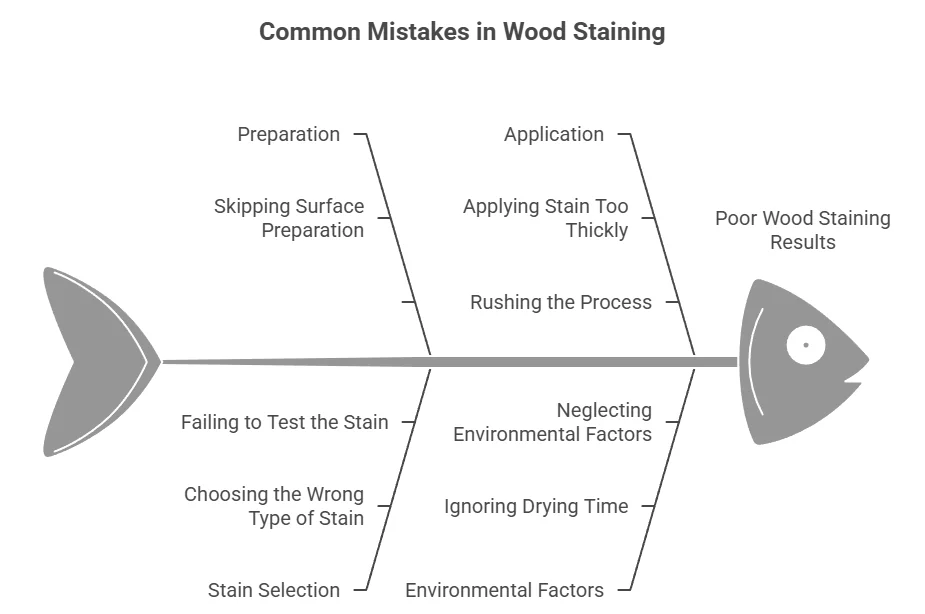
Staining wood can bring out its natural beauty and enhance its features, but several common mistakes can mar the final outcome. Avoiding these pitfalls will ensure your woodworking project turns out just as you envision it. Here are the key errors to steer clear of while staining wood.
Skipping Surface Preparation
One of the biggest mistakes you can make is to skip proper surface preparation. Wood needs to be clean and smooth before applying stain. If you ignore this step, dirt, dust, or old finishes can interfere with the absorption, leading to uneven color. Make sure to sand your wood thoroughly, going with the grain, and wipe away any dust with a damp cloth.
Choosing the Wrong Type of Stain
Using the wrong stain type can result in poor adhesion and uneven color. There are primarily two types of stains: oil-based and water-based. Oil-based stains penetrate deeper and offer a richer color, but they take longer to dry. Water-based stains dry quickly but may require more frequent reapplications. Always match your stain choice to the type of wood and the desired finish for the best results.
Applying Stain Too Thickly
Thick applications of stain can lead to blotchy and uneven finishes. A common mistake is to overload the brush or rag with too much stain. Instead, use a clean cloth or brush to apply a thin coat of stain. Allow it to soak in for a few minutes, then wipe off the excess. This method promotes even absorption and results in a uniform color.
Ignoring the Drying Time
Each stain has its own recommended drying time, and ignoring these guidelines can ruin your project. If you apply a second coat too early, it could lift the first coat, leading to inconsistencies. Always check the manufacturer’s instructions for drying times. If you’re working in a humid environment, allow extra time for the stain to cure properly.
Failing to Test the Stain
Before diving into your project, testing the stain on a scrap piece of wood or an inconspicuous area is crucial. This step helps you see how the wood reacts to the stain, and how the final color will look once dry. Without this test, you might be in for an unexpected surprise that could ruin your piece.
Not Considering Wood Type and Grain
Different types of wood have varying porosities, which affect how they absorb stain. For example, softer woods like pine absorb stain differently than hardwoods like oak. Additionally, the grain can also influence the final appearance. Always consider the wood type and grain when choosing your stain to avoid uneven coloring.
Neglecting Environmental Factors
Temperature and humidity play a significant role in the staining process. Ideal conditions are found in moderate temperatures (around 70°F) and low humidity. High humidity can delay drying times, while extreme temperatures can affect absorption. If possible, work indoors or during optimal weather conditions to achieve the best results.
Rushing the Process
Staining wood is not a race. Taking your time allows for each step to be executed correctly, ensuring a better end product. Rushing will often lead to mistakes, such as uneven application or not allowing adequate drying time. Patience is key; allow each coat to dry fully before applying additional layers.
Overlooking Sealing
Once you’ve stained your wood, you might think you’re finished. However, applying a clear sealant is an essential final step to protect your project from wear and damage. A sealant not only locks the stain in place but also provides an extra layer of durability, enhancing the wood’s natural beauty. Consider using polycrylic or polyurethane, depending on your needs.
Best Tools and Materials for Achieving an Even Stain Finish
Achieving an even stain finish on wood can elevate the aesthetics of your projects, be it furniture, cabinetry, or decorative accents. To ensure that your stained wood shines with uniformity, it’s crucial to work with the right tools and materials. Here, we’ll explore the best tools and materials that can help you get that flawless finish you desire.
Essential Tools for Staining Wood

Using the right tools is vital for achieving a smooth and even stain application. Here are some essential tools you should consider:
- Quality Brushes: A high-quality brush with natural bristles can distribute the stain evenly. Consider using a chip brush for smaller projects and a sash brush for corners.
- Staining Pads: These pads are excellent for large, flat surfaces, as they help cover more area and minimize streaks.
- Rollers: For bigger surfaces, paint rollers can speed up the process. Make sure to use a roller that is designed for smooth surfaces to avoid texture.
- Sprayer: If you have a large area to stain, an airless sprayer can provide a fine and even coat. Just be sure to practice your technique for best results.
- Drop Cloths: Protect your workspace with drop cloths. This keeps spills under control and reduces the chance of staining unintended areas.
- Sandpaper: Prior to staining, use sandpaper to achieve a silky smooth surface. A finer grit is best for the final sanding.
- Lint-Free Cloths: After applying the stain, use these cloths for wiping excess and ensuring an even finish without leaving residue behind.
Recommended Staining Materials
Your choice of stain is equally important as your tools. The stain type can affect how evenly the wood absorbs color. Consider the following:
- Oil-Based Stains: These stains penetrate deeply into the wood, offering a rich color. They tend to dry slowly, allowing more time to achieve an even finish.
- Water-Based Stains: These are quicker to dry and typically easy to clean up. Look for high-quality brands that promise less streaking for the best results.
- Gel Stains: For woods that tend to absorb stain unevenly, gel stains can provide a more controlled application. They sit on the surface, allowing for an even tone.
- Pre-Stain Conditioners: These are useful for softwoods like pine, as they help the wood absorb stain more evenly and prevent blotching.
Preparing Your Wood for Staining
Before diving into staining, preparation is key. Follow these steps for the best results:
- Start by thoroughly cleaning the surface to remove dust, dirt, and grease.
- Sand the wood using progressively finer grit sandpaper, from coarse to fine, to ensure a smooth touch.
- If you’re using a pre-stain conditioner, apply it before the stain to promote even absorption.
Applying the Stain Evenly
Once your materials are prepared, it’s time to apply the stain. Follow these guidelines:
- Apply a liberal amount of stain in the direction of the wood grain.
- Use your brush or pad to spread the stain evenly, ensuring not to leave any puddles.
- Work in manageable sections, especially for larger pieces, to maintain control and prevent drying before you blend the edges.
- After a few minutes, wipe away excess stain with a lint-free cloth to prevent streaks and achieve an even finish.
Useful Resources
For more information and techniques about staining wood, check out these resources:
- Wood Magazine – Stain Guide
- DIY Network – How to Stain Wood
- Family Handyman – Staining and Finishing
By utilizing the right tools and materials, along with careful preparation and application techniques, you can stain wood evenly and effectively. For additional tips and in-depth guides, you may find resources helpful at Wood Magazine and Woodcraft. With the right approach, your stained projects can turn out beautifully uniform, enhancing their appeal and durability. Start your next project armed with these tips for the best results.
Conclusion
Achieving an even stain finish on wood is an art that combines technique, preparation, and the right materials. First and foremost, properly preparing your wood surface cannot be emphasized enough; sanding and cleaning create a flawless base for the stain to adhere evenly. Selecting the appropriate stain for your specific type of wood is equally crucial, as different woods absorb stains differently. While you focus on applying the stain, remember to use the right tools. High-quality brushes or applicators can make a significant difference in how evenly the stain is distributed. To enhance your results, consider employing various techniques, such as applying the stain in thin coats and using a wiping method, which helps prevent drips and splotches.
Avoiding common mistakes like over-saturating the brush or not allowing for adequate drying time can save you from having to redo your work. Each step—from preparation to choice of materials—plays a vital role in ensuring your final product meets your expectations for a beautiful, even stain finish. By following these guidelines and tips, you can transform your wood projects into stunning pieces that showcase your skill and attention to detail. Embrace the process, and soon you’ll be staining wood like a pro!