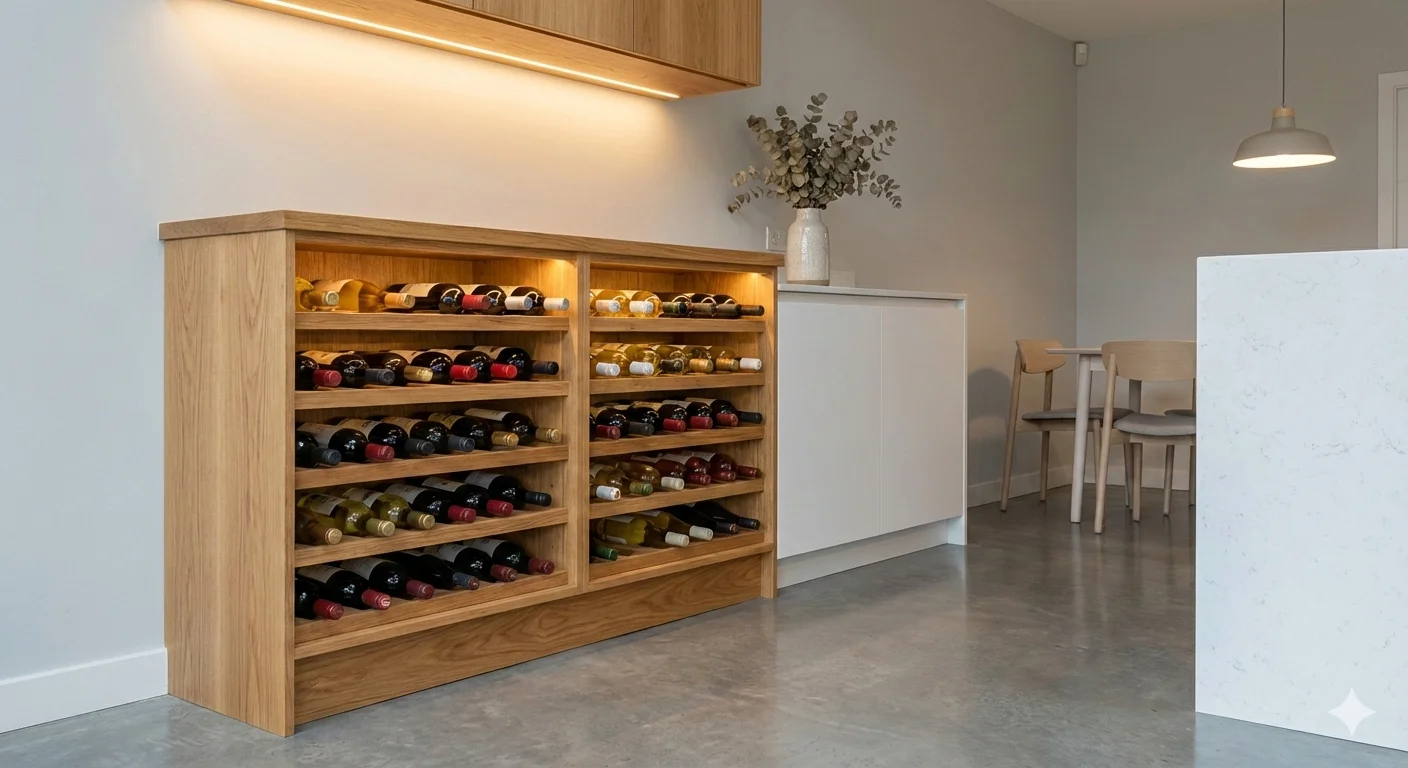
Are you searching for a unique way to organize your wine collection while adding a touch of style to your home? DIY Wooden Wine Rack Plans may just be the perfect solution. Whether you have a small apartment or a spacious home, there is a wooden wine rack design that suits your needs. Here’s a guide to help you create your own wine rack that reflects your personality and style.
Simple and Elegant Storage
If you want a wine rack that is simple yet elegant, consider a basic shelf design. This type of rack typically consists of horizontal shelves that hold wine bottles on their sides. You can customize the dimensions based on the space you have available. For example, a rack that is 36 inches wide and 12 inches deep can hold several bottles while fitting snugly in a corner. Materials you will need include:
- Wood boards (pine, oak, or your preferred type)
- A saw (hand saw or power saw)
- Wood screws
- Wood glue
- Sandpaper
- Wood stain or paint (optional)
Steps to create this rack:
- Measure and cut your wood boards to the desired length.
- Drill pilot holes and attach the shelves using wood screws.
- Sand the edges to ensure a smooth finish.
- Stain or paint the wood if you desire a colored finish.
Compact Bottle Holder
For those who want to maximize their space without compromising style, a compact bottle holder is ideal. This design usually features a vertical stand that supports the bottles upright. It adds an artistic flair while being functional.
You may want to incorporate the following materials:
- Thinner wood strips or dowels
- Wood glue
- PVC pipe or other cylindrical support (optional)
To build this holder:
- Cut your wood strips to create a base and upright supports.
- Space your dowels evenly to hold the bottle necks securely.
- Assemble the base and upright sections, ensuring everything is level.
- Allow it to dry before placing your bottles for stability.
Rustic Wine Barrel Rack
If you love the rustic charm, why not repurpose old wine barrels? This not only gives a unique look to your home but also promotes sustainability. A wine barrel rack can hold numerous bottles and fits perfectly in various settings. For this project, you will need:
- An old wine barrel
- Wood finishing tools
- Hinges (for added doors or covers)
Steps for creating a wine barrel rack:
- Cut the barrel in half lengthwise for an open design.
- Clean and sand the barrel to remove any rough edges.
- Stain or treat the wood as desired to enhance the natural patterns.
- Secure the two halves together if necessary or add a set of hinges.
Wall-Mounted Rack
Wall-mounted wine racks are fantastic for smaller spaces. They help save floor space while showcasing your bottles. These can range from simple wood slabs with bottle slots to intricate geometric designs. To construct a wall-mounted rack, gather the following:
- Wood planks or pre-cut wood pieces
- Wall anchors and screws
- Wood finish (optional)
Building your wall-mounted rack includes these steps:
- Decide on the design and cut wood accordingly.
- Attach wall anchors to support the weight of the bottles.
- Mount the wood onto the wall securely.
- Finish as desired.
For more inspiration and detailed plans, consider checking out resources such as Wood Magazine or Ana White. Both offer valuable guidance on DIY projects and plans to create beautiful wooden furniture, including wine racks.
A DIY wooden wine rack is not only a practical storage solution but also a chance to showcase your craftsmanship. With so many creative designs available, you can easily find the perfect fit for your space.
Essential Tools and Materials for Building Your Wine Rack
Building a DIY Wooden Wine Rack Plans can be a fulfilling project, allowing you to showcase your wine collection while adding a personal touch to your home decor. To get started, you need a set of essential tools and materials that will make the process smoother and more enjoyable. Whether you’re a beginner or someone with more experience, having the right items on hand is crucial.
Basic Tools
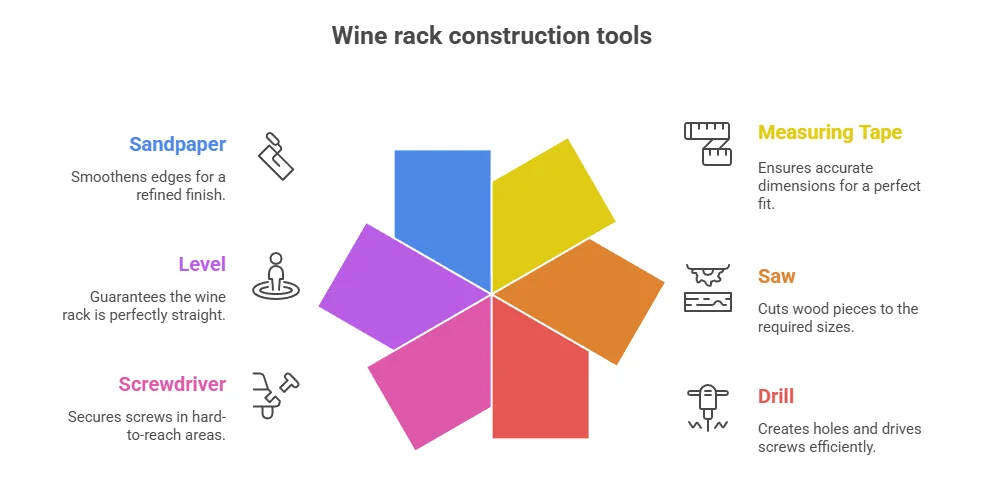
When embarking on this project, the following tools will be particularly useful:
- Measuring Tape: Accurate measurements are vital to ensure that your wine rack fits perfectly in your intended space.
- Saw: A circular saw or miter saw is ideal for cutting your wood pieces to size. For finer cuts, you may also consider a jigsaw.
- Drill: A power drill is necessary for making holes and driving screws. Make sure to have a set of drill bits on hand for various sizes.
- Screwdriver: A Phillips or flat-head screwdriver will work for securing screws in places that your drill can’t reach.
- Level: To ensure that your wine rack is perfectly straight, a level is essential.
- Sandpaper or Electric Sander: Smoothening out rough edges will enhance the finish of your rack and prevent splinters.
Materials Needed
The materials you choose will directly impact the look and durability of your wine rack. Here’s a list of the primary components:
- Wood: Common choices include pine, oak, or maple. Choose the type of wood based on your design preference and budget. Reclaimed wood can also add a rustic touch.
- Wood Glue: A strong adhesive will help bond pieces together, especially for joints that might not have screws.
- Screws: Choose wood screws to fasten your wood pieces securely. Ensure they are of appropriate length for your wood thickness.
- Wood Stain or Paint: To finish your rack, consider using a stain or paint that complements your home decor. Always test on a scrap piece of wood first.
- Sealant: A clear wood sealant can protect your wine rack from spills and moisture.
Optional Tools for Enhanced Design
If you’re looking to get creative or work on more intricate designs, consider adding these optional tools:
- Router: A router can help you create decorative edges or slots in your wood.
- Clamps: These are invaluable for holding pieces together while the glue dries or during assembly.
- Square: A carpenter’s square ensures your cuts and joints are square, which is critical for stability.
Where to Find Plans and Inspiration
Finding the right design for your DIY Wooden Wine Rack Plans can make all the difference. Here are some resources to consider:
- Wood Magazine – Provides a variety of plans and woodworking tips.
- Instructables – A vast community where you can find user-generated wine rack plans.
- Family Handyman – Offers step-by-step guides for various DIY projects.
- Ana White – Features free woodworking plans, including wine racks.
Safety Tips
As you work on your DIY Wooden Wine Rack Plans, prioritize safety by following these tips:
- Always wear appropriate safety gear, including goggles and gloves.
- Be aware of your surroundings, especially when using power tools.
- Ensure your work area is clean to prevent accidents.
With the right tools and materials at your disposal, creating a beautiful wooden wine rack can be a straightforward yet rewarding experience. Not only will you have a practical storage solution for your wine, but you’ll also create a piece that reflects your personal style. Happy building!
Step-by-Step Guide to Constructing Your First Wooden Wine Rack
Building your own wooden wine rack can be an enjoyable and fulfilling project. Not only does it provide a place to store your wine collection, but it also adds a touch of handmade charm to your home. In this guide, you’ll find step-by-step instructions to construct a practical and attractive wine rack. Whether you are a beginner or have some woodworking experience, this project is accessible and customizable to fit your space.
Before you start, ensure you have the right materials and tools. Here’s a simple list of what you’ll need:
Materials:
- Wood (pine, oak, or plywood)
- Wood screws
- Wood glue
- Sandpaper
- Wood finish or stain (optional)
Tools:
- Measuring tape
- Wood saw (hand saw or power saw)
- Drill
- Clamps
- Screwdriver
Once you have gathered your materials and tools, follow these steps:
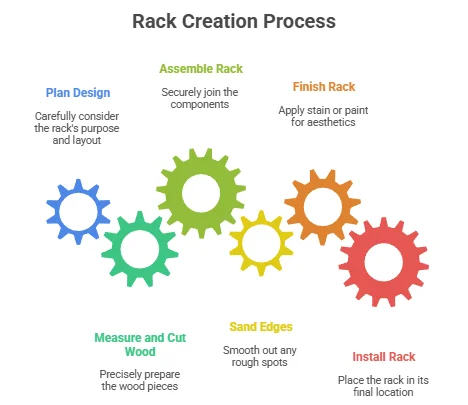
1. Plan Your Design
Decide on the size and style of your wine rack. Do you want it to be free-standing or wall-mounted? Sketch out your design on paper, considering the number of bottles you want to store. A simple design may feature horizontal slots for bottles to lie flat or vertical slots to store them upright.
2. Measure and Cut the Wood
Using your measuring tape and wood saw, cut the wood according to your plans. Make sure to cut the following pieces:
- Two vertical side pieces
- A top shelf
- A bottom shelf
- Horizontal supports (as many as needed for bottle slots)
Check your measurements twice before cutting to avoid mistakes.
3. Assemble the Rack
Begin by attaching the top shelf to the two vertical side pieces using wood screws or wood glue. Ensure it is level and secure. Next, attach the bottom shelf in the same way. After that, add the horizontal supports. Space them evenly, depending on how many bottles you want to store. Use clamps to hold everything in place while the glue dries.
4. Sand the Edges
With your wood now assembled, grab your sandpaper to smooth out any rough edges. You want your wine rack to look appealing and be safe to handle. Take your time here; this step makes a significant difference in the overall finish.
5. Finish Your Rack
Once the sanding is complete, you can choose to stain or paint your wine rack for added protection and aesthetic appeal. Make sure to let it dry completely before placing bottles on it.
6. Install and Enjoy
Place your wooden wine rack in your desired location. Ensure it’s stable, especially if you have pets or children around. Fill it up with your favorite bottles, and enjoy the pride of having built your unique piece.
As you can see, constructing your own DIY Wooden Wine Rack Plans is a straightforward process. It allows for creativity and personalization, making it a rewarding project. Consider visiting websites such as Woodworking Corner and Ana White for more design inspiration and tips.
If you are looking for additional resources and plans, check out websites like Wood Magazine. They offer various plans that can help guide you through your woodworking adventures.
Remember, each step in this guide enhances your DIY skills and allows you to craft something truly special for your home. Happy building!
Design Variations: Styles and Finishes for Your Wine Rack
When it comes to creating a DIY Wooden Wine Rack Plans, one of the exciting aspects is customizing it to fit your style. Design variations can transform a simple wooden structure into a statement piece in your home. You can choose from different styles and finishes to make your wine rack reflect your unique taste.
Popular Styles for Wooden Wine Racks
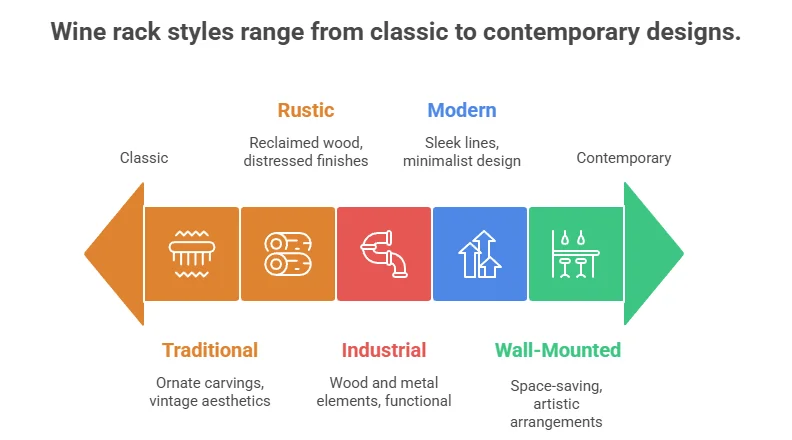
There are several styles of wooden wine racks that cater to different aesthetic preferences. Here are a few popular choices:
- Traditional: Characterized by classic designs often with intricate carvings and ornate details, traditional wine racks are perfect for those who appreciate vintage aesthetics. Use darker woods like mahogany or cherry for an authentic feel.
- Modern: Sleek and minimalistic, modern wine racks feature clean lines and can often be built with a combination of wood and metal. Light woods such as birch or maple can emphasize a contemporary look.
- Rustic: A rustic wine rack typically utilizes reclaimed wood for a charming, worn look. Distressed finishes in shades of brown or gray can enhance the natural beauty of the wood.
- Industrial: Combining wood with metal elements like pipes or rods gives an industrial flair. This style is gaining popularity for its functional yet stylish presentation.
- Wall-Mounted: For those short on space, wall-mounted racks are a practical and artistic solution. They allow for creative arrangements and can often serve as decor.
Choosing the Right Finish
The finish you choose can significantly affect the look of your wine rack. Here are some popular finishes to consider:
- Stain: Staining enhances the natural grain of the wood while adding color. Different stains, such as walnut or espresso, can create varying moods and feelings in your space.
- Paint: If you prefer a pop of color, painting your wine rack can make it stand out. Consider matching the paint color to your home’s interior for a cohesive look.
- Sealer: For a natural finish that preserves the wood’s appearance, applying a sealer is essential. This will protect your wine rack from moisture and damage.
- Varnish: Varnish provides a glossy finish that enhances the wood’s color and protects against wear and tear, making it an excellent choice for a frequently used item.
Combining Styles and Finishes
The beauty of designing your own wine rack is that you can combine styles and finishes for a truly unique piece. Here are a few combinations you might consider:
| Style | Finish | Description |
|---|---|---|
| Traditional | Dark Stain | A timeless elegant look suitable for classic home interiors. |
| Modern | Light Paint | Bright and fresh vibe ideal for contemporary spaces. |
| Rustic | Natural Sealer | Emphasizes the wood’s character while highlighting imperfections. |
| Industrial | Matte Varnish | Provides durability while keeping an understated industrial look. |

Design Tips for Your Wine Rack
Designing your own wine rack allows for endless creativity. Here are a few tips to help you along the way:
- Ensure your wine rack is the correct size for your collection. Measure your bottles and plan accordingly.
- Think about the placement of the wine rack. Aesthetics and accessibility both matter. Consider building it in a space where it can enhance the room’s decor.
- Incorporate additional storage options, such as glassware or corks, for versatility.
- Don’t be afraid to mix materials! A combination of wood and metal can elevate your design.
Building a DIY Wooden Wine Rack Plans with your own design variations can be a rewarding project that adds charm to your home. To find detailed plans and inspiration for your wine rack, check out Woodworking for Beginners and Ana White.
Tips for Maintaining and Organizing Your Wooden Wine Rack
Creating a stunning wooden wine rack is only the first step in enjoying your wine collection. To truly appreciate your investment, you must keep it organized and well-maintained. Follow these practical tips to ensure your wooden wine rack remains a beautiful and functional piece of furniture.
Regular Cleaning
Keeping your wooden wine rack clean is essential. Dust and dirt can accumulate, leading to a less appealing appearance. Use a soft, dry cloth to wipe down the surfaces. For deeper cleaning, a slightly damp cloth with a mild soap solution can work wonders. Always dry the surfaces thoroughly, as moisture can damage the wood.
Proper Placement
Where you place your wine rack can influence its longevity. Avoid direct sunlight as it can cause the wood to fade and distort. Instead, choose a cool, dark place with stable temperatures. A cellar or a shaded corner of your home can be ideal.
Temperature Control
Wooden wine racks are sensitive to temperature changes. Optimal wine storage is between 55°F and 65°F (13°C and 18°C). Fluctuating temperatures can ruin the taste of your wine and warp the wood. Consider using a thermometer or wine fridge to maintain a consistent climate.
Humidity Levels
Maintaining proper humidity is crucial in wine storage. Ideally, humidity levels should be around 60% to 70%. If the air is too dry, corks can dry out, leading to oxidation. If it’s too humid, mold and mildew may develop. Use a hygrometer to check humidity levels regularly.
Organizing Your Collection
Effective organization makes it easy to find the right bottle. Here are some strategies:
- Group by Type: Organize red, white, and sparkling wines separately.
- Labeling: Use labels to mark the vintage or region. This can help you quickly identify what you’re looking for.
- Order of Preference: Place your most frequently consumed wines at the front for easy access.
Inventory Management
Keeping track of your stock is vital. Consider creating a simple spreadsheet or using wine management apps like WineMATE to log your collection. Note details like varietal, vintage, and tasting notes. This will help you remember what you have and avoid buying duplicates.
Checking for Damage
Regular inspections are crucial for maintaining your wooden wine rack. Look for signs of wear, such as cracks, splinters, or unstable joints. Early detection can help you address issues before they worsen.
Using Coasters
To protect the wood from stains or rings, always use coasters or felt pads under your bottles. This small step can significantly decrease the risk of damage over time.
Preventing Overcrowding
Overcrowding can lead to damaged labels, crushed corks, or broken bottles. Ensure there’s adequate space between bottles. This not only helps with airflow but also makes it easier to retrieve a specific bottle without hassle.
Seasonal Maintenance
Just as you’d prepare your garden for each season, your wine rack needs attention too. Here are seasonal tips:
| Season | Task |
|---|---|
| Spring | Check for mold and deep clean surfaces. |
| Summer | Monitor temperature and humidity; adjust as necessary. |
| Fall | Restock and organize for holiday events. |
| Winter | Inspect for any winter damage; increase humidity if needed. |
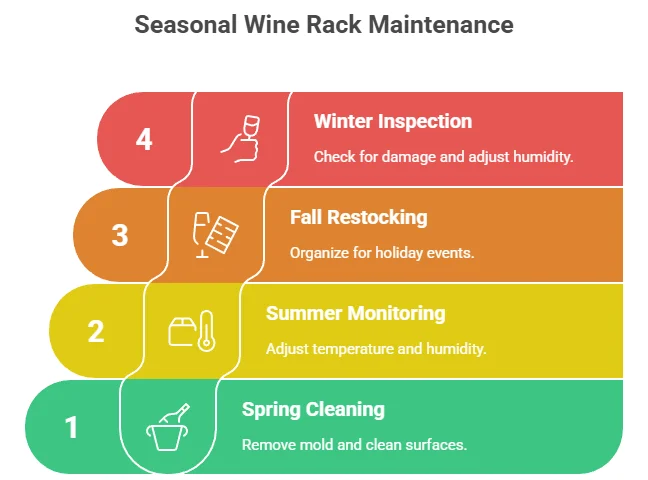
Maintaining and organizing your wooden wine rack involves several proactive steps. By regularly cleaning, controlling the environment, and staying organized, you can ensure your wine collection remains in top condition. For more information on wine storage solutions, visit Wine Enthusiast and Wine Magazine to explore tips and guides tailored for wine lovers.
Conclusion
Creating your own wooden wine rack is not just a rewarding project; it’s a way to infuse your personal style into your living space. By exploring creative DIY Wooden Wine Rack Plans, you have the opportunity to tailor a solution that fits perfectly, whether you have a small corner or a large cellar. With the essential tools and materials at your disposal, you’ll be equipped to embark on this exciting endeavor with confidence.
The step-by-step guide ensures that even beginners can successfully construct their first wooden rack, setting the foundation for your woodworking skills to flourish. You don’t have to stick to conventional designs. Instead, think outside the box when it comes to styles and finishes that can elevate the aesthetic appeal of your wine storage. Whether you prefer a rustic charm or a modern touch, there are countless variations to choose from.
Maintaining and organizing your wine rack is key to keeping it both functional and visually appealing. Good organization ensures easy access, while regular maintenance can prolong the life of your wooden creation, making it a long-lasting centerpiece. As you craft and enjoy your personalized wine rack, you’ll not only have a practical solution for your collection but also a unique reflection of your artistic vision and passion for wine. Embrace the joy of DIY and bring your wine rack to life today!